
The fastest way to stop roof water damage is to keep water moving off the roof. Clean gutters, repair flashing, replace damaged shingles, and maintain attic ventilation. Do those four things on a regular schedule and you eliminate the conditions that cause most residential leaks.
Here is what you can check or do this weekend:
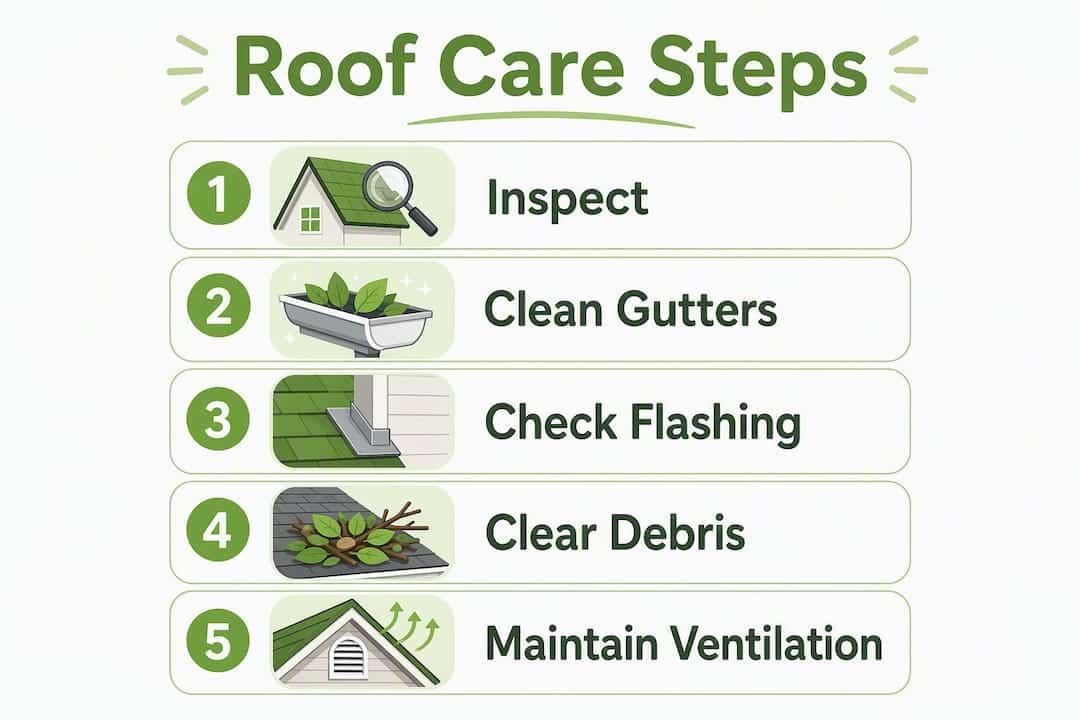
- Clean your gutters. Clogged gutters force water to back up under shingles at the eave, causing fascia rot and, in cold climates, ice dams.
- Scan from the ground with binoculars. Look for curled, missing, or dark-stained shingles. You do not need to climb on the roof.
- Check your attic. Bring a flashlight and look for damp insulation, stained deck boards, or daylight showing through the sheathing.
- Inspect around penetrations. Chimneys, skylights, and pipe vents are where most residential leaks start, not through the middle of a shingle field.
- Clear debris from valleys and gutters. Leaves piled in roof valleys hold moisture against shingles for days after rain.
Pro Tip: A roof’s job is to shed water, not hold it. Every repair, every cleaning, every inspection should ask one question: does water have a clear, unobstructed path off this roof?
Safety note: Do not walk on a steep or wet roof. Ground-level and attic checks cover the vast majority of what you need to know.
Table of Contents
- How do you inspect your roof for leaks step by step?
- Why gutters are your highest-impact prevention step
- How do flashing failures cause roof leaks?
- What roof covering problems lead to water intrusion?
- How attic ventilation and insulation prevent moisture damage
- How debris and overhanging trees accelerate roof damage
- How do you prevent ice dams in cold climates?
- What do roof repairs and prevention tasks typically cost?
- What does homeowners insurance cover for roof leaks?
- The shedding principle: what roofing professionals know that most homeowners don’t
- Key Takeaways
- Why gutters come first in Central Florida
- Larrysgutters protects your home from the ground up
- Further reading and sources
How do you inspect your roof for leaks step by step?
GAF recommends inspecting at least twice a year, in spring and fall, plus after any major storm. Here is a repeatable workflow:
- Exterior visual check from the ground. Use binoculars to scan every roof plane. Note missing shingles, granule loss (dark patches where shingles look bald), curled tabs, and any visible sagging.
- Gutter and downspout check. Walk the perimeter. Look for sagging sections, separated joints, granules pooled in the channels, and downspouts that discharge within two feet of the foundation.
- Attic inspection. On a dry day, go into the attic with a flashlight. Look for water stains on rafters or deck boards, damp or compressed insulation, mold or musty odors, and any daylight visible through the sheathing.
- Penetration check. Focus on chimneys, skylights, pipe boots, and ridge vents. From the attic, trace any staining uphill toward the ridge to find the actual entry point. Water travels along framing before dripping, so the stain on the ceiling may be several feet from the breach.
- Garden-hose test (low-slope or accessible roofs only). Have a helper inside the attic while you slowly wet one section at a time. Start low and work uphill. Stop when the helper spots dripping.
Tools to have on hand: binoculars, a bright flashlight, a phone or camera for photos, and a ladder with stabilizer feet if you need to check gutters up close.
What to record: photograph every problem area with a date stamp, note the location (e.g., “north-facing valley, 6 feet from chimney”), and keep a simple log. This documentation matters for insurance claims.

When to call a pro: if you spot active rot, large areas of missing shingles, or any flashing that has pulled away from the wall, stop and schedule a professional. A professional maintenance visit covers on-roof repairs and identifies issues that are genuinely hard to judge from the ground.
Why gutters are your highest-impact prevention step
A gutter system that works correctly channels every drop of rain away from your roof edge, fascia, siding, and foundation. When it fails, water pools at the eave and works its way under shingles. That is how you get rot, mold, and interior leaks from a roof that looks fine from the street.
Signs your gutters need attention:
- Sagging sections or gutters pulling away from the fascia
- Water overflowing during moderate rain (not just heavy downpours)
- Granules from shingles pooling in the channels
- Rust stains or peeling paint on the fascia below the gutter
- Downspouts discharging too close to the foundation
Maintenance schedule: Regular gutter cleaning, with added frequency in areas prone to rapid debris accumulation like Florida, helps maintain roof drainage effectively. After any major storm, do a quick check for blockages.
Pro Tip: Downspout extensions should carry water at least four feet from the foundation. If yours discharge right at the base of the house, a $10 plastic extension is one of the best investments you can make.
Gutter guards can help reduce the need for frequent cleaning but do not completely eliminate it. Micro-mesh guards perform well against fine debris; foam or brush inserts tend to trap seeds and require more maintenance than they save. If you are weighing options, the gutter guard installation workflow for Florida homes explains the trade-offs clearly.
Rough cost ranges for gutter work:
| Task | Typical U.S. Range |
|---|---|
| Professional gutter cleaning can cost varying amounts depending on the provider and scope of work. | |
| Gutter guard installation costs vary significantly depending on gutter length and type. | |
| Minor gutter repairs such as resealing or fastening typically incur moderate costs depending on extent of work. | |
| Complete gutter replacement costs depend on home size and materials used, varying accordingly. |
Routine maintenance visits typically cost $250–$600 per year and can extend the service life of an asphalt roof by about 5–10 years. That math makes preventive spending straightforward.
How do flashing failures cause roof leaks?
Flashing is the metal or rubberized material that seals the joints between your roof surface and any vertical surface or penetration. Chimneys, skylights, dormers, pipe boots, and roof valleys all rely on it. When flashing pulls away, cracks, or rusts through, water enters at exactly the point where the roof is most vulnerable.
Common failure modes:
- Step flashing along dormers or walls pulling away from the siding
- Chimney counter-flashing separating from the mortar joint
- Pipe boot collars cracking or shrinking around vent pipes
- Valley flashing corroding or lifting at the edges
What to look for from the ground or attic:
- Rust streaks running down from a chimney or skylight
- Water stains in the attic that trace uphill to a penetration
- Visible gaps between flashing and the surrounding surface
- Bubbling or blistering paint on interior walls near a chimney
For temporary fixes, a homeowner can apply professional-grade polyurethane or rubberized roofing sealant to a small gap. Never use standard household silicone caulk; it lacks UV resistance and will fail within a season on an exposed roof surface.
Pro Tip: Photograph every flashing problem before you touch it. A clear before-and-after record helps your contractor understand the scope and supports any insurance claim.
Anything involving re-bedding chimney counter-flashing in mortar, replacing step flashing under shingles, or resealing a skylight frame belongs with a licensed roofer. These are not difficult repairs, but doing them wrong creates a worse leak than the original.
What roof covering problems lead to water intrusion?
Your shingles, tiles, or membrane are the outermost layer, but they work together with the underlayment beneath them. The underlayment is the secondary barrier. When the covering fails, the underlayment buys you time. When both fail, water reaches the deck.
Material-specific warning signs:
- Asphalt shingles: granule loss (check gutters for grit), curled or cupped tabs, cracked shingles, dark streaking from algae
- Metal roofing: loose or missing fasteners, failed sealant at seams and penetrations, rust at cut edges
- Tile roofing: cracked or slipped tiles, broken mortar at ridges, damaged flashing at hips
- Flat or low-slope membranes: standing water (ponding) more than 48 hours after rain, bubbling or blistering, open seams
Repair vs. replace decision:
| Condition | Likely Action | Rough Cost Range |
|---|---|---|
| 1–3 damaged shingles | DIY or pro patch | — |
| Widespread granule loss, curling | Full replacement | — |
| Single cracked tile | Pro replacement | — |
| Flat roof open seam | Pro reseal | — |
| Underlayment failure (widespread) | Full re-roof | — |
Pro Tip: When replacing a few shingles yourself, use roofing nails, not staples, and apply a dab of roofing cement under each tab edge. A shingle that lifts in the next windstorm was not seated correctly the first time.
A single damaged shingle is a reasonable DIY fix on a low-slope, accessible roof. Anything involving more than a few squares, any work near a valley or penetration, or any roof steeper than a 4:12 pitch belongs with a contractor.
How attic ventilation and insulation prevent moisture damage
Poor attic ventilation is one of the most overlooked causes of roof failure. When warm, moist air from living spaces rises into an under-ventilated attic, it condenses on the cold deck boards. Over time, that moisture rots the sheathing from the inside out, long before any exterior sign appears.
In cold climates, the same heat loss that warms the deck melts snow at the ridge. That meltwater runs down to the cold eave, refreezes, and forms an ice dam. Water backs up behind the dam and forces its way under shingles. The fix is not heat cables; it is sealing attic bypasses and adding insulation so the attic stays cold and uniform.
Attic checks to run:
- Compressed or discolored insulation (a sign of past or ongoing moisture)
- Staining on rafters or deck boards, especially near the eaves
- Blocked soffit vents (often covered by insulation pushed to the edges)
- Musty odor, which suggests mold is already growing
Pro Tip: Check your attic in winter after a cold snap. If you see frost on the underside of the deck boards, your ventilation is inadequate. That frost melts when temperatures rise and drips onto your insulation.
Safety note: Attics contain electrical wiring, sharp truss plates, and loose insulation fibers. Wear a dust mask, long sleeves, and watch your step on joists.
How debris and overhanging trees accelerate roof damage
Leaves, pine needles, and seed pods do more than look messy. Debris piled in roof valleys holds moisture against shingles for days after rain, accelerating granule loss and eventually lifting shingle tabs. Overhanging branches abrade the surface every time the wind moves them.
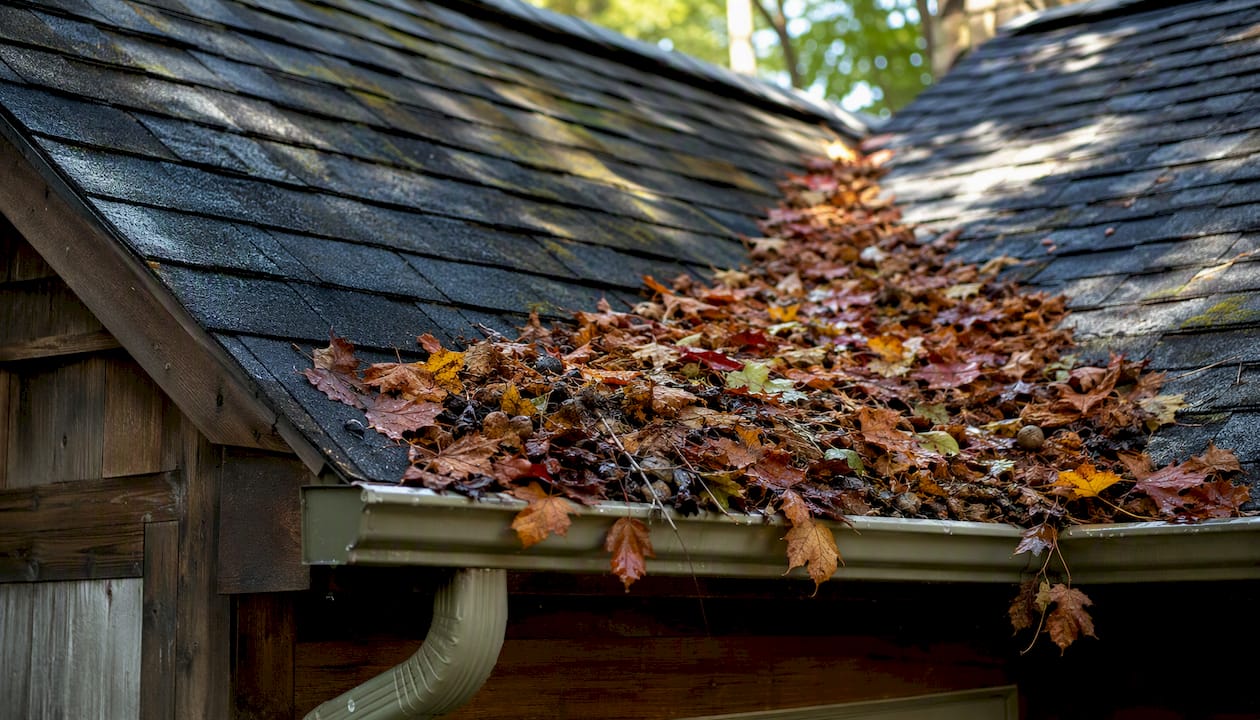
Moss and algae are a slower but equally serious problem. Moss roots work under shingle tabs and lift them. Algae staining is mostly cosmetic, but it signals moisture retention. Pressure washing to remove moss strips granules and can age a shingle roof by several years in a single session. Use a zinc- or copper-based chemical treatment instead, applied with a garden sprayer, and let rain rinse it off.
Practical maintenance tasks:
- Clear roof valleys and gutters of debris after every storm.
- Trim any branch that hangs within six feet of the roof surface.
- Apply a moss treatment in early spring if you see green growth.
- Check for debris buildup around skylights and chimneys after leaf-fall season.
For large trees or branches over the roof, hire a certified arborist. Cutting a large limb incorrectly can send it through the roof rather than away from it.
How do you prevent ice dams in cold climates?
Ice dams form when heat escaping from the living space warms the roof deck above the eave, melting snow at the ridge while the eave stays below freezing. The meltwater refreezes at the cold overhang, builds into a dam, and forces water under shingles.
Prevention steps:
- Seal all attic bypasses (around light fixtures, plumbing chases, and top plates) before adding insulation.
- Bring attic insulation to the level recommended for your climate zone (the Department of Energy’s zone map is a useful reference).
- Install an ice-and-water shield membrane at the eave during any re-roofing project; most building codes now require it for the first three feet above the exterior wall.
- Use a roof rake to remove snow from the lower few feet of the roof after heavy snowfall, working from the ground.
Pro Tip: Self-regulating heat cables installed along the eave can help as a temporary measure, but they treat the symptom, not the cause. If you rely on heat cables every winter, the real fix is attic air sealing and insulation.
Safety warning: Never chip at an ice dam with a hammer or axe. You will damage shingles. Never climb onto an icy roof.
What do roof repairs and prevention tasks typically cost?
Planning ahead is far cheaper than emergency repairs. A small flashing reseal done proactively costs a fraction of the drywall, insulation, and mold remediation that follows a season of ignored leaks.
| Task | Typical U.S. Cost Range | Typical Time |
|---|---|---|
| DIY gutter cleaning requires basic equipment and a few hours of work, depending on home size. | ||
| Professional gutter cleaning typically takes one to two hours and costs vary by provider. | ||
| Minor flashing resealing is a moderate-cost repair completed in a few hours by professionals. | ||
| Repairing a few shingles is generally a moderate-cost job completed relatively quickly. | ||
| Small area underlayment repairs require half a day and have a mid-range cost depending on extent. | ||
| A full roof replacement is a major project spanning a few days with costs varying widely by size and materials. | ||
| Annual maintenance programs typically cost $250–$600 per year and extend roof life by 5–10 years for asphalt roofs. |
Pro Tip: Schedule professional inspections in late summer or early fall. Contractors are less booked than in spring, and you catch issues before winter weather arrives.
The timing of repairs matters. A $300 flashing reseal done in September costs the same as one done in January, but the September repair prevents a winter of water infiltration. Emergency calls after a storm typically carry a premium over scheduled work.
What does homeowners insurance cover for roof leaks?
Homeowners insurance generally covers roof leaks when damage results from a sudden, accidental event: a storm, hail, a fallen tree. Wear-and-tear, long-term neglect, and deferred maintenance are typically excluded. Insurers often deny claims when the damage pattern suggests the problem developed over months or years.
Documentation checklist to protect your claim:
- Photograph every problem area immediately, with a date stamp
- Keep receipts for all maintenance and repairs
- Save any professional inspection reports
- Note dates of storms or weather events that may have caused damage
- Run a dehumidifier and document water containment steps if you have active leaking
Warranty note: Material warranties (from manufacturers like GAF) cover defects in the shingle or membrane itself, not installation errors. Workmanship warranties come from the installer and typically run one to ten years depending on the contractor. Save both documents in the same file as your maintenance log.
Pro Tip: If you have a leak, document interior damage immediately: place containers, photograph ceiling stains, and run a dehumidifier. Showing you acted quickly to limit further loss strengthens a claim.
This article provides general information, not legal or insurance advice. Confirm your specific coverage terms with your insurer or a licensed insurance professional.
The shedding principle: what roofing professionals know that most homeowners don’t
A roof does not stop rain. It redirects it. Every shingle, every piece of flashing, every valley is designed to hand water off to the next surface below it, all the way to the gutter and downspout. The moment that chain breaks — a lifted shingle tab, a gap in flashing, a clogged valley — water stops moving and starts pooling. Pooling water finds any gap, no matter how small.
That principle explains why attic inspections catch leaks long before ceiling stains appear. Water enters at a penetration, travels along a rafter or piece of sheathing, and may drip ten feet from the entry point. By the time you see a stain on the ceiling, the water has been moving through your roof structure for weeks.
The same principle governs repairs. A patch that creates a pocket or a raised edge does not fix a leak; it redirects water into a new problem. Every repair should restore the smooth, downward flow path the original installation created.
Pro Tip: For a temporary fix while waiting for a contractor, a piece of self-adhering ice-and-water shield membrane placed over a damaged area works far better than a tarp. It bonds to the surface and does not interrupt the shedding path the way a loose tarp can.
Homeowners should avoid on-roof repairs unless they have the training and equipment for it. Falls are common, and accidental shingle damage during an amateur repair often creates a second leak. Ground-level and attic checks give you most of what you need.
Key Takeaways
Preventing roof water damage comes down to one repeatable habit: keep water moving off the roof by maintaining gutters, flashing, and roof coverings on a consistent schedule.
| Point | Details |
|---|---|
| Regular inspections in spring and fall, and after major storms, help maintain roof health. | |
| Gutters are first-line defense | Clogged gutters cause under-shingle backups and fascia rot; clean them at least twice yearly. |
| Flashing fails at penetrations | Most leaks start at chimneys, skylights, and vents, not through the shingle field. |
| Document everything | Photos, dates, and repair receipts protect your insurance claim and warranty coverage. |
| Larrysgutters for Central Florida | Larrysgutters installs seamless gutters, gutter guards, and handles cleaning and repair for Central Florida homeowners. |
Why gutters come first in Central Florida
Central Florida gets some of the heaviest seasonal rainfall in the continental United States, and the pattern is unforgiving: intense afternoon storms drop large volumes of water in short windows. A gutter system that is even partially blocked cannot handle that load. What we see repeatedly is that homes with clean, properly sloped gutters and well-routed downspouts simply do not develop the eave rot and under-shingle moisture that leads to expensive repairs. Routine maintenance is not glamorous, but it is the single most cost-effective thing a homeowner in this region can do for their roof.
Larrysgutters protects your home from the ground up
Keeping water off your roof starts with a gutter system that actually works. Larrysgutters installs custom-fit seamless gutters in Central Florida designed for the region’s heavy rainfall, with no joints along the run where leaks typically start. Beyond installation, the team handles gutter guard installation to reduce debris buildup, plus routine cleaning and repair so your system stays clear between inspections.

Professional installation means correct slope, secure fastening, and downspouts routed well away from your foundation. These are details that matter more than most homeowners realize until the first major storm. If your gutters are sagging, overflowing, or more than 15 years old, a replacement is almost always cheaper than the water damage that follows a failure. Request a free quote from Larrysgutters and find out what a properly installed system costs for your home.
Further reading and sources
- Does homeowners insurance cover roof leaks? — NerdWallet
- Avoiding roof water damage from leaks and weather — GAF
- Residential roofing maintenance: homeowner guide — The Roofing Brief
- The Homeowner’s Guide to Roof Leak Repair — NRCIA
