
An effective gutter plan does four things: sizes gutters to your roof’s actual drainage area, routes downspouts to discharge at least 5 ft from your foundation, maintains a minimum slope of 1/4″ per 10 ft toward each outlet, and schedules cleaning before debris builds up enough to cause overflow. Get those four things right and you’ve solved roughly 90% of the water-damage scenarios that send homeowners to a contractor after the fact.
Here’s the one-page checklist to bring to any contractor quote or to use as your DIY planning sheet:
- Map your roof. Sketch each roof plane, measure eave lengths, and note which planes drain to which gutter run.
- Calculate drainage area. Multiply the plan-view footprint of each roof section by its pitch factor (≤4/12 = 1.0, 5–8/12 = 1.1, ≥9/12 = 1.2).
- Look up your local rainfall intensity using NOAA Atlas 14 for your zip code. In Central Florida, design intensity during summer storms is often high enough to require careful gutter sizing.
- Pick gutter size. A 5″ K-style gutter handles roughly 5,520 sq ft at 4 in/hr; a 6″ handles roughly 7,960 sq ft. Adjust for your actual intensity.
- Size and space downspouts. Place one downspout per 40 ft or less of gutter run, pairing 2×3″ downspouts with 5″ gutters and 3×4″ downspouts with 6″ gutters. In higher rainfall areas, closer spacing—such as every 20–30 ft—is advised.
- Set slope. Pitch gutters at 1/4″ per 10 ft toward each downspout. Use the center-high method on runs over 40 ft.
- Route discharge. Terminate at least 5 ft from the foundation on a sloping grade, or to an underground catchment at least 10 ft away.
- Plan maintenance. Schedule cleaning at least twice a year; add inspections after major storms.
- Decide DIY vs. pro. Seamless gutters, multi-story homes, and Florida Building Code (FBC) wind-fastening requirements all point toward hiring a licensed installer.
What to bring to a contractor quote: your roof’s total footprint (sq ft), the longest single gutter run (ft), your preferred profile (K-style or half-round), and your target budget range.
Table of Contents
- How do you map your roof and measure the drainage area?
- How do you calculate water flow and choose the right gutter size?
- How should you plan gutter layout, slope, and downspout routing?
- What materials, profiles, and gutter guards should you choose?
- What does a gutter system cost, and how long does installation take?
- What does a solid gutter maintenance plan look like?
- DIY or hire a pro? How to decide and what to ask
- Why does professional installation make such a difference?
- Key Takeaways
- What installers see that the planning guides don’t mention
- Larrysgutters can plan and install your system
- Useful sources and references
How do you map your roof and measure the drainage area?
Start with a simple sketch, not a blueprint. Walk the perimeter of your house and note every eave length. For a basic gable roof, you’ll have two long runs and two short ends. A hip roof adds diagonal planes that drain to corner gutters. The goal is to know exactly how many square feet of roof surface are shedding water toward each gutter section.
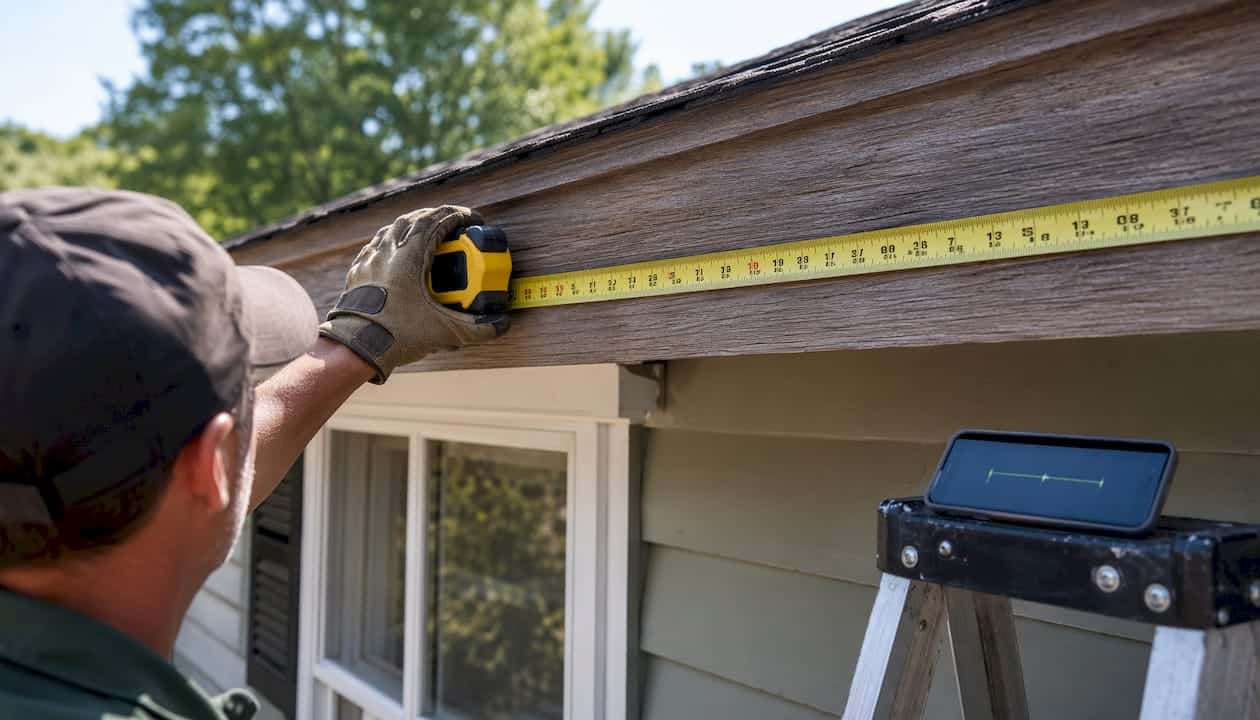
Measuring plan area (not slope area): Gutter sizing uses the horizontal projection of the roof, not the actual sloped surface. For a rectangular house that’s 40 ft × 60 ft, the total plan area is 2,400 sq ft. If the roof is a simple gable, each side gets roughly 1,200 sq ft. For a hip roof, divide the footprint by the number of drainage planes and allocate accordingly.
Pitch factor conversion: Once you have the plan area, multiply by the pitch factor to get the adjusted drainage area used in sizing calculations.
- Measure the rise over a 12″ horizontal run using a level and a tape measure from the attic or a ladder at the eave.
- A 4/12 pitch (rises 4″ for every 12″ of run) gets a factor of 1.0.
- A 5/12 to 8/12 pitch gets a factor of 1.1.
- Anything 9/12 or steeper gets 1.2.
For a 1,500 sq ft plan area at a 5/12 pitch, multiply by the pitch factor to get the adjusted drainage area used in sizing calculations.
Practical measuring tips: A 25-ft tape measure and a smartphone level app handle most single-story homes. For two-story or complex rooflines, measure from the ground using the house’s exterior dimensions and add overhangs (typically 12″–18″ per side). Note every valley, dormer, and change in direction because each one affects which gutter run receives that water.
Pro Tip: Take photos from the ground at each corner of the house and label them with the eave length you measured. A contractor can quote your job accurately from those photos plus a sketch, saving you a second site visit.
How do you calculate water flow and choose the right gutter size?
The sizing workflow follows five steps: measure drainage area, apply the pitch factor, look up design rainfall intensity, match the adjusted area to gutter capacity, then size and space downspouts. Each step feeds the next, so skipping one produces a wrong answer.
Step-by-step example for a 1,500 sq ft footprint at 5/12 pitch in Central Florida:
- Plan area = 1,500 sq ft
- Adjusted area = 1,500 × 1.1 = 1,650 sq ft
- Design intensity from NOAA Atlas 14 for Central Florida = approximately 7–9 in/hr
- At 4 in/hr, a 5″ K-style gutter has a defined capacity; at higher rainfall intensities, capacity decreases proportionally, so the adjusted drainage area must be evaluated against local rainfall patterns to ensure adequacy.
- For a home with multiple large roof planes in a high-intensity zone, 6″ gutters provide increased capacity compared to 5″ gutters and are recommended for homes with large roof areas or high rainfall intensity. provide meaningful headroom.
Downspout sizing and spacing: Pair 2×3″ downspouts with 5″ gutters and 3×4″ downspouts with 6″ gutters. Place one downspout per ≤40 ft of gutter run. In areas with intense rainfall like Miami or Houston, spacing every 20–30 ft is a smarter call.
| Gutter Size | Capacity at 4 in/hr | Downspout Size | Max Run per Downspout |
|---|---|---|---|
| 5″ K-style | ~5,520 sq ft | 2×3″ | ≤40 ft (closer spacing, such as every 20–30 ft, is recommended in high-rainfall areas) |
| 6″ K-style | ~7,960 sq ft | 3×4″ | ≤40 ft (closer spacing, such as every 20–30 ft, is recommended in high-rainfall areas) |
Gutter guards and capacity: Micro-mesh and reverse-curve guards restrict the inlet opening. If you plan to add guards, oversize the gutter by one size — use 6″ where you’d otherwise use 5″ — to compensate for reduced inlet area during heavy rain. Screen guards have less impact on capacity than micro-mesh but still warrant checking.
Pro Tip: The HardHatCalc gutter sizing calculator lets you plug in drainage area and rainfall intensity and returns gutter and downspout sizes in under a minute. Run your numbers before calling a contractor so you can verify their recommendation.
How should you plan gutter layout, slope, and downspout routing?
Sizing tells you what to buy. Layout tells you where everything goes and how it performs once installed. These are two different problems, and getting layout wrong is the more common mistake.
Slope and hanger placement
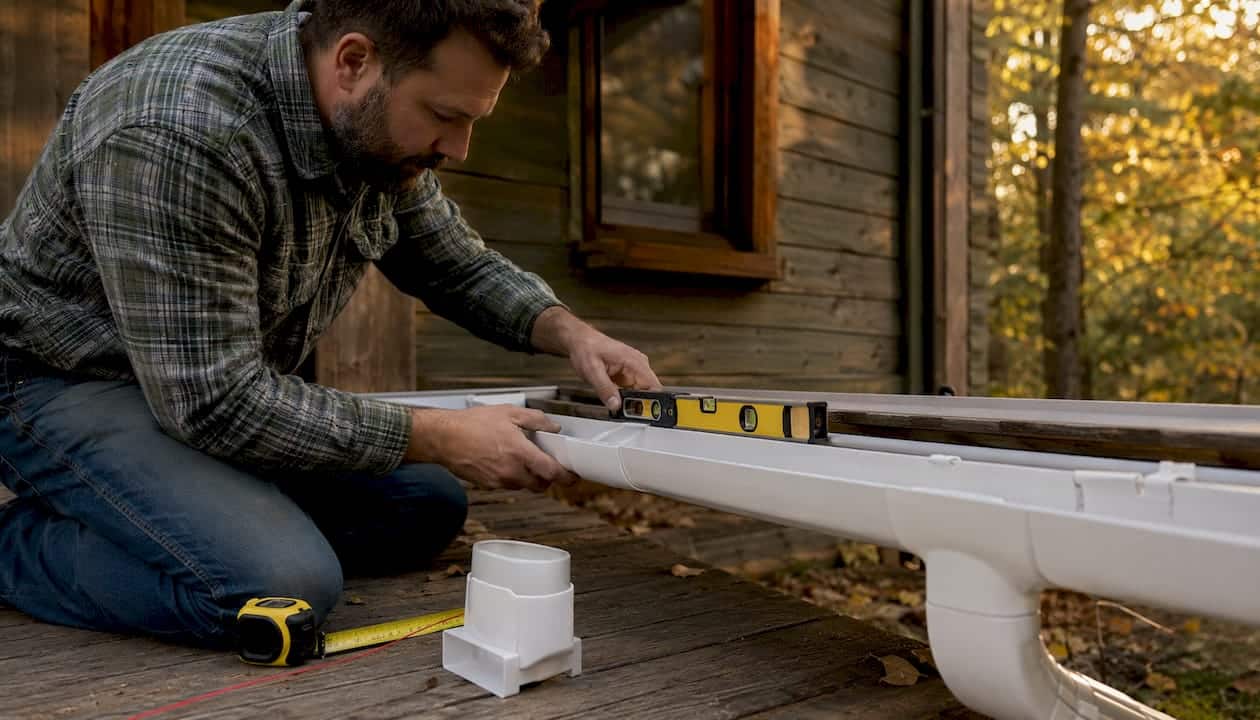
Building America recommends a minimum of 1/16″ per foot; the practitioner standard most installers use is 1/4″ per 10 ft. On a 30-ft run, that’s 3/4″ of total drop from the high end to the downspout. Visible to anyone standing at the corner? Barely. Enough to keep water moving? Yes.
For runs longer than 40 ft, use the center-high method: pitch the gutter down from the center toward downspouts at both ends. This keeps the visual sag minimal and eliminates the standing water that accumulates at the far end of a single long slope.
Hidden hangers are the current standard. Space them every 24″ in normal conditions; tighten to every 18″ in high-wind or heavy-snow exposure areas. In Florida, where FBC wind-resistance requirements apply, your installer should specify fastener type and spacing in writing.
Downspout placement rules
- Place downspouts at corners when possible, avoid placing them at high points of sloped runs, and space them no more than every 40 ft, with closer spacing (every 20–30 ft) in high rainfall intensity areas.
- Avoid routing downspouts across walkways or driveways unless using buried pipe.
Routing water away from the foundation
Downspouts should discharge to a sloping final grade sufficiently far from the foundation to prevent water accumulation near the structure, or to an underground catchment system placed at a safe distance. Never connect gutter discharge to a foundation’s perforated drain tile — that routes water directly to the footing, the opposite of what you want.
Surface options include splash blocks (minimum 4 ft extension, sloped away from the house) and flexible corrugated extensions. For cleaner results, buried PVC or ABS pipe carries water to a pop-up emitter, a dry well, or a rain barrel at a safe distance. Rain barrels work well for modest rainfall but overflow quickly during Florida-scale storms, so they need an overflow outlet routed at least 5 ft from the foundation.
Pro Tip: Before burying any downspout pipe, call 811 to have utilities marked. A buried drain that hits an irrigation line creates a bigger problem than the one you were solving.
What materials, profiles, and gutter guards should you choose?
Material and profile choices affect cost, lifespan, maintenance load, and how the system performs in your specific climate. For Central Florida homes, the combination of intense rainfall, hurricane-season wind loads, and heavy organic debris narrows the practical field quickly.
Material trade-offs
Aluminum is the most common choice for good reason. It doesn’t rust, it’s lightweight, and it’s available in .027 gauge (standard) and .032 gauge (heavier, better for high-wind areas). The heavier gauge costs a bit more but resists denting and holds fasteners better over time.
Galvanized steel is stronger but will eventually rust at cut ends and seams, especially in Florida’s humidity. It’s rarely the right call for new residential installations here.
Vinyl is inexpensive and easy to cut, but it becomes brittle in UV exposure and can warp in extreme heat. Florida summers are hard on vinyl gutters.
Copper is the premium option: 50+ year lifespan, no paint needed, and a distinctive patina. It’s appropriate for historic homes or high-end projects where budget isn’t the constraint.
Profile trade-offs
K-style gutters carry more water than half-round gutters of the same nominal width because their flat back and ogee front create a larger cross-section. They’re also easier to attach directly to a fascia board. Half-round gutters look better on older or craftsman-style homes and are slightly easier to clean because debris doesn’t catch in corners, but they require special hangers and have less capacity.
Seamless vs. sectional
Seamless gutters are custom-formed on-site with minimal joints; sectional gutters have seams every 10–12 ft that can fail over time. In high-rain or hurricane-exposure areas, fewer seams means fewer failure points. The custom-fit approach also means each run is cut to exact length, which eliminates the patching and caulking that sectional systems require after a few seasons.
Gutter guard comparison
| Guard Type | Debris Filtered | Inlet Restriction | Maintenance Need | Best For |
|---|---|---|---|---|
| Micro-mesh | Fine (pine needles, pollen) | High | Low (annual inspection) | Heavy tree cover, Florida homes |
| Screen | Medium debris | Low–Medium | Moderate | Deciduous trees, light debris |
| Reverse-curve | Large debris | Medium | Low–Moderate | Moderate debris, high water volume |
| Brush/foam | Medium debris | Medium–High | High (debris embeds) | Rarely recommended long-term |
Micro-mesh offers the finest filtration and performs best in heavy-debris areas, but professional installation is often required to meet wind-resistance codes in Florida. The gutter guard installation workflow matters as much as the product itself.
Pro Tip: If you’re adding micro-mesh guards to an existing 5″ system, seriously consider upgrading to 6″ gutters at the same time. The inlet restriction from micro-mesh in a 5″ gutter can cause overflow during a 3-in/hr Florida downpour even when the gutter is otherwise clean.
What does a gutter system cost, and how long does installation take?
Budget planning for gutters is straightforward once you separate material costs from installation labor and understand what drives the per-foot price up or down.
Typical cost ranges:
- Aluminum 5″ K-style seamless, installed: roughly $6–$12 per linear foot nationally, with regional variation.
- Aluminum 6″ K-style seamless, installed: roughly $8–$14 per linear foot. The step up from 5″ to 6″ adds maybe $2–$3 per foot, which is a small premium for meaningful extra capacity.
- Downspouts: typically $5–$10 per linear foot installed, plus $50–$150 per downspout for routing hardware.
- Gutter guard installation in Florida: $7–$15 per linear foot, translating to roughly $1,500–$3,500 for an average home.
The cost of not maintaining the system: Professional gutter cleaning runs $150–$300 per visit. Water damage repairs from overflow or foundation saturation can range from $500 to over $10,000 depending on severity. That range is the real argument for sizing up to 6″ gutters or adding micro-mesh guards upfront.
Installation timeline:
- Site visit and measure: 30–60 minutes for a standard home.
- Fabrication (seamless): The roll-forming machine comes to your property; gutters are formed on-site the day of installation.
- Installation: Most single-family homes are done in one day. Complex rooflines or large properties may take two.
- Routing and testing: Downspout extensions, buried pipe connections, and a water test to confirm slope and drainage.
Contractor quote checklist:
- Itemized scope: linear footage of gutter, number of downspouts, guard type and coverage
- Material gauge specified (ask for .032 aluminum in high-wind areas)
- Hanger type and spacing (every 24″ minimum; 18″ for FBC compliance in Florida)
- Downspout count and routing plan with discharge distances noted
- Guard type and brand, with warranty terms
- Wind-resistance fastening method for Florida Building Code compliance
- Workmanship warranty (minimum 1 year; 2–5 years is better)
Skipping the itemized scope is the single biggest mistake homeowners make when comparing quotes. A $500 price difference between two bids often comes down to gauge, hanger spacing, or guard quality, not labor.
What does a solid gutter maintenance plan look like?
A gutter system that’s sized and installed correctly still fails without maintenance. The schedule doesn’t need to be complicated, but it does need to be consistent.
Recommended cleaning and inspection frequency:
| Tree Coverage | No Guards | Screen/Reverse-Curve Guards | Micro-Mesh Guards |
|---|---|---|---|
| Light (few trees) | 2× per year | 1–2× per year | 1× per year |
| Moderate | 3× per year | 2× per year | 1–2× per year |
| Heavy (oaks, pines) | 4–6× per year | 2–3× per year | 1–2× per year |
Even with micro-mesh guards, annual professional inspection is recommended to confirm fastening integrity and wind-resistance compliance. Guards are not set-and-forget, particularly in hurricane-prone regions.
Pre-storm checklist (before hurricane season or any named storm):
- Clear all debris from gutters and downspout inlets.
- Check that all hangers and fasteners are tight; replace any that are loose or corroded.
- Verify downspout extensions are in place and discharge paths are unobstructed.
- Confirm guards are seated and secured; high winds can lift improperly fastened guards.
- Check that buried drain outlets (pop-up emitters) are clear and functional.
For Central Florida maintenance specifics, the pre-storm prep matters more than the fall cleaning that dominates advice written for northern climates. Florida’s threat window runs June through November.
DIY safety note: Single-story cleaning with a stable ladder, gloves, and eye protection is manageable for most homeowners. Two-story or steep-pitch rooflines are a different situation. The professional cleaning ROI becomes obvious when you factor in the risk of a ladder fall versus a $150–$300 service call.
For a detailed walkthrough of Florida-specific maintenance steps, including how to flush downspouts and spot early signs of fascia rot, that resource covers the full process.
DIY or hire a pro? How to decide and what to ask
Most homeowners can handle gutter cleaning and minor repairs themselves. Installing a new system is a different question, and the answer depends on a few specific factors.
Decision checklist:
- Roof height and complexity: Single-story gable roof? DIY is feasible. Two-story hip roof with multiple valleys? Hire a pro.
- Run length: Runs over 40 ft require precise slope management and often a center-high layout that’s hard to execute alone.
- Seamless gutters: You can’t DIY seamless gutters. The roll-forming machine is a commercial tool. If you want seamless (and in Florida, you should), you need a professional.
- FBC wind-fastening requirements: Florida Building Code specifies fastener type, spacing, and pull-out strength. A homeowner installing sectional gutters with standard screws may not meet code.
- Ladder comfort: Be honest. A fall from a 12-ft ladder causes serious injury. If you’re not confident on a ladder, the job isn’t worth it.
Questions to ask a contractor:
- Are you licensed and insured in Florida? (Ask for the license number and verify it.)
- What fastening method do you use for FBC wind-resistance compliance?
- What gauge aluminum do you use, and can I see a sample?
- What is your hanger spacing, and does it change for corner sections?
- What warranty do you offer on materials and workmanship?
- Can you provide references from jobs in this county within the last 12 months?
Red flags to watch for:
- A fixed-price quote given over the phone without an on-site measure
- Vague material specs (“standard aluminum” with no gauge stated)
- No mention of FBC compliance or wind-fastening methods
- Refusal to provide a written, itemized scope before you sign
- No local references or verifiable license
Pro Tip: Ask for the scope of work in writing before any deposit changes hands. A legitimate contractor will have no hesitation putting material specs, hanger spacing, downspout count, and warranty terms on paper. If they push back on that request, walk away.
Why does professional installation make such a difference?
The gap between a DIY gutter job and a professional one isn’t just about tools. It’s about the sequence of decisions that happen before a single screw goes in.
A professional installer starts with a site survey: measuring every run, checking fascia condition, identifying drainage obstacles, and noting the roof’s pitch at each section. That survey drives the fabrication. For seamless gutters, the roll-forming machine arrives on-site and produces each run to exact length, with no field joints except at corners and outlets. The result is a system with fewer leak points and a profile that fits the house precisely.
In Central Florida specifically, professional installation carries additional weight. Florida experiences significant annual rainfall with intense summer storms that can produce multiple inches of rain per hour, presenting a challenging environment for gutter systems. The debris load from live oaks, slash pines, and palm fronds is relentless. A system that’s undersized, improperly sloped, or fastened with the wrong hardware will fail under those conditions, sometimes within a single storm season.
What Larrysgutters brings to a Central Florida installation:
- On-site roll-form fabrication of seamless aluminum gutters, custom-fit to each run
- FBC-compliant fastening methods specified for wind-resistance requirements
- Micro-mesh guard installation for homes with heavy pine or oak debris
- Downspout routing plans that meet the 5-ft foundation discharge standard
- Written warranties on both materials and workmanship
Proper gutter planning in Central Florida isn’t just about moving water off the roof. It’s about keeping that water away from the foundation, the fascia, and the soffit — the three places where deferred maintenance turns into a five-figure repair bill.
For homeowners weighing the seamless gutter installation process or comparing material options, Larrysgutters offers free on-site quotes that include a written scope before any commitment.
Pro Tip: Ask your installer to walk you through the discharge routing plan before installation day. Knowing exactly where each downspout terminates and how far it discharges from the foundation is the single most important thing you can verify before the job starts.
Key Takeaways
Effective property gutter planning requires sizing gutters to your adjusted drainage area using SMACNA/NOAA standards, routing downspouts at least 5 ft from the foundation, and maintaining a consistent inspection schedule to protect the system through Florida’s storm season.
| Point | Details |
|---|---|
| Size to adjusted drainage area | Multiply plan area by pitch factor, then match to SMACNA thresholds: 5″ K-style handles ~5,520 sq ft at 4 in/hr; 6″ handles ~7,960 sq ft. |
| Downspout spacing and discharge | Place downspouts every 40 ft or less (20–30 ft in high rainfall areas); discharge at least 5 ft from the foundation or ≥10 ft to an underground catchment. |
| Oversize when adding guards | Restrictive guards (micro-mesh) reduce inlet capacity; use 6″ gutters where you’d otherwise use 5″ to prevent overflow. |
| Maintenance schedule | Clean at least twice a year; add inspections after major storms; schedule one annual professional inspection regardless of guard type. |
| Larrysgutters | Provides on-site seamless fabrication, FBC-compliant fastening, and guard installation for Central Florida homes, with written quotes and warranties. |
What installers see that the planning guides don’t mention
The two mistakes that show up most often on service calls aren’t dramatic. They’re quiet failures that compound over months. The first is undersized downspouts: a homeowner or a budget contractor installs 2×3″ downspouts on a 6″ gutter system, or spaces them 50 ft apart on a high-intensity Florida run. The gutter fills faster than it drains, overflows at the low point, and the fascia behind it starts to rot. By the time the homeowner notices, the repair bill includes wood replacement, not just gutter work.
The second mistake is discharge distance. A downspout that terminates 18 inches from the foundation, even with a splash block, is pushing water toward the footing with every rain event. Over a few years, that saturates the soil around the foundation and creates exactly the settlement and moisture intrusion the gutter system was supposed to prevent.
The fix installers use that homeowners can request directly: ask for a written routing plan that specifies the termination point of every downspout, measured from the foundation wall. If the contractor can’t or won’t provide that, it’s a signal the routing hasn’t been thought through.
Larrysgutters can plan and install your system
Spending time on measurements and material research is worth it. But at some point, the most practical next step is having someone who does this every day walk your property and tell you exactly what your home needs.

Larry’s Gutters handles the full process for Central Florida homeowners: on-site measurement, seamless gutter fabrication, guard selection and installation, and downspout routing that meets both the 5-ft discharge standard and Florida Building Code wind-resistance requirements. The visit produces a written, itemized quote with material specs, hanger spacing, downspout count, and warranty terms before you commit to anything.
For homes with heavy tree cover, the gutter guard installation workflow includes a sizing review to confirm your existing gutters can handle the inlet restriction before guards go on. For new installations, the seamless gutter installation service covers Central Florida with on-site roll-forming and same-day completion for most homes. Request a free quote and get a written scope back, usually within 48 hours.
Useful sources and references
The figures and standards in this guide come from the following primary and industry sources. Use them to verify sizing math, check rainfall intensity for your zip code, or review material guidance before a contractor conversation.
- NOAA Atlas 14 Precipitation Frequency Data Server — the authoritative source for local design rainfall intensity by zip code. Use this for the intensity value in your gutter sizing calculation (Steps 2 and 3).
- Building America Solution Center — Gutters and Downspouts — PNNL/DOE resource covering slope minimums, discharge distance standards, and installation best practices. Backs the 1/16″ per ft minimum and the 5-ft/10-ft discharge rules used throughout this guide.
- HardHatCalc Gutter Sizing Calculator — free tool for the five-step sizing workflow: drainage area, pitch factor, rainfall intensity, gutter capacity, and downspout sizing. Useful for verifying contractor recommendations.
- This Old House — Gutters and Downspouts Guide — practical reference for material types, installation steps, downspout sizing guidelines, and maintenance schedules.
- Larrysgutters — Gutter Maintenance Checklist for Florida — region-specific checklist for Central Florida homes, including pre-storm prep and post-storm inspection steps.
- Larrysgutters — Steps to Prepare Gutters for Storms — seasonal preparation guide for Florida’s hurricane season, covering fastener checks, outlet clearing, and guard security.
The SMACNA (Sheet Metal and Air Conditioning Contractors’ National Association) capacity tables are the industry standard for gutter sizing in the United States. The 5″ and 6″ K-style capacity figures cited in this guide (5,520 sq ft and 7,960 sq ft at 4 in/hr) are derived from those tables. When a contractor quotes a gutter size, asking them to reference the SMACNA table for your adjusted drainage area and local intensity is a reasonable and professional request.
