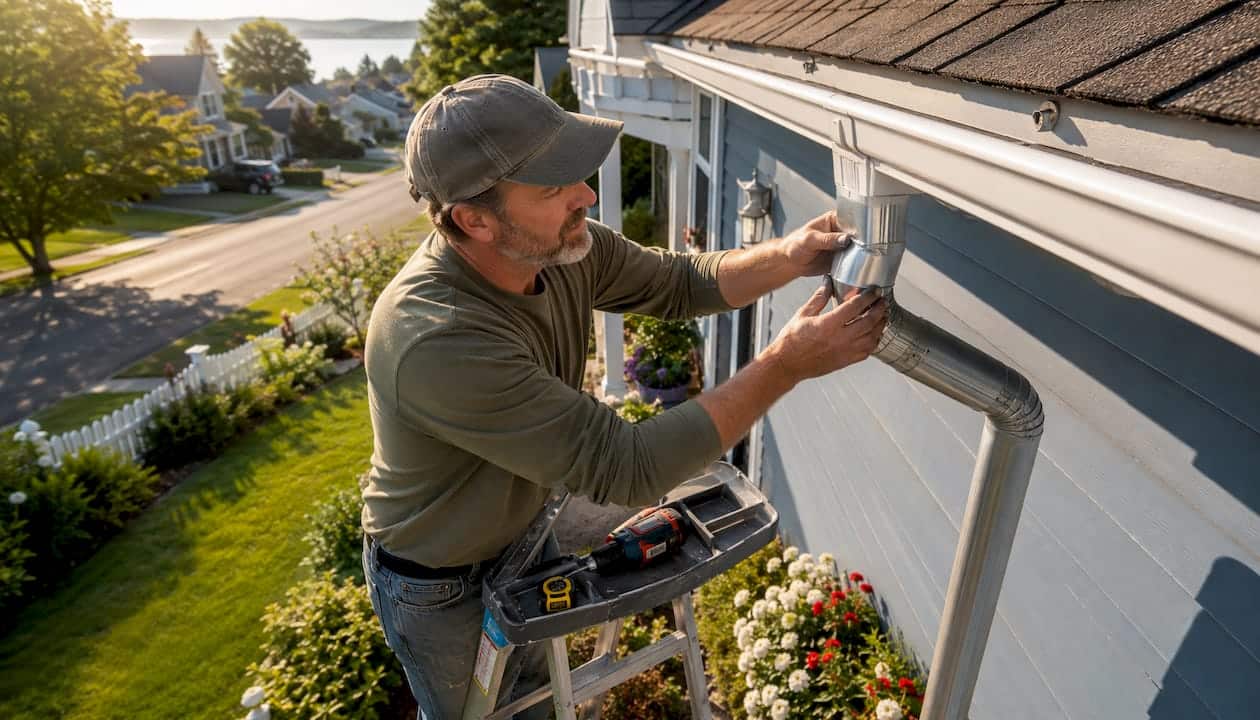
For most U.S. homes, a 3×4 rectangular A-style elbow matched to a 5″ or 6″ K-style gutter is the common and effective default. It moves water efficiently, resists debris buildup better than a sharper bend, and fits the overwhelming majority of residential downspout runs.
The main exceptions worth knowing before you buy:
- Tight wall clearances or underground tie-ins: Use a 90° elbow. The sharper angle fits where space is limited, though it does increase clog risk on standard runs.
- Large roof areas or high-rainfall climates: Step up to a 3×4 elbow minimum, or consider 4×5 for commercial-scale drainage needs.
Pro Tip: Measure the distance from your gutter outlet to the wall face before ordering any elbow. That gap determines your offset, and getting it wrong means a return trip to the hardware store.
Buying an elbow based on the angle printed on the box is a starting point, not a finish line. Professional installers treat factory angles as approximations and expect to make small field adjustments on every job.
Table of Contents
- What are the main types of gutter elbows?
- How do elbow angles work, and which one do you need?
- Which material should you choose for your elbows?
- How do you match elbow size and profile to your existing gutters?
- How do you install a gutter elbow safely?
- Should you repair, replace, or upgrade your elbow?
- What does a good maintenance routine look like?
- What do elbows typically cost, and how long does the job take?
- Quick glossary of gutter elbow terms
- Compatibility issues beyond size: snap-lock, hangers, and system fit
- Key Takeaways
- Why custom-fit elbows matter more in Florida
- Larrysgutters handles the hard part for Central Florida homeowners
- Useful sources and further reading
What are the main types of gutter elbows?
The two fundamental categories are A-style and B-style, and mixing them up is one of the most common installation mistakes homeowners make.
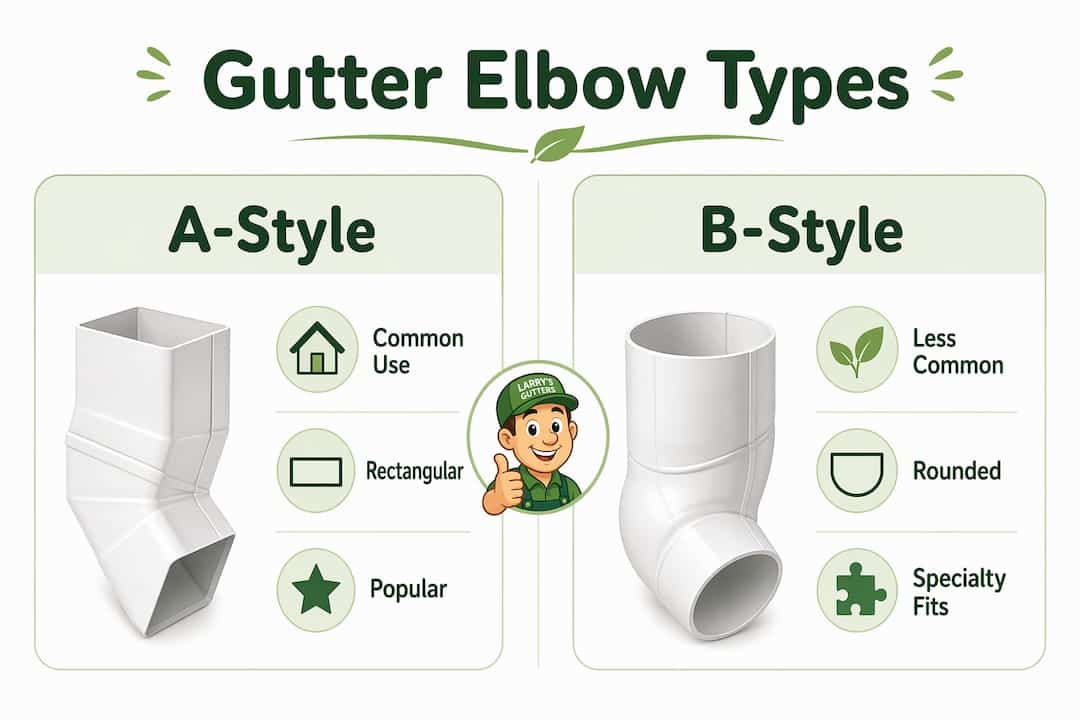
A-style elbows bend front to back, directing water straight out from the wall or back toward it. They handle the top connection from gutter outlet to downspout and the bottom kick-out that sends water away from the foundation. B-style elbows turn left or right, running the downspout parallel to the wall or routing it around corners and obstacles. An AB-style elbow transitions between the two orientations in a single fitting, useful when a run changes direction.
Beyond A and B, you’ll encounter these types:
- Inside elbow: Fits interior corners of a building where two gutter runs meet.
- Outside elbow: Wraps around exterior building corners.
- Drop/offset elbow: Moves the downspout away from the wall to clear a ledge or overhang, then back in.
- Adjustable/expandable elbow: Telescopes or pivots to create a custom angle without cutting.
- Decorative variants: Round-profile and square-profile elbows for half-round or ornamental gutter systems.
Most homes use 2–3 elbows per downspout: one at the top outlet, one or two at the base. Adding more than that slows flow noticeably, so plan your routing before you start cutting.
How do elbow angles work, and which one do you need?
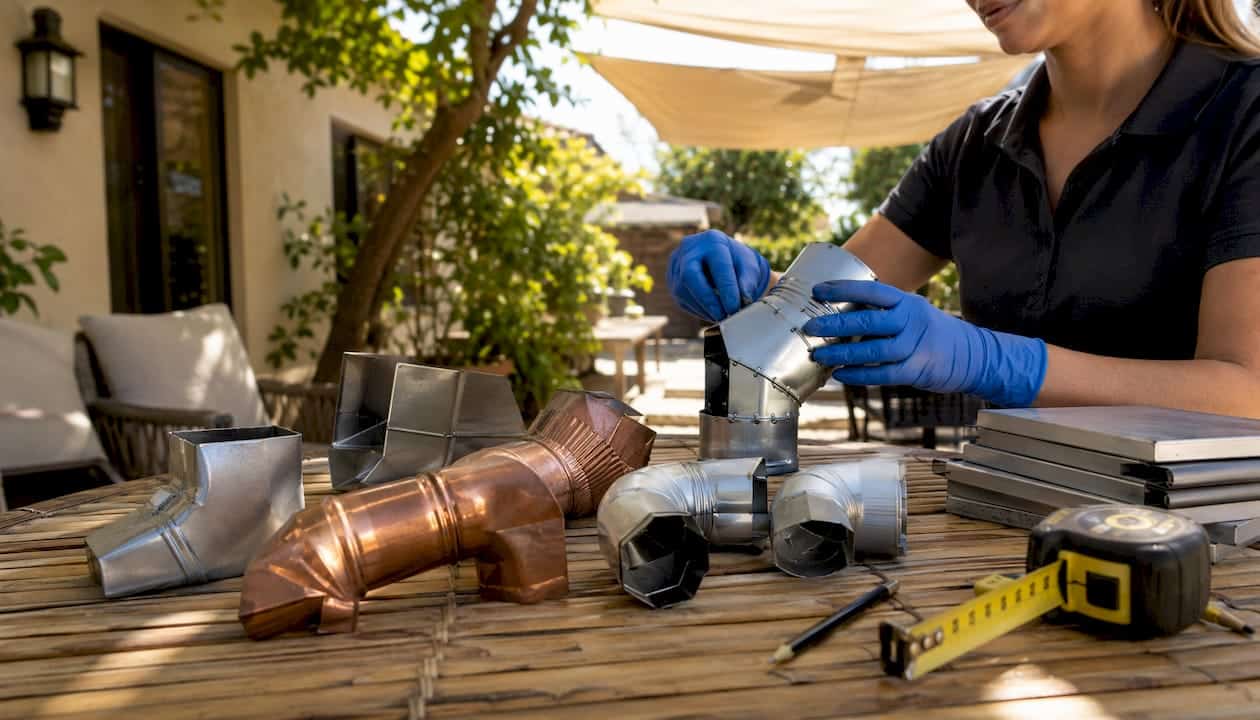
Factory elbows come in four common angles: 30°, 45°, 70–75°, and 90°. Each serves a different purpose.
- 30°: A gentle bend for long, gradual offsets. Good when the wall is close to plumb and you need minimal redirection.
- 45°: The middle-ground angle. Handles moderate offsets and works well on most standard runs.
- 70–75°: The functional standard for residential work. Smoother flow than 90°, fewer catch points for leaves and debris, and fits the geometry of most homes.
- 90°: Reserved for tight clearances and underground drain tie-ins. The sharp turn increases splash and debris accumulation, so avoid it on open runs.
One thing most product listings won’t tell you: factory angles are approximations, not precision specs. A labeled 75° elbow may be a degree or two off, and your wall geometry will rarely match it exactly. Installers expect to fine-tune on site.
On-site measurement checklist:
- Measure the horizontal distance from the gutter outlet face to the wall surface (the “offset”).
- Measure the vertical drop from the gutter outlet to where the downspout meets the wall.
- Calculate the angle: divide the offset by the drop and use a basic trigonometry table, or hold a scrap piece of downspout against the run and scribe the cut line directly.
- Note any obstructions (window sills, utility lines, ledges) that force the downspout off a straight path.
- Check roof pitch effects on water flow routing — steeper pitches push more volume and may require a larger elbow.
For complex rooflines where no single factory angle fits, adjustable elbows or a two-elbow assembly using smaller angles can create a custom bend without stressing the joints.
Pro Tip: If you’re unsure of the exact angle, buy an adjustable elbow first. Set it in place, lock the angle, then use it as a template to order fixed elbows for the rest of the run.
Which material should you choose for your elbows?
Material choice affects how long your elbows last, how they handle heat and freeze cycles, and whether they’ll match your existing gutters.
- Aluminum: The most common residential choice. Lightweight, paintable, and corrosion-resistant. Handles Florida’s heat and UV exposure well. Typical service life: 20+ years with basic maintenance.
- Vinyl: Inexpensive and easy to cut, but it becomes brittle in sustained heat and cracks in hard freeze cycles. Fine for mild climates on a tight budget; not ideal for Central Florida’s summer intensity.
- Copper: Long-lasting and visually distinctive. Develops a natural patina that many homeowners find appealing. Pairs with copper or premium ornamental gutter systems. Higher upfront cost, but rarely needs replacement.
- Galvanized steel: Strong and rigid, but prone to rust if the finish is scratched or the coating wears. Needs periodic inspection and touch-up paint in humid or coastal environments.
Color and finish matching matters more than most people expect, especially on retrofit projects. Aluminum elbows can be factory-painted or field-painted to match existing seamless gutter runs. Vinyl comes in a fixed color palette, so matching an older system can be tricky. Copper and steel have their own distinct looks that don’t blend with aluminum systems.
For homes near the coast, aluminum or copper outperform galvanized steel in salt-air conditions. In areas with heavy tree cover and high debris load, aluminum’s smooth interior surface sheds buildup better than rougher galvanized finishes.
How do you match elbow size and profile to your existing gutters?
Size mismatch is the fastest way to create a leak. The elbow opening must match the downspout dimensions exactly.
- 2×3 elbows: Older homes and smaller roof areas. Still widely available but being phased out in new construction.
- 3×4 elbows: The current residential standard. Handles typical roof drainage for most single-family homes.
- 4×5 elbows: Commercial applications or custom residential systems with very large roof surfaces.
Profile compatibility is equally important. K-style gutters (the most common U.S. residential profile) use rectangular downspouts and rectangular elbows. Half-round gutters use round downspouts and round elbows. Mixing profiles requires an adapter fitting, and even then the transition can create turbulence and leak points. Avoid mixing shapes unless an adapter is the only option.
Sizing checklist before you buy:
- Measure the width and depth of your existing downspout at the connection point.
- Check the lip profile: K-style and half-round have different outlet shapes.
- Confirm the elbow slides over (or into) the downspout with a snug fit. A gap of more than 1/8″ will need extra sealant and may still leak under heavy rain.
- Adapters are acceptable for one-off transitions but shouldn’t be used as a workaround for a fundamentally mismatched system.
Wrong elbow orientation or size can direct water straight toward the foundation. Plan the discharge point before you install anything.
How do you install a gutter elbow safely?
A basic elbow swap is within reach for most homeowners, but roof access and ladder work carry real fall risk. Know the limits before you climb.
Tools you’ll need:
- Tin snips or aviation snips (for aluminum)
- Cordless drill with metal bits
- Pop rivet gun and aluminum rivets
- Gutter sealant or silicone caulk (rated for metal)
- Tape measure and marker
- Ladder with stabilizer arms and non-slip feet
- Safety glasses and work gloves
Installation steps:
- Mark the cut line on the downspout at the elbow connection point.
- Cut with snips; deburr the edge so it doesn’t tear the sealant.
- Slip the elbow onto the downspout (the upper piece always overlaps the lower to shed water).
- Crimp the joint if needed for a tighter fit.
- Drive two pop rivets through the overlapping faces to lock the connection.
- Apply gutter sealant to the inside seam and any exterior gaps.
Joining method tradeoffs:
- Slip-fit only: Fast, but relies entirely on sealant. Fine for low-slope runs; less reliable under high flow.
- Crimp + rivet: The most secure method for long-term leak prevention. Takes a few extra minutes but holds up through years of thermal expansion.
- Caulk-only: Acceptable as a temporary patch or for vinyl systems; not a substitute for mechanical fastening on aluminum.
Working above the first story on a wet or steep roof is a job for a professional. A fall from a ladder costs far more than a gutter repair. If the elbow is at a second-story outlet or requires roof access, contact Larrysgutters for a safe, on-site assessment.
Pro Tip: Always connect gutter sections so the upper piece laps over the lower. Reversing this traps water at the seam and guarantees a leak within one rainy season.
Should you repair, replace, or upgrade your elbow?
Repair (patch it): Small pinhole, minor surface corrosion, or a loose seal. Clean the area, apply gutter sealant or a metal patch kit, and re-rivet if the joint has shifted. Cost: a few dollars and an hour.
Replace the elbow: Visible splits, warped shape, or a joint that has failed more than once. A single elbow costs $3–$15 depending on material and size. If the surrounding downspout section is also damaged, replace both at once.
Upgrade the system: Repeated clogs at the same elbow, water consistently backing up, or an undersized 2×3 system on a home that now has a larger roof load. This is the moment to reconsider the whole downspout run, not just the elbow.
Call Larrysgutters when:
- The elbow is at a second-story outlet or requires roof access.
- The downspout ties into an underground drain and the connection has failed.
- You’ve patched the same spot twice and it keeps leaking.
- The roofline is complex and you’re not confident in the angle calculation.
Knowing when gutters need replacing versus when a single elbow swap will do the job saves you from over-spending on a full system when a $10 part is all that’s needed.
What does a good maintenance routine look like?
Elbows fail most often from debris buildup, loose fasteners, and dried-out sealant. A twice-yearly check catches all three.
Recommended schedule:
- Spring: Clear any debris that accumulated over winter. Check all elbow joints for loosened rivets or screws. Inspect sealant for cracking or separation.
- Fall: Repeat the debris clear after leaves drop. Touch up any paint or finish chips on steel or aluminum elbows before the wet season.
- After major storms: Check for shifted elbows, especially at the top outlet where wind load is highest.
Quick inspection checklist:
- Debris clear at every elbow joint (leaves and twigs pack into bends)
- Rivets and screws tight with no visible gap at the overlap
- Sealant intact on interior seams
- No rust streaks or white oxidation on aluminum
Gutter guards reduce the debris load reaching your elbows significantly. Strainer inserts at the top elbow inlet are a lower-cost option for homes with moderate tree cover. Neither eliminates the need for annual checks, but both extend the interval between cleanings.
What do elbows typically cost, and how long does the job take?
Parts:
- Standard aluminum 3×4 elbow: $5–$15 per piece at most home improvement stores
- Copper elbows: $20–$60 depending on size and finish
- Vinyl elbows: $3–$8, widely available but limited in size options
- Adjustable elbows: $10–$25 per piece
Labor and time:
- Single elbow swap (DIY): 30–60 minutes including prep and cleanup
- Multi-elbow reroute (DIY): 2–4 hours depending on complexity
- Professional single elbow replacement: typically $75–$200 including labor, depending on height and access
- Full downspout reroute with underground tie-in: pricing varies significantly by region, access difficulty, and materials; get at least two quotes
Regional variation is real. Labor rates in Central Florida differ from the Pacific Northwest or the Northeast. Height, material, and time of year (peak storm season drives demand) all affect what you’ll pay. For accurate pricing, seamless gutter pricing guidance gives a useful baseline for Florida homeowners.
Quick glossary of gutter elbow terms
- A-style elbow: Bends front to back; used at the top outlet and bottom kick-out.
- B-style elbow: Bends side to side; routes downspouts around corners or along walls.
- AB-style elbow: Transitions between A and B orientations in one fitting.
- Drop/offset elbow: Moves the downspout away from the wall and back in to clear an obstruction.
- Adjustable elbow: Pivots or telescopes to create a custom angle without cutting.
- Crimp: A mechanical compression of the elbow edge to tighten the slip-fit connection.
- K-style: The most common U.S. residential gutter profile; uses rectangular downspouts.
- Half-round: A semicircular gutter profile; uses round downspouts and round elbows.
- Downspout adapter: A transition fitting that connects two different profile or size components.
- Slip-fit: A joining method where one piece slides inside another before fastening.
Compatibility issues beyond size: snap-lock, hangers, and system fit
Elbow size is only one compatibility variable. The way your gutter system is assembled can create friction points that a correctly sized elbow won’t solve on its own.
Snap-lock gutter systems use a proprietary clip mechanism that locks gutter sections together without exposed fasteners. Standard elbows often don’t engage the snap-lock profile correctly, leaving a gap at the outlet that leaks under heavy rain. If your gutters use a snap-lock design, confirm the elbow is from the same system family before buying.
Hanger spacing affects elbow placement too. A hanger positioned directly at or near the outlet can block the elbow from seating flush. The fix is usually repositioning the nearest hanger by a few inches, but on older systems with corroded spikes, that can turn a simple elbow swap into a larger repair.
Fascia-mounted vs. spike-and-ferrule systems also behave differently at the outlet. Fascia-mounted gutters sit tighter to the roofline, which can reduce the clearance available for the elbow’s top bend. Measure that gap before assuming a standard elbow will fit.
For homes with roof-to-gutter transitions that involve overhangs, dormers, or complex fascia angles, the elbow choice is rarely straightforward. That’s exactly the situation where an on-site measurement visit pays for itself.
Key Takeaways
The A-style elbow with a moderate angle in a 3×4 size is a common default for most U.S. residential downspouts, with sharper angles reserved for tight clearances and underground tie-ins only.
| Point | Details |
|---|---|
| Default elbow choice | A 3×4 rectangular 70–75° A-style elbow fits most residential K-style gutter runs. |
| Angles are approximations | Factory angles like 75° are functional starting points; expect small field adjustments on every install. |
| Material matters by climate | Aluminum suits most U.S. homes; vinyl degrades in sustained heat; copper lasts longest but costs more. |
| Measure before you buy | Check offset distance, drop height, and downspout profile before ordering any elbow. |
| Larrysgutters | For Central Florida homes, Larrysgutters provides on-site measurement, custom-fit seamless elbow installation, and gutter guard services. |
Why custom-fit elbows matter more in Florida
Central Florida’s weather puts gutter systems through a stress test most of the country never sees. Afternoon storms can dump several inches of rain in under an hour, and that volume hits your elbows hard. A standard off-the-shelf elbow installed without precise field measurement will gap, leak, or back up under that kind of load.
At Larrysgutters, we’ve seen what happens when elbows are sized for average rainfall rather than Florida rainfall. The joints separate. Water runs behind the fascia. Foundation erosion follows. That’s why we favor custom-fit seamless installations over pieced-together systems. A seamless run with properly measured, field-fitted elbows handles the volume, holds its shape through thermal expansion, and lasts years longer than a generic assembly.
Florida homeowners also deal with a debris load that northern guides underestimate. Spanish moss, palm fronds, and pine needles pack into elbow bends fast. The right elbow angle and a well-placed gutter guard system are the two things that keep that problem manageable.
Larrysgutters handles the hard part for Central Florida homeowners
Choosing the right elbow is straightforward once you know what to measure. Installing it safely at height, routing it around a complex roofline, or tying it into an underground drain is a different matter.

Larry’s Gutters serves homeowners across Central Florida with seamless gutter installation, elbow replacement, gutter guard installation, and full system cleanings. Every job starts with an on-site measurement visit so nothing is guessed. If your current elbows are leaking, undersized, or just worn out, a seamless gutter installation from Larrysgutters replaces the patchwork with a system built for Florida’s rainfall. Request a free quote directly through the site and get a scheduling window that works for you.
Useful sources and further reading
The following resources informed this guide and are worth bookmarking for deeper technical detail:
- Aqua Barrel: A Elbow vs B Elbow — Clear breakdown of A vs. B orientation with sizing and angle guidance; useful for first-time buyers.
- This Old House: Understanding Gutter Downspouts — Tom Silva’s practical overview of elbow types and routing logic for residential installs.
- Gutterworks: How to Determine the Degree of Elbow You Need — Industry-sourced explanation of why 75° is the functional standard and how angles are approximated in the field.
- Larrysgutters: How to Measure for New Gutters — Florida-specific measurement procedures for downspouts and elbows.
- REPS of Texas: Gutter Installation Service — Regional professional installation reference for homeowners exploring full-service gutter workflows.
- Larrysgutters: Essential Gutter Safety Gear for DIY Homeowners — Safety gear and ladder guidance for anyone attempting elbow work at height.
