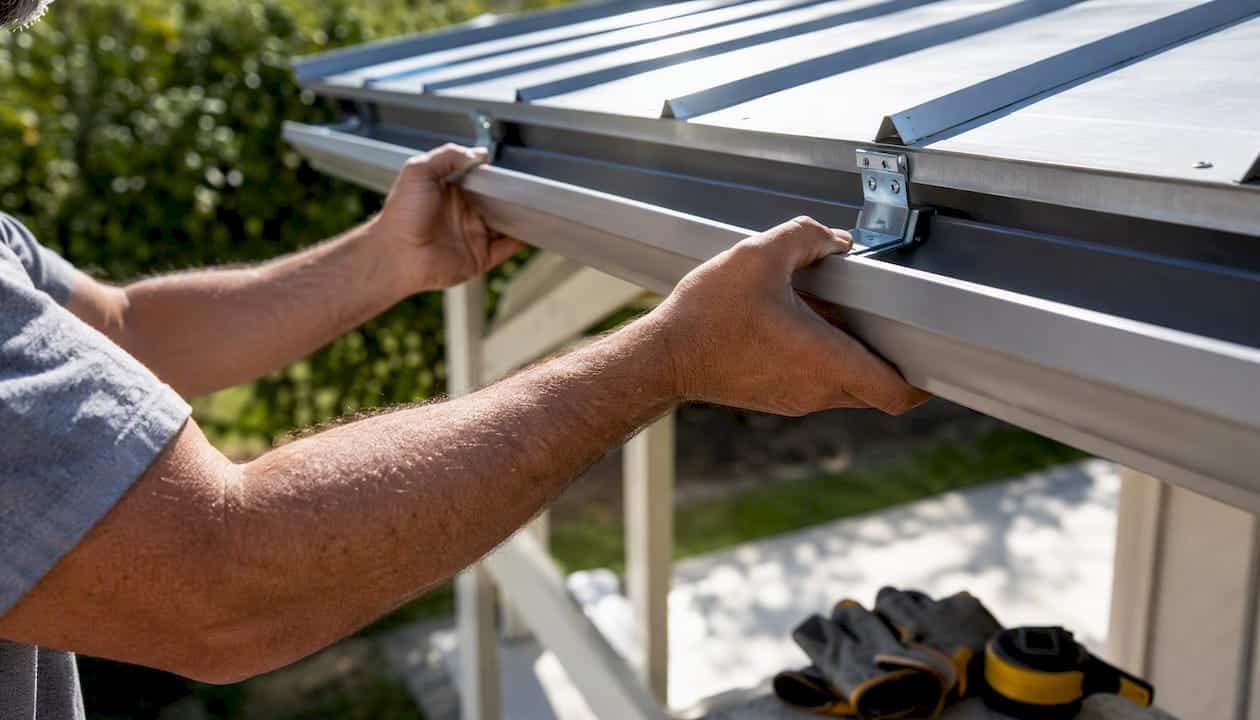
Most carports need gutters. The real question is which system fits your roof type and how to attach it without voiding your roof warranty. For standing-seam metal roofs, use non-penetrating seam clips. For corrugated panels or carports with a solid fascia board, fascia-mounted brackets or rib clips work well. Small carports with short eave runs can use a DIY kit like a Yardistry-style rain gutter kit. Larger or open-sided metal carports with heavy rainfall exposure call for professionally installed seamless gutters, typically 6″ K-style or box profile.
Here is the quick shortlist:
- Small carport, simple fascia, short eave run: A 5″ K-style DIY kit or Yardistry-style pavilion gutter kit. Reasonable for runs under 20 feet with low-to-moderate rainfall.
- Larger carport or standing-seam metal roof: Professional seamless gutters with seam clips. No penetrations into the roof panel.
- High-rainfall area or large roof area: 6″ K-style or box/rectangular eave gutters with extra downspouts, spaced every 20–40 feet depending on roof area and local rainfall intensity.
Professional installers recommend a gutter pitch of 1/4″ to 3/8″ drop per 10 feet of run on metal roofs. Start by measuring your eave length and identifying your roof panel type. Those two facts determine everything else.
Key Takeaways
Carport gutters are worth installing on almost every metal carport, and the attachment method, not the gutter profile, is the decision that determines long-term performance.
| Point | Details |
|---|---|
| Pitch requirement | Set 1/4″–3/8″ drop per 10 feet of run; metal roofs shed water fast and need the full range. |
| Attachment by roof type | Standing seam requires non-penetrating seam clips; corrugated panels use rib clips or fascia brackets. |
| Profile and size | Use 5″ K-style for small carports; step up to 6″ or box gutters for large roof areas or high-rainfall zones. |
| Downspout spacing | Plan one downspout every 20–40 feet depending on roof area and local rainfall intensity. |
| Larrysgutters | Offers free on-site quotes, custom seamless fabrication, and correct clip selection for Central Florida carports. |
Table of Contents
- Do carport gutters actually protect your property?
- What gutter styles work best on carports and metal buildings?
- How do gutters attach to metal carport roofs?
- How do you size gutters, set pitch, and place downspouts?
- Which gutter material holds up on a metal carport?
- DIY kit or professional install: what does each actually cost?
- Installation checklist and mistakes that cause real problems
- How to maintain carport gutters and whether guards are worth it
- How Larrysgutters approaches carport gutter projects
- What professional installers actually prioritize on carport jobs
- Larrysgutters handles carport gutter projects across Central Florida
- Sources
Do carport gutters actually protect your property?
Yes, and for metal roofs the case is stronger than most homeowners expect. Metal panels shed water faster than asphalt shingles. A moderate rain event on a 20-by-20-foot carport roof dumps a significant volume of water off the eave in a short window, and without gutters, that water hits the ground directly below the eave line at full force.
The damage modes are specific and cumulative. Concentrated runoff erodes soil along the foundation perimeter, which over time causes settling. It stains concrete pads and siding. It saturates landscaping beds and can undermine pavers or finished decking. If your carport sits adjacent to a garage door or entry door, uncontrolled runoff splashes mud and debris onto those surfaces every storm.
When are gutters optional? A small carport on a well-drained gravel pad, with the grade sloping away from any structure and no landscaping or finished surfaces nearby, can sometimes get by without them. That scenario is less common than people assume, especially in Florida where rainfall intensity makes even a modest roof area a serious drainage challenge.
Pro Tip: If you have landscaping, a concrete pad, finished decking, or any door opening within 10 feet of the carport eave, treat gutters as required. The cost of installation is a fraction of the cost of foundation repair or repeated landscaping replacement.
What gutter styles work best on carports and metal buildings?
Four profiles cover nearly every carport application. The right one depends on roof area, rainfall intensity, and whether you want a DIY kit or a custom-fabricated system.
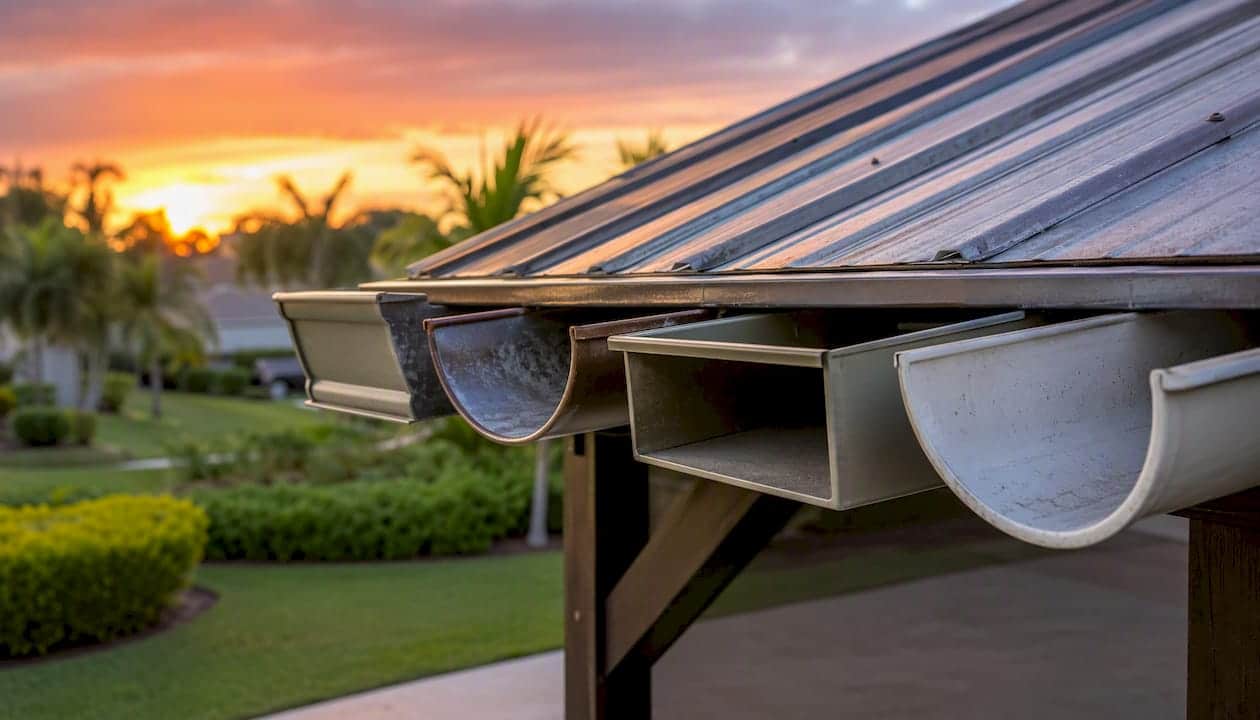
K-style gutters are the workhorse. The flat back makes them easy to mount against a fascia board, and the ogee front profile handles moderate-to-high water volume. A 5″ K-style suits most residential carports; a 6″ K-style handles larger roof areas or high-rainfall climates. Available in aluminum, steel, copper, and vinyl. Aluminum is the most common choice for carports because it is lightweight, corrosion-resistant, and easy to cut on-site.
Half-round gutters are a step up in durability and aesthetics. The rounded trough drains cleanly with fewer debris-catch points, which matters if your carport sits under trees. Capacity is slightly lower than K-style at the same width, so size up by an inch in heavy-rain areas. Common in aluminum and copper.
Box or rectangular eave gutters are the right call for large metal buildings. They handle significantly higher flow rates than K-style or half-round profiles and integrate cleanly with eave trim on commercial-style carports. If your carport has a long eave run or sits in a high-intensity rainfall zone, box gutters are worth the added cost.
Seamless gutters are not a profile but a fabrication method. A seamless system is roll-formed on-site to the exact length of your eave run, eliminating mid-run joints. Fewer joints means fewer leak points, which is a real advantage on metal roofs where thermal movement stresses every splice. Larrysgutters fabricates and installs seamless systems custom-fit to the carport.
DIY kit reality: Yardistry offers rain gutter kits sized for specific pavilion and carport frames, with pre-cut lengths and brackets matched to their structure dimensions. These kits make sense when the eave run is short, an existing fascia board is present, and rainfall is low-to-moderate. For anything beyond that, the kit’s fixed dimensions and sectional joints become limitations.
| Feature | K-style | Half-round | Box/eave | Seamless |
|---|---|---|---|---|
| Best for | Most residential carports | Architectural/tree-shaded | Large metal buildings | Any size, fewest joints |
| Attachment type | Fascia brackets or seam clips | Strap hangers or fascia | Eave angle or fascia | Fascia brackets or seam clips |
| Material options | Aluminum, steel, vinyl, copper | Aluminum, copper | Steel, aluminum | Aluminum, steel |
| Capacity | Medium to high | Medium | High | Medium to high |
| Roof-type suitability | Fascia-backed, corrugated, standing seam | Fascia-backed, corrugated | Metal eave angle, corrugated | All types with correct clip |
How do gutters attach to metal carport roofs?
Attachment is the decision that matters most. Get it wrong and you either void your roof warranty, create a leak path, or watch the gutter pull away from the eave after the first thermal cycle.
The rule is simple: never penetrate a standing seam. Standing-seam metal roofs expand and contract with temperature changes. A screw driven through the seam creates a stress point that cracks sealant and eventually leaks. Seam clips or fascia mounting are the correct non-penetrating options for standing-seam roofs.
The four common attachment methods:
- Seam clips: Clamp onto the raised seam without any fastener penetrating the panel. The gutter hanger attaches to the clip. This is the standard method for standing-seam carports and preserves roof warranties.
- Rib or rib-clip brackets: Designed for corrugated and exposed-fastener panels. The bracket seats in the panel rib and fastens through the rib crown with a self-tapping metal screw and neoprene washer. Sealant under the washer is required.
- Fascia-mounted brackets: When the carport has a solid fascia board or eave trim backing, standard fascia brackets work well and keep all fasteners out of the roof panel entirely.
- Vampire clips and strap systems: Used on open-sided carports without fascia. Vampire clips and strap mounts tie into the roof rib or eave angle and are a practical option for structures without side panels.
When penetration into an exposed-fastener panel is unavoidable, use self-tapping metal screws with neoprene washers and apply a compatible sealant under the washer. Anchor to the eave strut, eave angle, or fascia backing rather than to thin roof panel field areas. Thin panels flex under load and will work fasteners loose over time.
How do you size gutters, set pitch, and place downspouts?
Size first, then slope, then downspout count. Getting the sequence right means you never install a gutter run only to find it overflows in a moderate storm.
The industry-recommended pitch is 1/4″ to 3/8″ drop per 10 feet of gutter run. On metal roofs, many installers prefer the upper end of that range because metal panels shed water faster than shingles, and a steeper slope keeps the gutter draining between storms rather than holding standing water.
Sizing checklist:
- Measure the eave length for each gutter run.
- Calculate the roof area draining into that run (eave length × roof slope projection).
- Check your local design rainfall intensity. Florida’s high-intensity storms push most residential carports toward 6″ gutters.
- Choose 5″ K-style for roof areas under roughly 750 square feet in moderate rainfall; step up to 6″ K-style or box gutters for larger areas or high-intensity rainfall zones.
Downspout placement: Gutter and downspout sizing for metal buildings is an engineered activity, with typical downspout spacing ranges over tens of feet depending on roof area and rainfall intensity. For a residential carport, one downspout per 20–30 feet of run is a reasonable starting point. Pair a 5″ gutter with a 2″×3″ or 3″ round downspout; pair a 6″ gutter with a 3″×4″ or 4″ round downspout.
Five steps to plan your layout:
- Measure and map every eave run, noting any inside or outside corners.
- Choose your gutter profile based on roof area and local rainfall.
- Determine downspout count and mark outlet locations at or near the low end of each run.
- Mark the slope: snap a chalk line from the high end to the outlet location at your chosen pitch.
- After installation, test with a garden hose at the high end and confirm water reaches the downspout outlet without pooling.
Discharge matters as much as collection. Route downspout extensions at least 4–6 feet from the foundation, or tie into an underground drain if the site allows. Surface discharge toward a slope away from the structure is the minimum standard.
Which gutter material holds up on a metal carport?
Aluminum is the right choice for most carports. It does not rust, handles thermal movement better than steel, and is available in a wide range of painted finishes that can be matched to the carport color. Lighter weight also means less stress on the attachment clips over time.
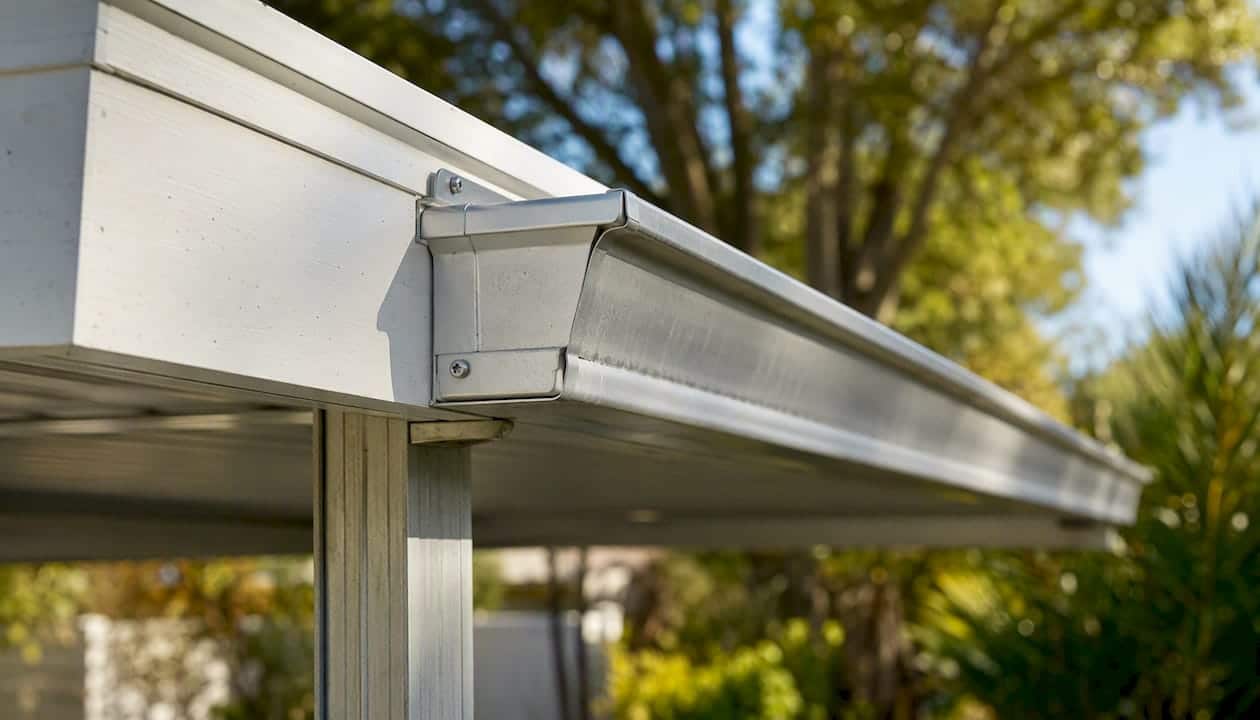
Galvanized or Galvalume steel gutters are stronger and can handle heavier debris loads, but they need a protective coating in coastal or high-humidity environments. In Central Florida’s salt-air coastal zones, uncoated steel gutters will show rust within a few years.
Copper is the premium option. It is extremely durable, develops a natural patina, and requires no painting. The cost is significantly higher, and copper must never contact aluminum or steel directly without isolation because of galvanic corrosion.
Vinyl is the lowest-cost option but the least suitable for metal carports. Vinyl becomes brittle under UV exposure and cracks under thermal cycling, which is severe on metal eaves that heat up quickly in direct sun.
Pro Tip: Match your gutter finish to the carport’s trim color rather than the panel color. Trim color is what the eye follows at the eave line, and a matched finish looks intentional rather than added-on.
Thermal movement is a real factor on metal eaves. Aluminum expands and contracts with temperature swings, and so does the carport structure. Use expansion joints on runs longer than 40 feet and leave 1/4″ gaps between gutter sections at splices to prevent buckling.
DIY kit or professional install: what does each actually cost?
Small, simple carports with short eave runs and an existing fascia board are reasonable DIY candidates. A Yardistry-style kit for a pavilion or small carport frame typically runs in the $100–$600 range depending on the run length and profile included. You supply the labor and any additional downspout hardware.
Professionally installed seamless gutters for carports typically cost $4–$12 per linear foot, installed. The range is wide because roof type, height, attachment complexity, and downspout count all affect the price. A standing-seam roof requiring seam clips and fascia reinforcement sits at the higher end. A corrugated-panel carport with a solid fascia and straightforward bracket attachment sits lower.
| Cost element | DIY kit | Professional seamless |
|---|---|---|
| Material cost | $100–$600 (kit) | $4–$12/linear foot installed |
| Labor | Homeowner | Included |
| Roof-type suitability | Fascia-backed, simple runs | All types, including standing seam |
| Joint count | Multiple (sectional) | Minimal (seamless) |
| Expansion joint handling | Manual, often skipped | Planned by installer |
| Warranty on gutters | Kit manufacturer | Installer + material |
For a cost-effective gutter choice, weigh the per-foot installed price against the risk of a DIY installation that leaks or fails at a joint within a year or two.
Decision checklist:
- Roof type: Standing seam? Hire a professional. Seam clips require experience to install correctly.
- Eave length: Runs over 30 feet benefit from seamless fabrication and planned expansion joints.
- Local rainfall: Florida’s rainfall intensity pushes most carports toward 6″ gutters and professional sizing.
- Access and safety: Metal carport eaves can be slippery and awkward to work on safely without staging.
- Warranty implications: A DIY installation that penetrates a standing seam can void the roof panel warranty.
Hidden costs to budget: fascia reinforcement when the backing is thin or absent, underground drain connections, permits if your municipality requires them for accessory structure modifications, and the cost of correcting leaks from an improper first installation. Hiring a professional gutter installer for complex roofs usually costs less than fixing a failed DIY attempt.
Installation checklist and mistakes that cause real problems
Follow a slope-first, support-first sequence. Measure and mark before you cut anything.
Step-by-step installation sequence:
- Measure all eave runs and map downspout outlet locations.
- Mark the high and low points of each run; snap a chalk line at your chosen pitch (1/4″–3/8″ per 10’).
- Install outlet drops and end caps on gutter sections before mounting.
- Set hangers or brackets along the chalk line at the manufacturer’s specified spacing (typically 24″ on center for most aluminum systems, per industry installation guidance).
- Cut gutter sections to length, leaving 1/4″ expansion gaps at each splice.
- Assemble sections with concealed splices and non-curing sealant on joints.
- Install downspout outlets, elbows, and downspout runs; secure with straps every 6 feet.
- Test with a garden hose at the high end; confirm full drainage to the outlet with no standing water.
- Route discharge extensions away from the foundation.
Common mistakes:
- Hanger spacing too wide, causing the gutter to sag between supports and hold water
- Insufficient slope, leading to standing water and mosquito breeding in Florida climates
- Penetrating a standing seam with a screw instead of using a seam clip
- No expansion gaps between sections, causing buckling in summer heat
- Undersized downspouts that back up in heavy rain
- Skipping galvanic isolation between dissimilar metals
- Failing to seal splice joints with non-curing sealant
Pro Tip: Anchor hangers to the eave strut, eave angle, or a solid fascia backing. Fastening into thin roof panel field areas gives you a connection that works loose as the panel flexes. If there is no solid backing, add a fascia board or use seam clips.
How to maintain carport gutters and whether guards are worth it
Clean at least twice a year, spring and fall, and after any major storm. In Central Florida, where oak pollen, pine needles, and heavy summer storms are constants, twice a year is the minimum. Properties near the coast or under heavy tree cover may need quarterly attention.
Maintenance schedule:
- Spring: Clear debris from winter storms, check hangers and brackets for loosening, reseal any joints showing gaps, flush with a hose and confirm slope.
- Fall: Clear leaves and organic buildup before the dry season; inspect downspout outlets for blockage.
- After major storms: Check for displaced hangers, debris blockages, and any sections that shifted.
- Annually: Inspect all sealant joints; reapply non-curing sealant where cracking or separation is visible.
For a detailed Florida-specific maintenance schedule, the seasonal timing matters more than most homeowners realize.
Gutter guard options for carports:
- Mesh or micro-mesh screens: Work well with K-style gutters. Keep out leaves, pine needles, and most debris while allowing water through. Best overall fit for residential carports.
- Reverse-curve covers: Effective for large debris but can let fine debris accumulate at the curve. Less suited to box gutters.
- Foam inserts: Inexpensive and easy to install but degrade under UV exposure and can trap organic material that promotes mold. Not recommended for metal carports in high-sun environments.
Guards reduce cleaning frequency. They do not eliminate inspection. Shingle grit, seed pods, and fine debris still accumulate over time and need clearing. A gutter guard installation adds value on carports under heavy tree cover, but plan for an annual check regardless.
Pro Tip: Test your gutters with a hose after every cleaning, not just after installation. A partially blocked downspout outlet that drains slowly in a trickle will back up and overflow in a Florida downpour.
How Larrysgutters approaches carport gutter projects
Larrysgutters starts every carport project with a roof-type evaluation before any measurement or material recommendation. For standing-seam roofs, the recommendation is non-penetrating seam clips. For corrugated or fascia-backed carports, fascia brackets or rib clips are selected based on what the structure can support.
The typical workflow: a free on-site quote, roof-type assessment, eave measurement, profile selection (usually 5″ or 6″ seamless aluminum K-style for Central Florida residential carports), custom seamless fabrication on-site, installation with the correct clips and isolation hardware, and a hose test before the crew leaves. Discharge routing is planned during the measurement visit, not as an afterthought.
Larrysgutters also installs gutter guards and handles cleaning and repair for existing systems. If you are adding gutters to an existing carport and are not sure whether your roof type is standing seam or corrugated, that is exactly the kind of question the on-site assessment answers.
Three questions to ask any installer before signing:
- What attachment method do you use for this roof panel type, and does it require any penetrations?
- Does your installation warranty cover the gutters separately from the roof warranty?
- How do you handle expansion joints on runs over 30 feet?
For the full seamless gutter installation process, Larrysgutters covers every step from measurement to discharge routing.
What professional installers actually prioritize on carport jobs
The attachment method and expansion accommodation are the two decisions that separate a gutter system that lasts from one that fails within a few seasons. Most homeowners focus on profile and color. Experienced installers focus on how the gutter connects to the structure and how it handles the thermal movement that happens every single day on a metal roof.
A field-tested tip worth knowing: on runs over 30 feet, place expansion joints at the point where the roof gets the most direct afternoon sun, not just at the midpoint of the run. That is where thermal movement is greatest, and that is where a splice without an expansion joint will crack its sealant first.
Testing slope with a garden hose before the crew packs up is not optional. A gutter that looks correctly pitched by eye can still have a low spot that holds water. The hose test finds it in five minutes. Finding it two months later after a mosquito complaint costs more.
If your carport has a standing-seam roof or a run longer than 40 feet, call a professional. The seam clip selection alone requires knowing the specific seam profile, and getting it wrong means the clip either slips or damages the seam. That is not a DIY judgment call.
Larrysgutters handles carport gutter projects across Central Florida
Custom seamless gutters for a carport cost less than most homeowners expect, and they outperform sectional kits on every metric that matters over time: fewer joints, correct sizing for local rainfall, and attachment hardware chosen for the specific roof panel.

Larry’s Gutters fabricates seamless aluminum gutters on-site, sized to your exact eave length, and selects the correct attachment method for your roof type during the free on-site assessment. For Central Florida homeowners dealing with summer downpours, that custom fit is the difference between a gutter that handles the storm and one that overflows at the corners. Guards, cleaning, and repair are available as part of the same service relationship.
Ready to stop guessing about profile size and attachment clips? Request a free seamless gutter quote and get a measurement visit scheduled. If you want to compare the value of seamless versus sectional before you call, the breakdown at are seamless gutters worth the money lays it out plainly.
Sources
The technical recommendations in this article draw from the following sources, each useful for a different level of detail.
- Gutters on Metal Roof | Free Estimate & Correct Professional Installation
- Gutter install guide (Drexmet)
- Metal Building Gutters & Downspouts: Sizing & Install
- Metal Building Gutter Systems | Factory Steel Overstock
- Attach gutter to metal roof: A practical guide for safe and durable installation – Rescreening Masters
