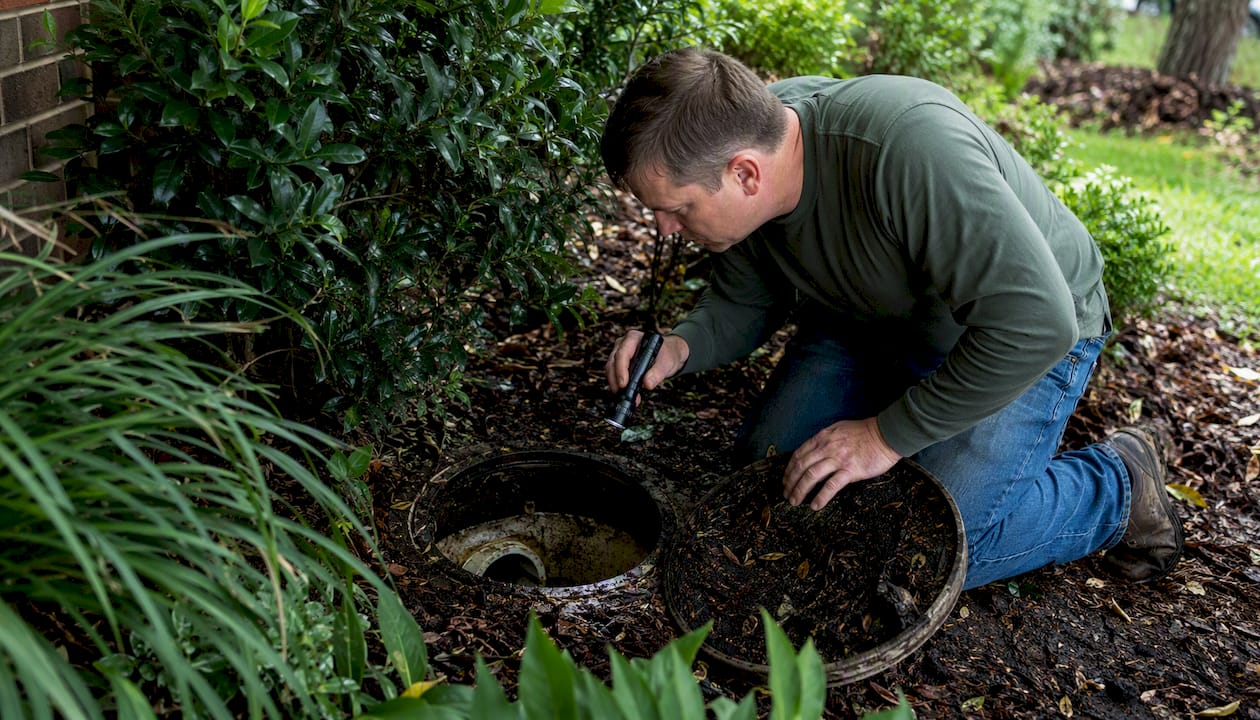
Standing water pooling at a downspout base, or gurgling coming from your yard during a storm, almost always means the underground drain run is clogged. Start with three safe, immediate steps: disconnect the downspout adapter if you can reach it, run a garden hose into the opening to test flow, and walk the pipe’s path to the outlet to check whether anything is discharging there at all. Take a few photos or a short video while you do this. It costs nothing and gives you (or a contractor later) real evidence instead of a guess.
Here’s what to do in the first ten minutes after you notice the problem:
- Disconnect the downspout from the underground adapter, if accessible, and look inside for obvious debris.
- Run a garden hose into the pipe from wherever it enters the ground, and watch how fast the water moves or backs up.
- Check the far end (the outlet, storm drain connection, or dry well) for flow, trickle, or nothing at all.
- Write down or photograph what you see: water level, discharge speed, any soil that looks unusually wet along the pipe’s path.
If water starts backing up toward the house, or you suspect the pipe has collapsed or a root mass is blocking it entirely, stop. Don’t force a hose or auger deeper, and never pour caustic drain chemicals into a buried line. Chemicals made for indoor pipes can sit stagnant in a horizontal underground run and eat through corrugated plastic long before they touch the actual clog.
Table of Contents
- What Causes Underground Drain Clogs and How the System Works
- What Usually Causes a Clogged Underground Drain?
- How Do You Locate an Underground Drain Clog?
- How to Clear an Underground Drain Yourself
- When Should You Call a Professional for an Underground Drain?
- How Do You Prevent Underground Drain Clogs?
- Need a Pro Look at Your Underground Drains?
- Sources
What Causes Underground Drain Clogs and How the System Works
An underground downspout run exists for one reason: to carry roof runoff away from your foundation instead of dumping it right next to the house. Water drops from the gutter into the downspout, passes through an adapter that transitions it into a buried pipe, travels horizontally underground, and exits somewhere: a storm sewer connection, a street inlet, or a dry well that lets water soak into the soil gradually.
Every piece of that path has a name worth knowing before you call a contractor or start troubleshooting:
- Downspout adapter — the fitting where the vertical downspout meets the buried pipe. This joint takes more abuse than any other part of the system.
- Drop and horizontal run — the vertical section into the ground, followed by the long horizontal stretch that does most of the work.
- Access point or cleanout — a cap or lid, sometimes hidden under mulch or grass, that lets you or a technician get a snake or camera into the line without digging.
- Termination point — where the water actually exits: a storm drain, a curb outlet, or a dry well.
- Pipe material — corrugated (flexible, ridged) versus smooth-walled solid pipe, and solid versus perforated (drilled with small holes to let water seep into surrounding soil).
- Slope — the gradient of the pipe. Even a slight drop over distance keeps sediment moving; a flat run lets it settle.
Knowing these terms matters because when you call a professional, “there’s a clog somewhere in my yard drain” gets you a guess. “The adapter joint looks fine but I get no flow at the termination point after running a hose for five minutes” gets you an accurate diagnosis before anyone shows up.
What Usually Causes a Clogged Underground Drain?
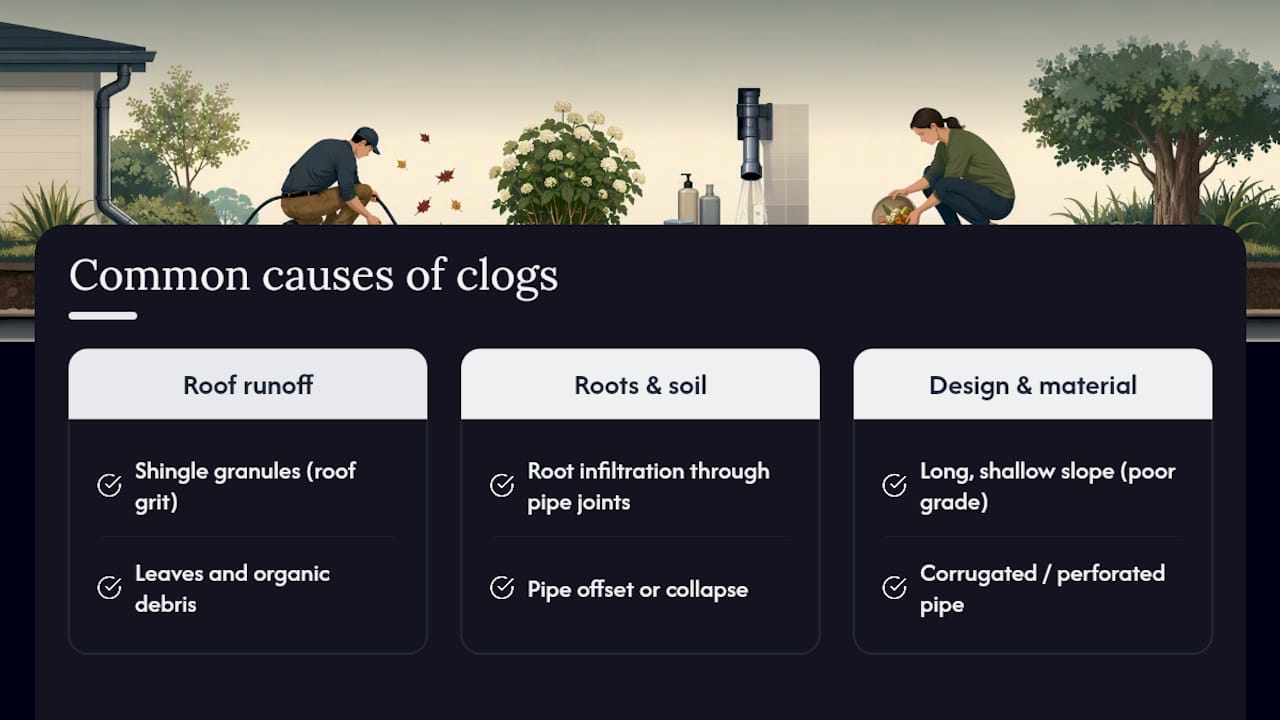
Most underground drain clogs trace back to one of six causes, and the symptoms usually point you toward which one you’re dealing with.
Shingle granules and roofing grit are one of the most common culprits, and they catch homeowners off guard because they show up even on properties with zero trees nearby. Every asphalt shingle sheds fine grit as it ages, and that grit washes straight into the gutter and down into the buried pipe, where it settles and compacts into sediment over years of roof runoff. A roof replacement or an aging shingle roof tends to accelerate this.
Leaves and organic debris are the second major cause, especially on properties with mature trees close to the roofline. Root infiltration is the third, and it’s almost always tied to pipe material: perforated pipe, designed to let water escape into the soil, also invites roots looking for moisture straight through those same holes.
Pipe offset or collapse happens when soil settles unevenly, tree roots physically push a joint apart, or old corrugated pipe simply degrades and crushes under the weight of soil above it. And then there’s slope. A long horizontal run with minimal grade is one of the least visible but most persistent causes: even a perfectly clean pipe can back up over time if it barely drops in elevation from one end to the other, because there’s not enough gravity pulling sediment along.
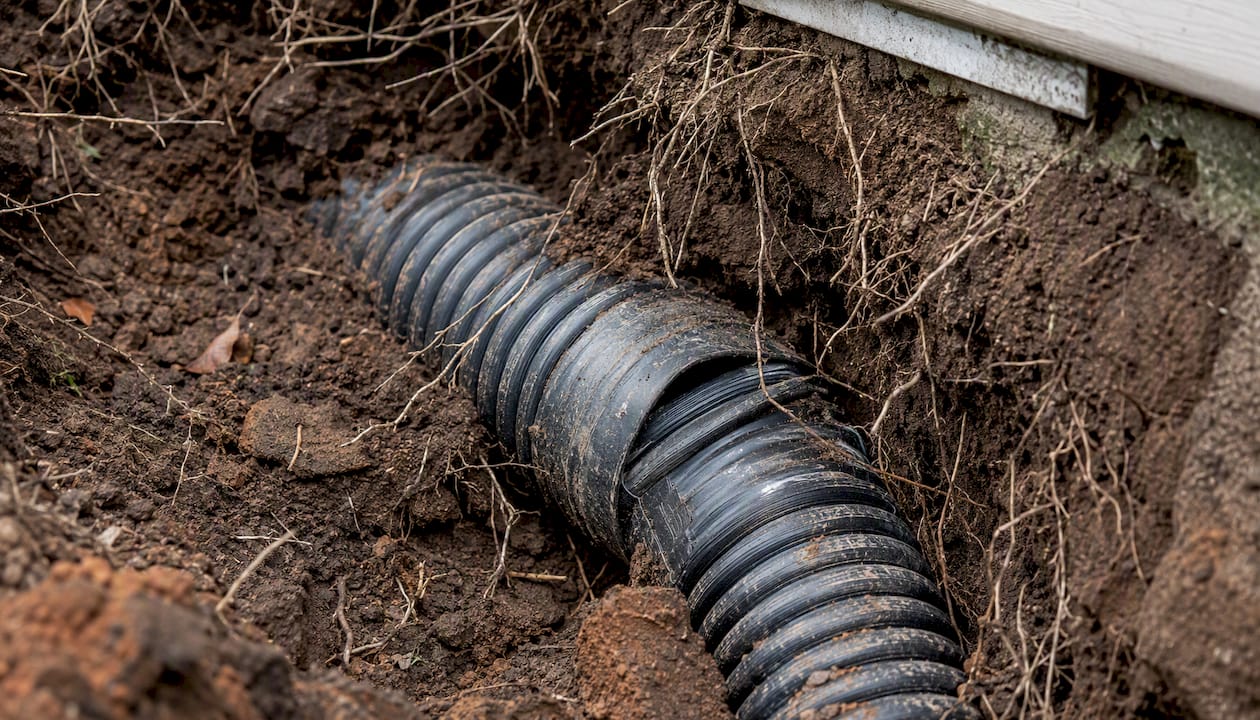
Here’s a rule of thumb that holds up across most residential setups: the longer and flatter the run, and the more likely it’s corrugated or perforated pipe, the faster it accumulates sediment and the more likely roots eventually find their way in. Smooth, solid PVC laid at a consistent slope generally resists both problems better.
How Do You Locate an Underground Drain Clog?
Finding where the blockage sits, not just confirming that one exists, is the step that saves you money on any professional visit. Work through this sequence before you call anyone.
- Watch the system during an actual rainstorm, if you can safely do so, and note exactly where water backs up or overflows.
- Run the garden hose test from the downspout entry point and time how long it takes for water to either disappear or back up.
- Check the termination point (outlet, storm drain, dry well) for any discharge at all during the hose test.
- Do a bucket test: pour a measured five-gallon bucket into the entry point and time how long it takes to drain completely.
- Listen for gurgling, which usually signals a partial blockage rather than a complete one, and note where the sound seems loudest.
- If you have access to any cleanout caps along the run, pop them and look or smell for standing water and debris.
If you’ve run through all six steps and still can’t pinpoint the location, or if the same clog keeps coming back after you clear it, that’s the point where a camera inspection earns its cost. A sewer camera on a flexible cable finds root intrusion, a collapsed section, or an offset joint with pinpoint accuracy, something no amount of hose-flushing and guessing will match.
Pro Tip: Before calling a contractor, take a short video of the hose test, from insertion to whatever happens at the outlet, and photograph any soggy ground along the suspected pipe route. Contractors quote faster and more accurately when they can see the actual symptom instead of relying on your description of it.
How to Clear an Underground Drain Yourself
Work through these methods in order, starting with the least invasive. Stopping at the right point matters as much as starting correctly.
- Clear surface debris from the downspout and gutter first. A blocked underground line sometimes isn’t underground at all; it’s just a screen or elbow packed with leaves at the top.
- Disconnect the downspout adapter and insert a garden hose directly into the buried pipe, running it at full pressure for two to three minutes while you watch the termination point for flow.
- If the hose alone doesn’t clear it, try a wet/dry vacuum. Seal the pipe opening around the vacuum hose as tightly as you can and run it for 60 to 90 seconds at a time, alternating with the hose to loosen and pull out sediment.
- Try a blow bag, an inflatable bladder attached to your garden hose that expands inside the pipe and uses pulsing water pressure to push debris toward the outlet.
- As a last DIY step, feed a manual plumbing snake or hand auger through the downspout, rotating gently and stopping the moment you feel serious resistance.
Some situations call for stopping immediately rather than pushing harder:
- The snake passes through freely but water still pools afterward, which usually means the actual blockage is further along than your cable reached.
- The cable hits something that spins and grabs rather than pushes through, a strong sign of root mass rather than loose debris.
- You hear grinding or a metal-on-metal sound, which usually means you’ve hit a pipe joint or a crushed section, not a clog.
- Water starts backing up toward the house instead of draining, at which point continuing risks pushing the problem into your foundation drainage or crawlspace.
Two safety notes matter more than anything else in this section. Never pour caustic or acid-based drain cleaners into a buried run. They’re formulated for vertical indoor pipe and short exposure times; in a flat horizontal underground pipe they sit and can damage corrugated plastic or PVC joints long before they touch the actual clog. And go easy on pressure. A residential pressure washer on full blast can rupture thin corrugated pipe walls that a calibrated professional jetting rig handles safely, so if you’re borrowing a pressure washer for this job, keep it on the lowest effective setting and never leave it stationary against the pipe wall.
Tools, Rentals, and Safety Gear for This Job
For a single clog on your own property, buying a full mechanical drum auger rarely makes sense. Most home centers and tool rental counters rent hand augers, motorized drain snakes, and hose blow bags by the day, which covers the vast majority of yard drain problems. A wet/dry vacuum is worth owning outright since it’s useful for a dozen other jobs around the house, but the snake and blow bag are classic rental items unless you own a lot of rental property.
Some rental counters also offer small handheld camera units built for residential lines, a middle option between total guesswork and paying a contractor for a full inspection visit.
Basic personal protective equipment for this job: waterproof gloves, safety glasses (sediment and organic slurry splash more than you’d expect), rubber boots, and a simple dust or particulate mask if you’re clearing anything with heavy decomposed leaf matter or standing organic muck. None of this is exotic gear, but skipping it on a job that involves stagnant water and old debris is a bad trade for saving five minutes.
On pressure: yard drain lines are not the same as your driveway or siding, so treat any pressure washer or jetting attachment with real restraint. Low-pressure, high-volume flow (think garden hose, not power washer) clears most sediment clogs without risking pipe damage. If you rent a jetting attachment rated above a few hundred PSI, walk your rental counter through exactly what pipe material you have before you use it.
When Should You Call a Professional for an Underground Drain?
Certain signs mean it’s time to stop troubleshooting and get a professional camera down there. Call a pro when you suspect a collapsed or crushed pipe section, when the same clog returns within weeks of clearing it yourself, when your auger keeps hitting a dense root mass rather than passing through, when you can’t locate or access the outlet at all, or when water is actually backing up into the house rather than just pooling outside.
Professional services generally fall into a few categories:
- Camera inspection — a flexible camera run through the line to confirm exact location, material condition, and cause before anyone digs or jets anything.
- Hydro-jetting — high-pressure water that scours the interior pipe wall and breaks up compacted sediment and biofilm; professionals typically run 3,000 to 4,000 PSI on many lines but dial it down significantly for thinner residential yard pipe.
- Mechanical cabling or root cutting — a motorized cable with a cutting head that physically shears through root intrusion before any jetting happens.
- Localized excavation and repair — digging up and replacing a specific damaged or offset section rather than the whole run.
- Full-line replacement or reroute — the answer when a line has multiple failure points or was installed poorly from the start.
When roots are heavily involved, jetting alone often isn’t enough. A two-stage approach, mechanical cutting to physically remove the root mass followed by a hydro-jet flush to clear remaining debris and verify flow, tends to outperform either method used alone. A camera inspection typically runs less than a straightforward clearing visit. Clearing costs more when roots or heavy sediment are involved, and any excavation or pipe repair sits well above both, since it involves labor, materials, and often landscaping restoration. Time on site follows the same pattern: an inspection can wrap up in under an hour, a jetting or cabling job usually takes half a day, and excavation and repair can stretch into multiple days depending on the length of run and how deep the pipe sits.
Pro Tip: Before you book anyone, ask three specific questions: do they run a camera before quoting repairs, what pressure they use on residential yard lines versus main sewer lines, and whether they’ll replace corrugated pipe with smooth PVC if the repair involves opening up the ground. A contractor who hesitates on any of these three is worth a second opinion. Reputable drain jetting services will walk you through pressure settings for your specific pipe material without you having to ask twice.
Get a written estimate that separates inspection, clearing, and any repair work into line items, and ask for the camera footage itself, not just a verbal summary. Proper debris disposal matters too: sewer-cleaning specifications require contractors to collect removed solids in watertight containers rather than dumping them onto your lawn or into a storm drain, and a professional outfit should handle this without you needing to ask.
How Do You Prevent Underground Drain Clogs?
A seasonal routine beats emergency troubleshooting every time, and it costs a fraction of an excavation bill.
In fall, clear gutters completely before winter debris load hits them, and give the underground run itself an annual flush with a garden hose even if nothing looks wrong. After any roof replacement or major roofing work, flush the system again; fresh shingle grit sheds heaviest in the first year or two after installation. After any significant storm, walk the yard and check for new soft spots or pooling along the pipe’s known path.
On the equipment side, gutter guards or downspout screens cut down dramatically on what makes it into the buried line in the first place, since most sediment and leaf debris never gets past the gutter if it’s properly screened. If you’re already opening up a section for repair, replacing corrugated or perforated pipe with smooth solid PVC is the single upgrade that does the most to prevent a repeat problem down the road. And mark your buried lines, with flags or a simple sketch kept with your home records, so nobody parks, digs, or drives heavy equipment over a pipe that’s only a foot or two underground.
On the landscaping side, keep new tree plantings a healthy distance from any known underground run, since root systems reliably grow toward the moisture a drain pipe provides. Root barriers installed between a tree and the pipe route add another layer of protection if you’re landscaping near an existing line. Depending on where you are in your maintenance cycle, reviewing a full gutter maintenance checklist alongside this underground-specific routine covers both halves of the system that work together to keep water away from your foundation.
The Downspout Adapter Joint Most Homeowners Miss
Here’s something that surprises a lot of homeowners doing their own gutter cleaning: the failure point isn’t usually the buried pipe itself. It’s the joint where the downspout meets the underground adapter, and service technicians report it’s routinely overlooked during standard gutter cleaning visits, because it’s low, often covered by mulch or landscaping, and easy to assume is fine if the gutters themselves look clear.
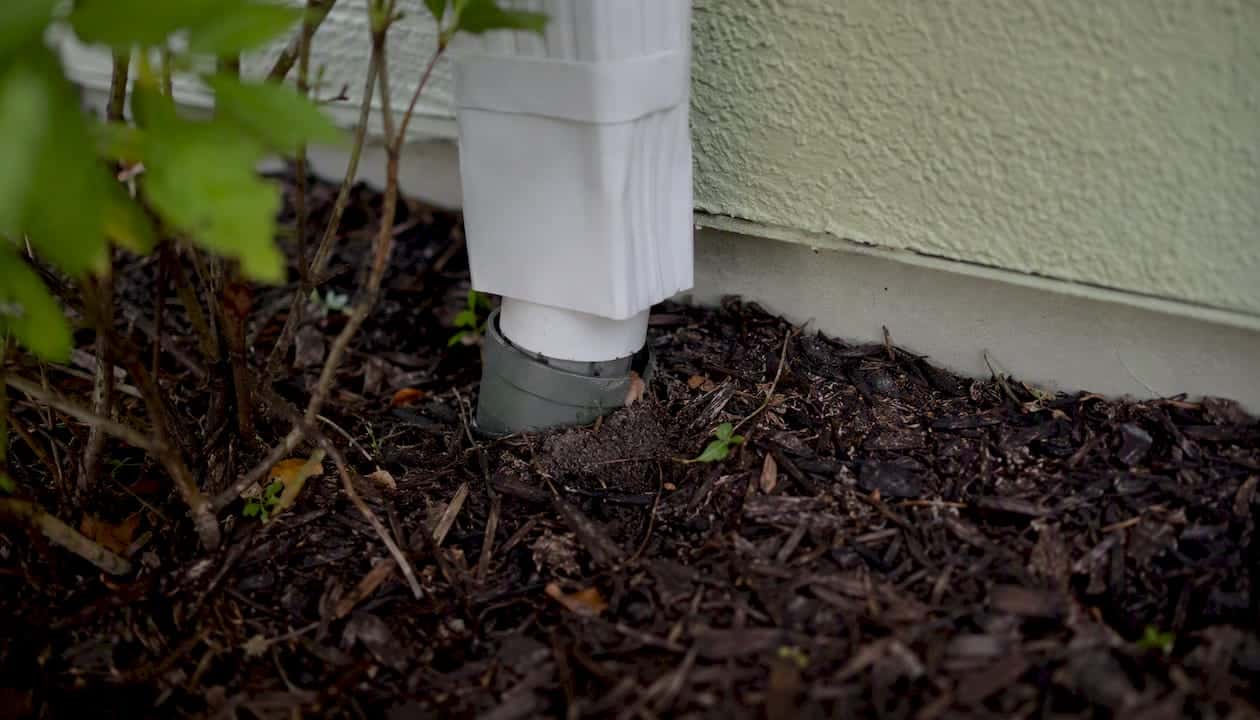
The signs are specific once you know to look for them: water spraying sideways at the seam during a storm instead of flowing straight down, a puddle that forms right at the base of the downspout even when the rest of the yard drains fine, a fitting that wiggles or has visibly separated from the pipe below it, or unusually wet or eroded soil right around that joint after rain compared to the surrounding ground.
Pro Tip: If you find any of these signs, the fix is often temporary but immediate: reseat the adapter fully into the pipe and use a rubber coupling or sealant rated for underground use to hold it. Photograph the joint’s condition either way, and if you eventually request a camera inspection, specifically ask the technician to check adapter connections as part of the pass, not just the pipe run itself.
A Straightforward Take on Repair Versus Replacement
The homeowners who handle underground drain problems well are the ones who diagnose before they dig. A garden hose test and a few photos tell you more in ten minutes than a guess ever will, and that diagnosis should drive every decision that follows, whether that’s a DIY fix or a call to a professional.
Realistic expectations matter here too. Clearing a sediment or debris clog is usually a same-day fix, either by you or a technician. Repairing an offset joint or a short collapsed section takes longer and involves actual excavation. Full-line replacement is a bigger project, but it’s also the point where corrugated pipe finally gets swapped for smooth PVC, which is the upgrade that actually stops the cycle of repeat clogs rather than just resetting the clock on the next one.
A professional video inspection changes the whole equation because it replaces guesswork with an actual picture of what’s wrong and exactly where. That’s the difference between patching a symptom and fixing the cause, and it’s why Larry’s Gutters treats camera-confirmed diagnosis as the starting point for any underground drain repair, not an upsell tacked onto the end of a cleaning visit.
Need a Pro Look at Your Underground Drains?
If everything above points to a clog beyond what a garden hose and a blow bag can fix, Larry’s Gutters handles the parts of this job that go past DIY: camera-confirmed inspection, clearing, and full replacement of buried runs with smooth, solid pipe instead of the corrugated material that keeps failing.

When you call, ask specifically for a camera inspection before any repair estimate, so you’re paying for a confirmed diagnosis instead of a guess. Ask what pressure settings get used on residential yard lines versus larger sewer connections, and request before-and-after video along with a written estimate that separates inspection, clearing, and repair into distinct line items. That’s the same standard Larry’s Gutters applies to seamless gutter installation and drainage work across Central Florida: show the problem on camera, explain the fix in writing, and replace failure-prone materials with something that actually lasts through Florida’s rainy season. If your buried drain keeps backing up no matter what you try, request a quote and get a real inspection scheduled instead of guessing again next storm.
Key Takeaways
Diagnosing an underground drain clog before you dig, snake, or call a contractor saves money and prevents the kind of damage that turns a simple fix into an excavation project.
- Test first: a garden hose and a timed bucket test tell you more than any assumption about tree roots or old pipe.
- Stop immediately if water backs up toward the house, if a snake hits a spinning root mass, or if you hear grinding.
- Never use caustic drain chemicals in a buried line; they sit too long and damage pipe walls before touching the clog.
- Check the downspout adapter joint specifically. It’s the most commonly overlooked failure point in the entire system.
- When you do call a pro, request camera footage and a written, itemized estimate before agreeing to any repair.
| Point | Details |
|---|---|
| Diagnose before you dig | Run a hose test and document flow at the outlet before assuming the worst or calling a contractor. |
| Follow the DIY safety order | Try surface cleanup, hose flush, wet/dry vac, blow bag, then a hand snake, stopping at any warning sign. |
| Check the adapter joint | Spraying, pooling, or a loose fitting at the downspout adapter often signals the real problem, not the buried pipe. |
| Match the fix to the cause | Sediment usually clears with flushing; dense roots typically need mechanical cutting plus a jet flush. |
| Ask for camera-confirmed repairs | Larry’s Gutters recommends video inspection before quoting any underground drain repair or pipe replacement. |
Sources
A few sources are worth bookmarking if you want to go deeper on any part of this process, or if you’re building a paper trail for insurance or future contractor visits.
- Why Your Underground Downspout Drain is Clogged and What to Do About It — Blue River Gutters
- How to Clear a Blocked Underground Gutter Drain: A Homeowner’s Guide – Plumbing Member Article By Superior Plumbing and Gas Company
- Wastewater specifications 402 — cleaning of sanitary sewers (contractor obligations and disposal procedures)
- Cleaning out clogged underground drain pipes: 5 Pro Tips — Always Affordable Plumbing
Save any camera inspection video and written estimate you receive. Beyond helping you compare contractor bids, that footage doubles as documentation if you ever need to file an insurance claim tied to water damage from a failed underground line.
