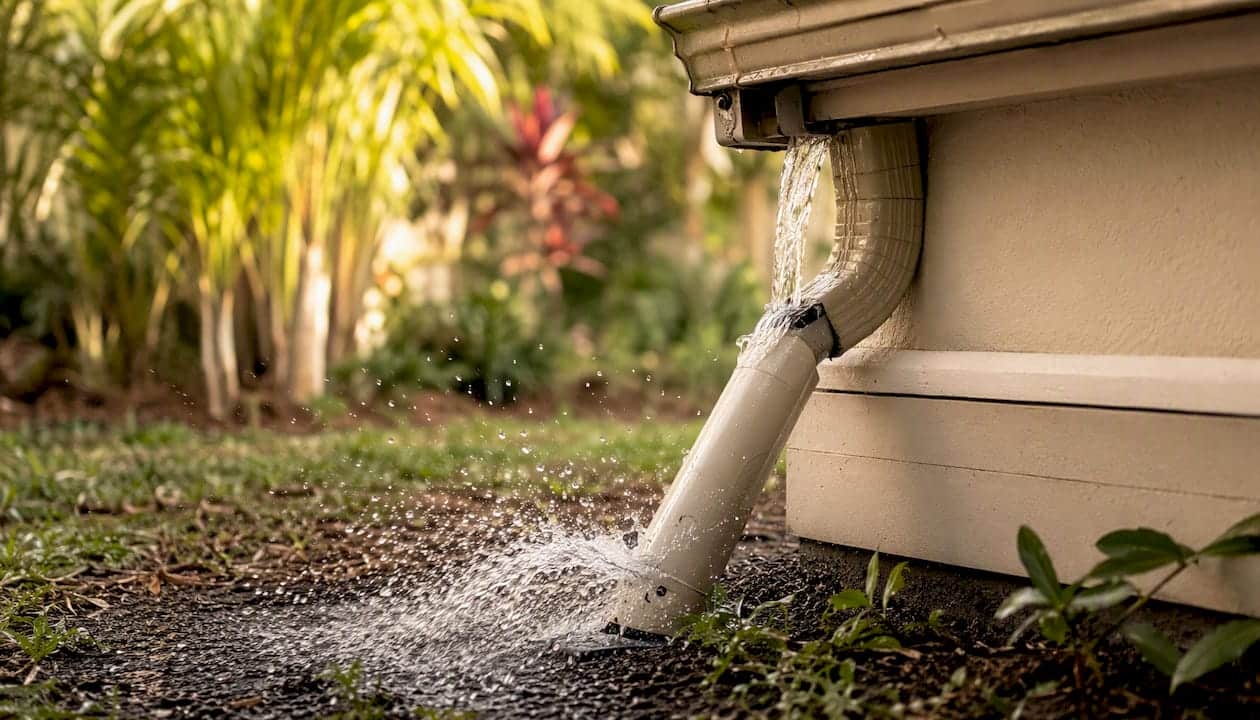
Route your downspouts at least 5 feet from the foundation, confirm the first 10 feet of grade slopes away from the house, and keep your gutters clear. Those three steps alone eliminate the most common source of residential water damage. From there, you can layer in swales, French drains, and a properly sized rain barrel or cistern to turn runoff into a usable resource. The sequence matters: foundation protection first, harvesting second.
- Route downspouts 5+ ft from the foundation per IRC R801.3, using a splash block, buried extension, or cistern inlet
- Clear gutters at least twice a year (spring and fall minimum; quarterly in heavy-canopy areas)
- Regrade the first 10 ft around the house to a minimum 5% slope (6 inches of drop over 10 feet)
- Install a swale or berm where surface water pools or flows toward the house
- Add a French drain at the perimeter if saturation persists after surface fixes
- Size a rain barrel or cistern to your irrigation demand using the capture formula G = P × A × 0.6 × E
Pro Tip: Before spending money on a cistern or French drain, spend an afternoon extending downspouts and checking grade. Those two fixes cost under $100 in materials and solve the majority of foundation-water complaints.
Key Takeaways
Efficient rainwater management starts at the roof: route downspouts at least 5 feet from the foundation, confirm grade slopes away from the house, and size any storage tank to your actual seasonal demand before investing in underground systems.
| Point | Details |
|---|---|
| Route downspouts 5+ ft away | IRC R801.3 requires discharge at least 5 feet from foundation walls to prevent soil saturation. |
| Confirm grade before anything else | The first 10 feet around the house needs a 5% slope (6 inches of drop) to move water away. |
| Size tanks to real demand | Use G = P × A × 0.6 × E with 75%–90% efficiency; match tank size to irrigation demand, not maximum capture. |
| Maintain on a schedule | Gutters twice yearly, inlet filters monthly during rain season, first-flush diverters after each significant rain. |
| Larrysgutters for gutter work | Custom seamless gutter installation and repair in Central Florida — the starting point for any drainage plan. |
Table of Contents
- Why managing rainwater well matters more than most homeowners realize
- How to assess your property and find problem spots before calling a contractor
- Gutter and downspout best practices that actually reduce water problems
- How grading, swales, and berms move water away from your house
- French drains and subsurface drainage: when you actually need them
- Rainwater harvesting basics: how the system components work together
- How to size a rainwater tank without overpaying
- Routine maintenance and troubleshooting for long-term reliability
- When to hire a professional and what to ask before you sign anything
- The order of fixes matters more than the size of your budget
- Larrysgutters handles the gutter work so the rest of your system can function
- Sources
Why managing rainwater well matters more than most homeowners realize
A standard 1,500 sq ft roof sheds roughly 900 gallons of water for every inch of rain. That water doesn’t spread evenly across your yard — it concentrates at downspout exits, often within 18 inches of the foundation. Building science research confirms that a continuous, uninterrupted path from roof to a safe discharge point is the single most effective defense against foundation bulk-water problems. Without it, saturated soil expands, hydrostatic pressure builds against foundation walls, and water finds the path of least resistance — usually through cracks, window wells, or floor-wall joints.
The cost argument for getting this right early is straightforward. Foundation repairs routinely run into the tens of thousands of dollars, while extending a downspout costs less than an afternoon’s work. IRC R801.3 sets the minimum discharge distance at 5 feet from foundation walls precisely because that gap gives water enough travel distance to disperse before it reaches the soil zone that matters most.
There’s an upside too. Once you’ve solved the drainage problem, that same roof runoff becomes a free water source. Capturing it for irrigation, toilet flushing, or laundry reduces municipal water demand and cuts utility bills, especially during dry seasons when outdoor watering peaks.
How to assess your property and find problem spots before calling a contractor
A systematic walk-around takes less than an hour and tells you exactly what to prioritize. Work from the roof down.
- Inspect the roof and gutters. Look for missing sections, sags, and joints pulling apart. Check that gutters slope toward downspouts — you should see no standing water in the channel after a rain. A level or a simple string line reveals whether slope is adequate.
- Trace every downspout to its exit. Confirm each one discharges at least 5 feet from the foundation. Mark any that terminate at a splash block sitting against the house or that drain into a buried pipe you can’t verify.
- Check grade in the first 10 feet. Use a 10-foot board and a level or a line level and string. You need at least 6 inches of drop over those 10 feet (5% slope). Flat or reverse-sloping ground is a red flag.
- Look for low spots and ponding areas. Walk the yard 24–48 hours after a rain. Any area still holding water after 48 hours has a drainage problem. Note the location and approximate size.
- Inspect window wells. They should drain freely. A well that holds water after rain needs a gravel sump at the bottom or a drain connection.
- Check the basement or crawlspace. Efflorescence (white mineral deposits), staining at the floor-wall joint, or a musty smell after rain all point to water intrusion. These are urgent flags — don’t defer them.
- Photograph everything. Timestamps matter when you’re talking to a contractor. Photos of standing water, stained walls, and grade problems give a pro the context to quote accurately.
Warning flags that need immediate attention: water in the basement after any rain event, soil that stays saturated within 2 feet of the foundation for more than 48 hours, or downspouts that visibly discharge against the house wall.
Gutter and downspout best practices that actually reduce water problems
Gutters only work when they’re sized right, sloped correctly, and discharge water far enough from the house. A gutter that’s too small backs up and overflows at the worst possible spot — directly against the foundation. Standard residential gutters run 5 inches wide for most applications, with 6-inch gutters warranted for steep roofs or high-rainfall climates. Slope toward the drop outlet should run 1%–2% (roughly 1/8 to 1/4 inch per foot). Flatter than that and debris accumulates; steeper and the gutter looks visibly tilted.
Downspout discharge is where most homeowners get it wrong. IRC R801.3 requires discharge at least 5 feet from foundation walls, and the options for getting there are practical:
- Splash block with extension: cheapest option, works on flat or gently sloped ground
- Flexible or rigid buried extension: routes water underground to daylight at a slope, cleaner appearance, more reliable
- Cistern or rain barrel inlet: turns the discharge point into a capture point — covered in the harvesting section below
One rule that applies to all of them: don’t send runoff onto neighboring properties or public right-of-way. That’s a code violation in most jurisdictions and a neighbor dispute waiting to happen.
Gutter guards reduce cleaning frequency but don’t eliminate it. Micro-mesh guards handle fine debris well and are worth the investment on homes surrounded by pine trees or heavy leaf canopy. Cheaper foam or brush inserts can trap debris inside the gutter and create a maintenance headache. Whatever guard type you choose, inspect and clean at least annually — guards slow debris accumulation, they don’t stop it.

Seamless gutters eliminate the seam-joint leaks that plague sectional systems. A professional fabricates them on-site to the exact length of each run, which means no joints except at corners and downspout connections. For homes in high-rainfall areas, seamless gutters are worth the investment because they reduce leak points and typically last longer with less maintenance. A professional install also means correct slope is set from the start — something that’s surprisingly hard to get right on a DIY job.
Pro Tip: After any heavy rain, walk the perimeter and look for splash marks on the foundation or siding. Splash marks directly below a gutter joint mean the joint is leaking — a common problem in sectional systems that seamless gutters avoid entirely.
How grading, swales, and berms move water away from your house
Surface drainage is the first line of defense after gutters. The goal is simple: water that hits the ground near your house should flow away from it, not toward it.
The minimum slope standard for the first 5–10 feet around a foundation is 5% — that’s 6 inches of drop over 10 feet. On impervious surfaces like patios and driveways within 10 feet of the house, 2% is the minimum. If your grade doesn’t meet these numbers, regrading is the fix. For small areas (a flower bed that’s settled against the house, a low spot at a corner), a homeowner can regrade with a wheelbarrow of screened topsoil and a rake. Screened native topsoil, particularly silty clay loam, settles more predictably than bagged compost mixes and performs better long-term. Keep at least 4 inches of foundation visible above finished grade to prevent moisture contact with siding.
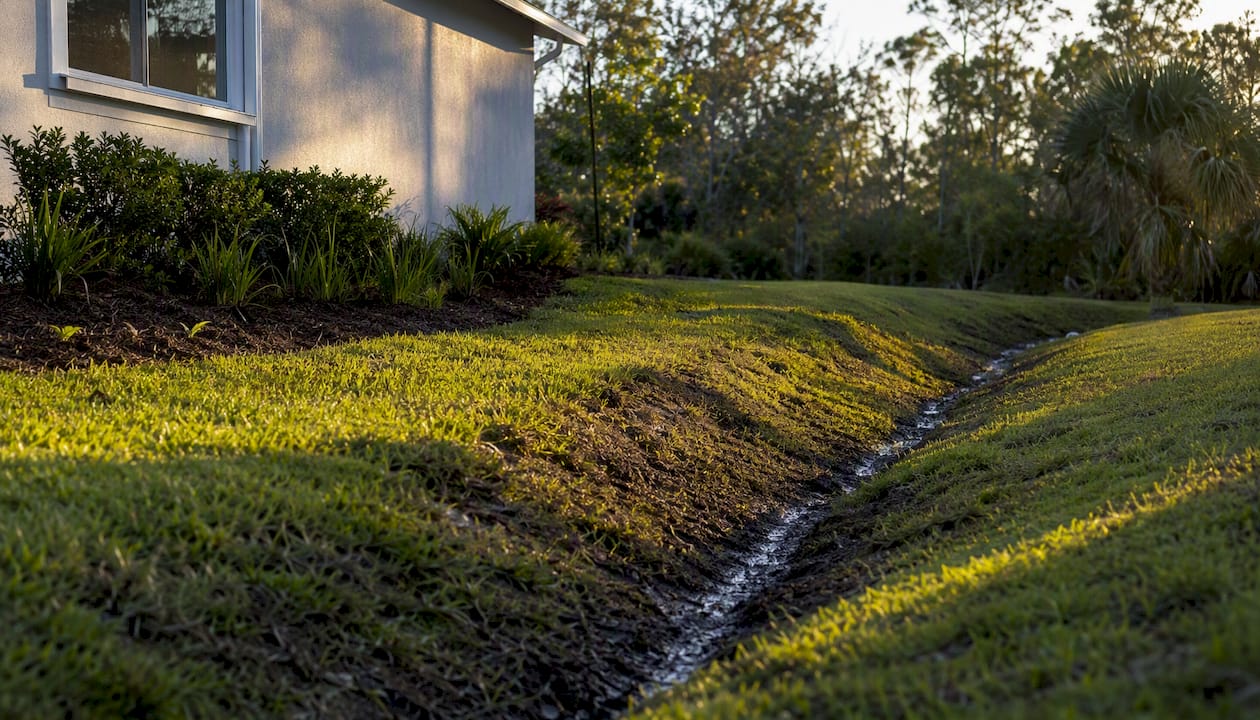
For larger areas or persistent ponding, a swale is the right tool. A swale is a shallow, vegetated channel that collects and routes surface runoff. Design specs call for:
- Longitudinal slope between 2% and 4% along the channel
- Side slopes no steeper than 3:1 (3 feet of horizontal run for every 1 foot of depth)
- Sizing adequate to handle runoff from a 6-month, 24-hour storm event for your area
Vegetation matters as much as geometry. Dense, close-growing grasses slow runoff velocity and filter pollutants before water reaches the outlet. Turf-type tall fescue, buffalo grass, and native sedges all work well depending on your climate. For waterwise planting choices that hold up in dry periods between rain events, native grasses and low-water perennials reduce the maintenance burden while keeping the swale functional.
Berms — low, compacted soil ridges — work alongside swales to redirect sheet flow. A berm on the uphill side of a low spot intercepts water before it pools; a swale on the downhill side carries it away. Together they handle most surface drainage problems without any underground work.
Pro Tip: When regrading near the foundation, tamp the soil in 2-inch lifts rather than dumping it all at once. Loose fill settles unevenly and can create a depression against the house within a season.
DIY regrading is feasible for areas under roughly 500 sq ft with modest grade changes. Anything involving significant soil volume, retaining structures, or proximity to a footing is contractor territory.
French drains and subsurface drainage: when you actually need them
Surface fixes solve most problems. A French drain is the right call when the water table is seasonally high, when grade constraints prevent surface drainage (a flat lot, a house at the bottom of a slope), or when soil saturation persists despite correct grading and swales.
A French drain intercepts groundwater or surface water and routes it through a perforated pipe to a safe outlet. The basic installation:
Material choice affects long-term performance. Smooth PVC perforated pipe outperforms corrugated plastic because the smooth interior doesn’t trap sediment the way corrugated ridges do. Outlet options include daylight (the pipe exits at a slope face or swale), a drywell (a gravel-filled pit that allows infiltration), or connection to a storm sewer where local code permits it.
Pro Tip: Wrap the entire gravel envelope, not just the pipe, in filter fabric. A sock on the pipe alone lets fine soil particles migrate into the gravel over time, reducing drainage capacity. A full fabric envelope keeps the gravel clean for years longer.
Common failure modes: root intrusion from nearby trees (use solid pipe within 10 feet of large trees), fabric clogging from fine silt (use the right fabric weight for your soil type), and inadequate slope (check with a level before backfilling). Signs a French drain has failed include water returning to the problem area, soft spots above the trench line, or visible sediment at the outlet. Flushing the pipe with a garden hose from the outlet end is a quick diagnostic — if flow is restricted, the drain needs cleaning or replacement.
Rainwater harvesting basics: how the system components work together
A rainwater harvesting system has five functional components, and understanding each one helps you size and maintain the system correctly.
- Catchment: the roof surface. Larger roofs capture more water; metal and tile roofs shed water more cleanly than asphalt shingles, which can contribute granules and organic material to runoff.
- Conveyance: gutters, downspouts, and connecting piping that move water from the roof to storage. This is where gutter sizing and slope matter most.
- First-flush diverter: routes the first portion of runoff — which carries the most dust, bird droppings, and debris — away from the tank. A general rule of thumb is to divert at least 1–2 gallons per 100 sq ft of catchment, which flushes the roof surface before cleaner water enters storage.
- Storage: the barrel, tank, or cistern. Must be opaque (to prevent algae growth), mosquito-proof (sealed lid with screened overflow), and UV-resistant if aboveground.
- Delivery: gravity feed works for ground-level irrigation; a pump is needed for pressurized distribution. For irrigation-only systems, a low-wattage submersible pump or a solar-battery pump keeps operating costs minimal.
Pre-tank filtration — leaf guards at the gutter, a rain head or vortex filter at the downspout, and a calming inlet inside the tank — dramatically reduces sediment load and maintenance frequency. A calming inlet (a curved pipe that releases water gently near the tank bottom) prevents incoming flow from disturbing settled sediment, which means less stirring up of particulates every time it rains.
Common non-potable uses: irrigation (the most practical starting point), toilet flushing, and laundry. Potable use requires licensed system design, multi-stage filtration, UV treatment, and compliance with state plumbing codes — it’s a different category of project entirely and not a DIY undertaking.
How to size a rainwater tank without overpaying
The practical sizing formula is:
G = P × A × 0.6 × E
Where:
- G = gallons captured per period
- P = precipitation in inches for the period
- A = catchment area in square feet (roof footprint, not total roof surface)
- 0.6 = unit conversion factor (converts inches × sq ft to gallons)
- E = system efficiency, typically 75%–90% when no site-specific data are available
G = 3 × 1,200 × 0.6 × 0.80 = 1,728 gallons per month
Now compare that to your demand. A typical residential irrigation system for a 2,000 sq ft lawn uses roughly 1,000–2,000 gallons per week during peak summer. If your monthly capture is 1,728 gallons but your weekly demand is 1,500 gallons, a single 500-gallon barrel won’t bridge the gap — you need either a larger cistern or a realistic expectation that harvested water supplements rather than replaces municipal supply.
Design details that matter: aboveground tanks need UV-resistant material or an opaque cover; underground cisterns avoid temperature swings but cost significantly more to install. Overflow must route away from the foundation — the same 5-foot rule applies. Linking two or more tanks in series extends storage without requiring a single large vessel, which can be easier to permit and install.
Routine maintenance and troubleshooting for long-term reliability
A system that isn’t maintained stops working — usually at the worst possible time. The table below reflects the component-level O&M framework from the DOE/FEMP rainwater harvesting technology review.
| Component | Action | Frequency |
|---|---|---|
| Gutters and downspouts | Clear debris, check slope and joint integrity | Twice yearly (spring and fall); quarterly in heavy-canopy areas |
| Inlet filters and leaf guards | Remove and rinse screens | Monthly during rain season |
| First-flush diverter | Empty standpipe, check valve function | After each significant rain event |
| Storage tank (exterior) | Inspect for cracks, UV damage, lid seal | Annually |
| Storage tank (interior) | Sediment flush, inspect calming inlet | Annually or per manufacturer guidance |
| Overflow pipe | Confirm clear path, check screen integrity | Seasonally |
| Pump and controls | Test operation, check connections and pressure | Monthly during use season |
| Backflow prevention device | Inspect and test | Annually or per local code |
Common troubleshooting issues:
- Odor from the tank: usually anaerobic bacteria from accumulated sediment. Flush and clean the tank; increase first-flush diversion volume.
- Sediment in delivered water: inlet filter or first-flush diverter needs cleaning; check calming inlet position.
- Tank overflows during moderate rain: demand is lower than capture rate — add a second tank or redirect overflow to a swale.
- Low pump pressure: check for clogged inlet filter, air lock in the line, or pump wear.
- Clogged downspout: flush from the top with a garden hose; if blocked solid, a plumber’s snake clears most obstructions.
Safety notes: Always use a properly rated ladder on stable ground for gutter work — ladder safety for gutter cleaning is a separate skill set worth reviewing before you climb. Never work on pump electrics while the system is energized. In climates with hard freezes, drain aboveground tanks and exposed piping before the first frost.
When to hire a professional and what to ask before you sign anything
Some jobs are genuinely DIY-friendly: extending a downspout, adding a splash block, regrading a small flower bed, or installing a rain barrel. Others carry enough risk — to your foundation, your neighbor’s property, or your own safety — that a professional is the right call.
Hire a pro for:
- Regrading areas larger than a few hundred square feet, especially near the footing
- Exterior perimeter French drains at footing depth (excavation near the foundation requires care)
- Large buried cisterns (permitting, structural backfill, and inlet/outlet connections)
- Any plumbing connection for indoor non-potable or potable use
Questions to ask before hiring:
- Are you licensed and insured for drainage and excavation work in this state?
- Can you provide references for similar drainage projects completed in the last two years?
- What pipe material and filter fabric spec will you use, and why?
- Do you perform a drainage calculation, or are you estimating by eye?
- What does the warranty cover, and for how long?
- What’s the installation timeline, and how will you protect the foundation during excavation?
Cost ranges vary widely by region and site conditions. Gutter replacement with seamless gutters typically runs a few hundred to a few thousand dollars depending on linear footage and home height. Seamless gutter pricing depends on material (aluminum vs. copper vs. steel), profile, and access difficulty. French drain installation for a typical residential perimeter runs higher, driven by excavation depth, pipe length, and outlet complexity. Get at least two written quotes with material specs before committing.
Ask to see photos of past work. A contractor confident in their drainage installs will have them. Request local code familiarity — discharge to storm sewers, for example, requires a permit in most jurisdictions, and a contractor who doesn’t know that is one who hasn’t done it correctly before.
Pro Tip: Schedule major drainage work in late summer or early fall. Soil is typically drier, excavation is cleaner, and you have time to observe performance through the fall rain season before winter sets in.
The order of fixes matters more than the size of your budget
Most homeowners approach rainwater management backwards. They see a wet basement and immediately think French drain or cistern — big, expensive, permanent. The right sequence is the opposite: start with the cheapest, highest-impact fixes and only add complexity when simpler solutions prove insufficient.
Clear gutters and extend downspouts first. That single step resolves the majority of near-foundation water complaints. Then walk the perimeter after the next rain and check grade. If water still pools within 10 feet of the house, regrade. If regrading isn’t feasible due to hardscape or grade constraints, add a surface swale to route water away. Only after those surface fixes are in place does it make sense to evaluate whether a French drain or a cistern is justified.
The budget logic is equally straightforward. A $50 downspout extension that solves the problem is better than a $3,000 French drain that addresses a symptom while the real cause (a downspout discharging against the house) remains. Spend the monitoring time. Watch what happens after two or three rain events before committing to underground work.
Seasonal timing shapes the decision too. Major regrading and French drain installation are best done in dry conditions — late summer or early fall in most climates. Rain barrel installation can happen any time, but connecting it to a cistern system before the rainy season starts means you capture the first significant storms rather than letting them run off.
The one place to invest early, even before you’ve solved every drainage problem, is the gutter system itself. A well-sized, properly sloped, professionally installed seamless gutter is the foundation of every other fix on this list. Everything downstream — downspout extensions, swales, cisterns — depends on the gutter doing its job first.
Larrysgutters handles the gutter work so the rest of your system can function

The most common reason rainwater management systems underperform isn’t a bad swale design or an undersized tank. It’s a gutter that sags, leaks at the joints, or discharges too close to the house. Larrys Gutters specializes in custom seamless gutter installation, gutter guard installation, and gutter cleaning and repair for residential properties across Central Florida — the exact foundation of a well-functioning rainwater management plan.
A service visit starts with a full inspection: gutter slope, joint integrity, downspout discharge locations, and any signs of near-foundation water damage. You get a written recommendation with transparent pricing before any work begins, and every installation comes with a workmanship warranty. Whether you need a new seamless gutter system installed to spec, guards added to reduce cleaning frequency, or an existing system repaired and re-sloped, Larrysgutters can handle it. Get a free quote and schedule your inspection at Larrysgutters — and make sure your overflow routes at least 5 feet from the foundation before the next rain.
Sources
The guidance in this article draws from building codes, federal agency reviews, and university extension research. Each source below covers a specific layer of the topic.
- Rainwater harvesting systems technology review
