
TL;DR:
- Regular gutter inspections in Central Florida are essential due to frequent storms and year-round debris accumulation. Early signs of damage include sagging, rust streaks, leaks, and poor pitch, which require prompt attention to prevent costly repairs. Consistent maintenance and timely professional help ensure the longevity and proper functioning of your gutter system.
Gutter damage is defined as any deterioration, misalignment, or blockage that prevents your gutter system from directing rainwater safely away from your home’s foundation, fascia, and siding. Knowing how to spot gutter damage early is the single most effective way to avoid foundation repairs, basement leaks, and structural rot that cost far more than a routine inspection. Central Florida homeowners face a specific set of threats: intense storm seasons, dense pine and oak canopy, and year-round humidity that accelerates corrosion faster than in drier climates. This guide walks you through every tool, technique, and warning sign you need to assess your gutters with confidence, whether you are doing a quick post-storm check or a full seasonal inspection.
How to spot gutter damage: tools and timing
The right tools and the right timing make the difference between a thorough inspection and a missed problem. Before you climb a ladder or grab a hose, gather the following:
- Extension ladder rated for your weight plus equipment
- Garden hose with a spray nozzle for flushing tests
- Small hand mirror to inspect undersides and hidden gaps
- Work gloves and a gutter scoop for debris removal
- Level or measuring tape to check gutter pitch
- Waterproof flashlight for shaded or overcast conditions
Dry weather is the best time for a visual inspection, but a check immediately after a heavy storm reveals problems that only appear under load. Standing water in the channel, overflow at the seams, and shifted hangers all show up clearly when gutters are wet and full. Scheduling both a dry-weather and a post-storm check gives you the most complete picture of your system’s condition.
Pro Tip: A small hand mirror lets you see the underside of the gutter lip and the back face of downspout brackets without repositioning the ladder repeatedly. Early corrosion and loose fasteners hide in exactly those spots.
| Inspection condition | What it reveals |
|---|---|
| Dry weather, full sun | Rust stains, paint peeling, visible sag, debris buildup |
| Immediately after storm | Active leaks, overflow points, shifted hangers, downspout blockages |
| Night or low light | Use a flashlight to spot water trails and mineral deposits on fascia |
Safety is non-negotiable. Place the ladder on firm, level ground, never on wet grass or mulch. Have a second person stabilize the base, and never lean out beyond the ladder’s side rails.
What are the signs of gutter damage to look for?
The industry term for what most homeowners call “gutter problems” is gutter system failure, and it covers a spectrum from minor cosmetic issues to structural deterioration that threatens your roofline. Recognizing the difference between the two determines whether you need a tube of sealant or a full replacement.
The most common visual indicators include:
- Sagging sections where hangers have pulled away from the fascia
- Rust streaks or orange discoloration on the gutter face or inside the channel
- Peeling paint or water stains on the fascia board or siding directly below the gutter
- Visible gaps or separations at seam joints between gutter sections
- Pooling water sitting in the channel hours after rain has stopped
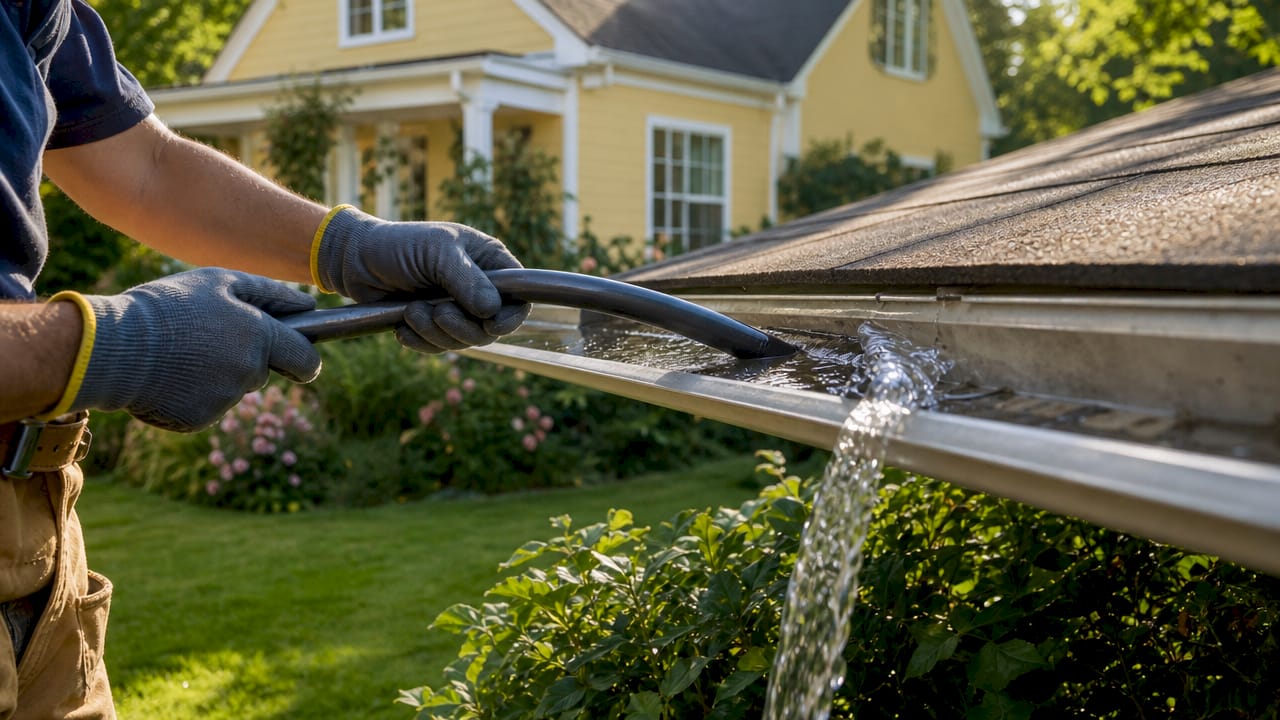
Physical testing adds another layer. Flush the gutter with a garden hose from the end farthest from the downspout and watch for water escaping at joints, dripping from the back edge, or pooling instead of flowing. Regular gutter inspections prevent foundation damage, basement leaks, and structural rot caused by unchecked overflow. That means a single afternoon of inspection work can protect tens of thousands of dollars in structural investment.
Pro Tip: Run your gloved hand along the inside of the channel after flushing. Soft spots in the metal signal rust that has eaten through the wall from the inside, which is invisible from the outside until it fails completely.
| Damage type | Visible sign | Urgency |
|---|---|---|
| Sagging | Section droops between hangers | High: causes overflow and fascia rot |
| Rust | Orange streaks, pitting, soft spots | High if widespread; medium if isolated |
| Leaking seam | Water drips at joint during flush | Medium: sealable if caught early |
| Clog | Overflow during rain, no flow at downspout | Medium: clean immediately |
| Improper pitch | Standing water after rain stops | Medium: adjust hangers to restore slope |
Gutters must maintain a pitch of roughly 1/4 inch of drop for every 10 linear feet to drain properly. When that slope is lost, standing water promotes rust, mosquito breeding, and accelerated gutter failure. Use a level during your ladder inspection to confirm the channel still holds its angle toward the downspout.
What causes gutter damage in Central Florida?
Central Florida’s environment is harder on gutters than most homeowners realize. Biannual inspections and post-storm checks are considered the minimum standard for this region, and the reasons are specific and compounding.
- High-wind storms twist gutter sections and snap hanger screws. Even a moderate tropical system can shift an entire run of gutters by half an inch, enough to reverse the pitch and create a standing water problem.
- Pine needles and evergreen debris compact into dense mats that standard cleaning tools miss. Unlike oak leaves that flush out easily, pine needles weave into a felt-like layer that holds moisture against the metal and accelerates rust.
- Year-round humidity keeps metal surfaces damp between rain events, shortening the lifespan of uncoated aluminum and making steel gutters especially vulnerable to interior corrosion.
- Root and canopy overhang from live oaks and slash pines drops debris year-round rather than seasonally, which is why homes near pine or evergreen trees require quarterly maintenance rather than the standard twice-yearly schedule.
- Thermal expansion from Florida’s heat cycles causes gutter sections to expand and contract daily, gradually loosening fasteners and opening seam joints over time.
“Environmental factors like storms and tree debris in Florida require stricter inspection routines than in other regions.” — Walsh Roofing
Neglecting these factors does not just mean dirty gutters. It means a small shifted hanger becomes a sagging section, which becomes a fascia rot problem, which becomes a $3,000 repair that a $150 cleaning would have prevented.
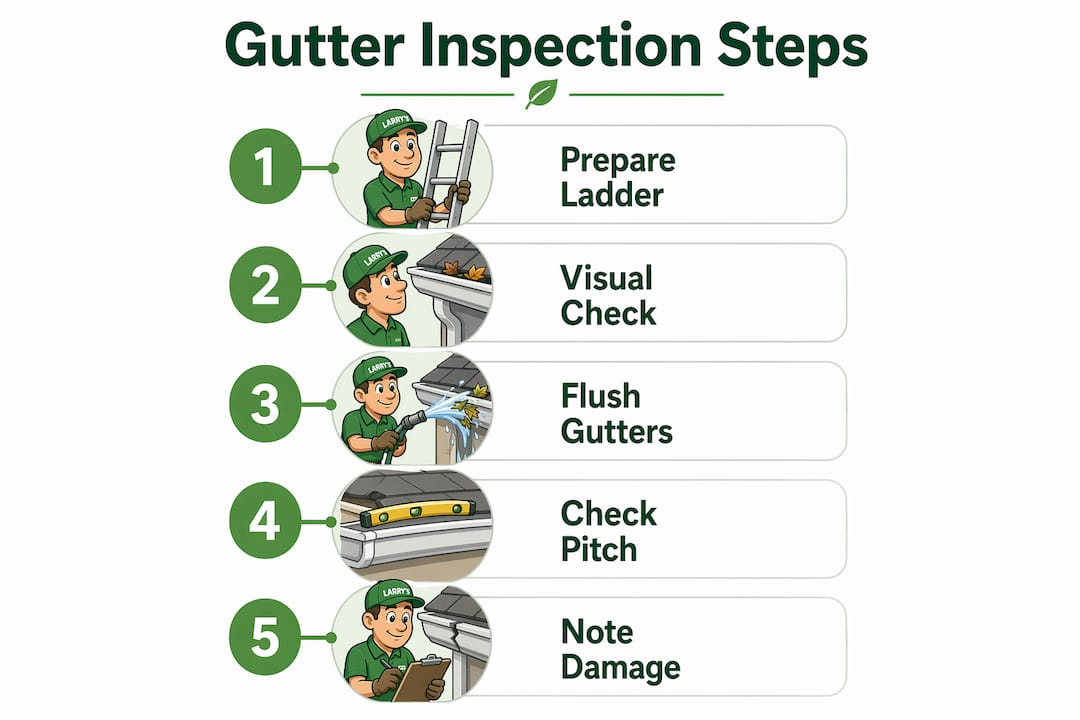
Step-by-step guide to inspecting your gutters safely
Follow this sequence every time you conduct a full inspection. It covers ground-level assessment through downspout discharge, and it produces a documented record you can use to track deterioration over time.
- Prepare your tools and conditions. Gather your ladder, hose, mirror, gloves, scoop, and flashlight. Choose a dry day or inspect within 24 hours after a storm. Tell someone you are going up.
- Walk the perimeter at ground level. Look up at the gutter profile from multiple angles. Note any sections that visibly sag, any paint staining on the fascia, and any gaps where the gutter has pulled away from the roofline.
- Climb and inspect hangers, seams, and the channel. Check each hanger screw for looseness. Run your mirror along the back face of the gutter to spot corrosion hidden from direct view. Look for rust pitting inside the channel and debris buildup at seam joints.
- Flush with a garden hose. Start at the end farthest from the downspout. Watch for leaks at every seam and joint. Observe the flow speed. Water that moves sluggishly or pools indicates a pitch problem or a partial clog.
- Inspect downspouts and extensions. Check the elbow joint at the base of each downspout first. Clogs most often form at the elbow joint and are removable by disconnecting the section and pulling debris out by hand. Confirm that extensions direct water at least four feet from the foundation.
- Document every issue. Photograph sagging sections, rust spots, and leak points. Note the location relative to a fixed reference like a window or corner. This record helps you track whether a problem is worsening and gives any contractor a clear starting point.
Pro Tip: Use the gutter inspection checklist from Larrysgutters to organize your findings by damage type and urgency. It takes the guesswork out of deciding what to fix first.
For a detailed walkthrough of each step, the gutter inspection guide from Larrysgutters covers Florida-specific conditions in depth.
How do you fix common gutter damage issues?
Not every gutter problem requires a contractor. Knowing which repairs are within DIY range and which signal a need for professional help saves both time and money.
Repairable with DIY methods:
- Small cracks and pinhole leaks at seams, sealed with professional-grade gutter sealant applied to a clean, dry surface. DIY sealants often fail when applied over dirty or wet metal, so surface prep is not optional.
- Sagging sections where the hanger has simply loosened. Tighten the existing screw first. If the hole is stripped, drill a new pilot hole into solid wood rather than reusing the enlarged original hole, which will not hold.
- Downspout clogs at the elbow joint, cleared by hand or with a plumber’s snake.
Requires professional assessment:
- Rust that spans several feet, appears inside the channel, or creates soft spots. Extensive rust or soft spots indicate metal degraded beyond repair, and patching only delays the inevitable.
- Fascia board rot beneath the gutter. This means water has been infiltrating for an extended period, and the structural substrate needs replacement before any new gutter work makes sense.
- Gutters that have shifted significantly after a storm, pulling the fascia with them.
| Problem | DIY fix | When to call a pro |
|---|---|---|
| Small seam leak | Clean and apply gutter sealant | If leak returns after two repairs |
| Sagging section | Tighten or replace hanger | If fascia wood is soft or rotted |
| Downspout clog | Manual removal at elbow joint | If clog is deep in the wall or buried pipe |
| Widespread rust | Not recommended | Full section or system replacement |
For a clear breakdown of your options, the gutter repair options guide from Larrysgutters covers four repair approaches with cost and durability comparisons. If you are weighing repair against replacement, the gutters need replacing guide gives you a direct decision framework.
Key takeaways
Spotting gutter damage early requires a structured inspection routine, the right tools, and an understanding of the specific conditions Central Florida creates for your home’s drainage system.
| Point | Details |
|---|---|
| Inspect twice a year, minimum | Central Florida’s storms and debris demand biannual checks, quarterly for homes under heavy tree cover. |
| Use a hand mirror for hidden damage | The underside of gutters and back of downspout brackets hide early corrosion invisible from standard views. |
| Check pitch during every inspection | Gutters need a 1/4-inch drop per 10 feet; lost pitch causes standing water and accelerates failure. |
| Know when to stop DIYing | Widespread rust, soft spots, or rotted fascia require professional replacement, not sealant. |
| Document every issue | Photographs and location notes let you track deterioration and give contractors a clear starting point. |
What I’ve learned after years of watching gutters fail in Florida
Most homeowners I talk to wait until water is pouring over the front of their gutters before they take action. By that point, the fascia is usually already soft, the paint on the siding is peeling, and what started as a $200 cleaning job has turned into a $1,500 repair. Preventative maintenance is not a luxury in Central Florida. It is the only rational approach given what the weather does to these systems.
The mistake I see most often is homeowners treating gutter inspection as a once-a-year task they do in the fall. Florida does not have a single debris season. Pine needles fall year-round, afternoon thunderstorms run from May through October, and tropical systems can hit any month. A gutter that looked fine in January can be clogged and overflowing by April without a single storm touching it.
The other pattern I notice is overconfidence in DIY sealant repairs. A tube of hardware-store caulk applied over a dirty, wet seam will last one rain event. Professional-grade gutter sealant applied to a properly prepped surface lasts years. The product matters, but the prep matters more. If you are going to fix it yourself, do it right or you will be back on the ladder in three weeks.
My honest recommendation: inspect after every significant storm, do a full hands-on check twice a year, and call a professional the moment you find soft fascia wood or rust that covers more than a few inches of channel. The seasonal maintenance guide from Larrysgutters is a practical starting point for building that routine.
— Larrysgutters
Protect your home with professional gutter services in Central Florida
If your inspection turned up sagging sections, rust, or fascia damage, Larrysgutters provides specialized gutter repair, cleaning, and seamless installation across Central Florida’s counties.

Larry’s Gutters designs custom-fit seamless gutters built to handle Florida’s rainfall volume, with gutter guard options that reduce debris buildup and cut cleaning frequency significantly. Whether you need a post-storm repair, a full system replacement, or a professional inspection you can trust, the team handles it all. Start with the downspout installation guide to understand what a properly functioning system looks like, or go straight to the full installation guide if replacement is on the table. Contact Larrysgutters directly for a free quote.
FAQ
How often should Central Florida homeowners inspect their gutters?
Central Florida homeowners should inspect gutters at least twice per year, with additional checks after every significant storm. Homes under heavy pine or evergreen tree cover require quarterly maintenance due to year-round debris accumulation.
What are the first signs of gutter damage to look for?
The earliest signs are water stains on the fascia or siding, sagging sections between hangers, and rust streaks on the gutter face. These indicators appear before active leaks develop and signal that repairs are needed soon.
Can I repair a leaking gutter myself?
Small seam leaks are repairable with professional-grade gutter sealant applied to a clean, dry surface. Hardware-store caulk applied over dirty or wet metal fails quickly, so surface preparation determines whether the repair holds.
When does a gutter need full replacement instead of repair?
Replacement is necessary when rust spans several feet or creates soft spots in the metal channel, or when the fascia board beneath the gutter has rotted. Patching degraded metal only delays failure by weeks.
What is the correct slope for a gutter to drain properly?
Gutters require a pitch of 1/4 inch of drop for every 10 linear feet toward the downspout. Less slope causes standing water, which accelerates rust and creates conditions for mosquito breeding.
