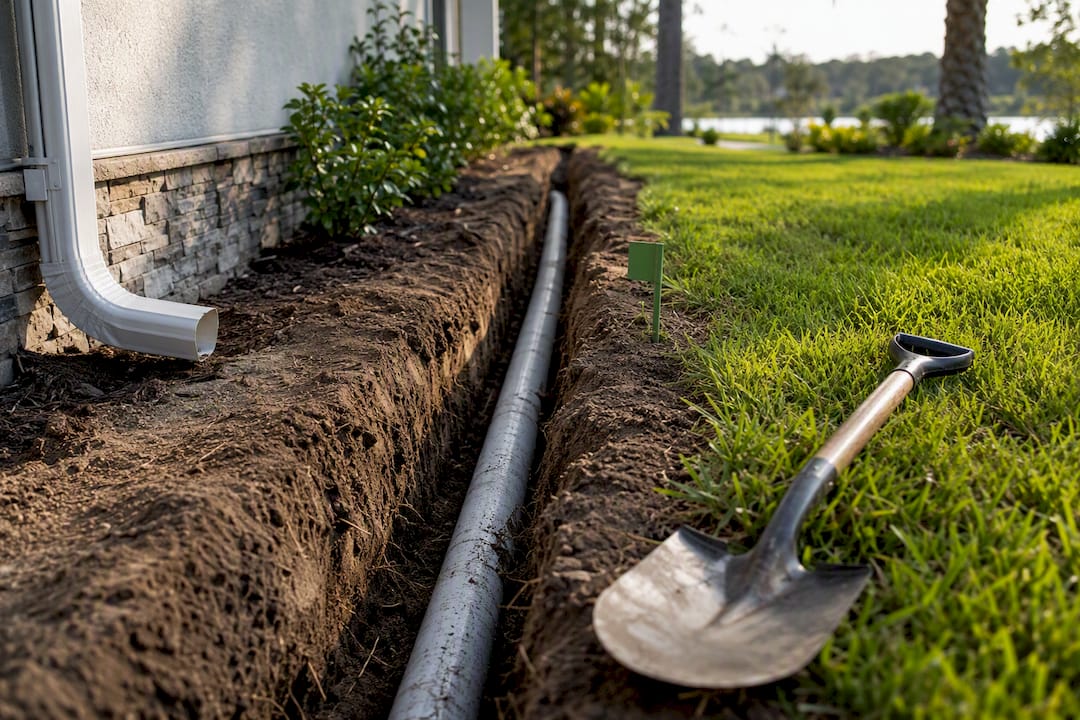
Burying downspouts is usually the right call, provided you can run a continuous downhill grade to a real discharge point and use solid, correctly sized pipe. The catch is what happens underground once you can’t see it: freezing, clogging, and settling all show up eventually if the slope or pipe choice is wrong. What follows covers the trade-offs, the exact specs, the install sequence, and when it’s smarter to hand the job to a contractor.
TL;DR:
- Proper downhill grade and correct pipe sizing are critical to prevent freezing, clogging, and settling issues in underground downspout drainage systems.
- Using 4-inch smooth-wall PVC or HDPE pipe is recommended for most residential runs longer than 20 feet, with a trench slope of at least 1/8 inch per foot for effective drainage.
- The best discharge point is daylighting to a lower, well-drained area, while alternatives like pop-up emitters and dry wells depend on soil absorption and lot grade.
- Regular maintenance such as flood testing, inspecting outlets, and clearing catch basins can help prevent clogging and freezing problems over time.
- A professional install offers benefits like proper assessment, guaranteed slope, permits, and warranties, especially for complex or tight lot drainage challenges.
Table of Contents
- What Does It Mean to Bury a Downspout?
- Weighing the Pros and Cons Before You Dig
- Which Pipe Size and Depth Actually Work?
- How Do You Choose Where the Water Goes?
- Installing a Buried Downspout Step by Step
- Why Buried Drains Clog, Freeze, or Fail
- What Should You Budget for This Project?
- How Larry’s Gutters Approaches Buried Drainage
- An Installer’s Take on the One Mistake That Ruins Everything
- Get a Straight Answer Before You Dig
- Sources
What Does It Mean to Bury a Downspout?
Burying a downspout means running solid pipe from the bottom of your gutter’s downspout, underground, to a discharge point well away from your house. It’s a different animal from a French drain, which uses perforated pipe to collect groundwater along its length. It’s also different from a simple pop-up emitter stuck a few feet out, or a dry well, which is a gravel-filled pit designed to let water soak into the surrounding soil. A buried downspout drain has one job: carry roof runoff, fast, to somewhere it can’t hurt your foundation.
The goal is straightforward. Water pooling against a foundation wall softens soil, and softened soil settles unevenly, which is how you end up with cracked slabs and sticking doors years later. Routing that water 10 or more feet away, underground, solves the problem without a visible pipe running across your yard.
Burying isn’t right for every property, though. Skip it, or at least rethink it, when:
- There’s no lower grade or outlet anywhere near the downspout, so the pipe would have nowhere to drain.
- The water table sits high enough that a dry well would just refill from below.
- Soil percolation is poor, typically dense clay, which defeats a dry well before it’s even backfilled.
- The route crosses tree roots, a septic field, or utility lines you can’t safely dig around.
Weighing the Pros and Cons Before You Dig
The upside of a buried downspout is real and visible fast: no more splash blocks scattered across the lawn, no more muddy trenches where water used to spill, and a foundation that stays dry through the wet season. Gutters and drainage working together protect your foundation more effectively than either one alone, and burying the downspout is what finishes that job instead of leaving it half done at the wall.
The downside is that you’re trading a visible, easy-to-fix problem for an invisible one. A cracked splash block is obvious. A clogged buried pipe is not, at least not until water starts backing up into your gutters during a storm.
The main trade-offs:
- Pros: foundation protection, no more erosion channels or trip hazards, cleaner landscaping, less mud tracked indoors.
- Cons: hidden maintenance, clogging from shingle grit and leaf litter, freeze risk in cold climates, and a higher upfront cost than a splash block.
Three site conditions make the cons worse. A flat lot with no natural grade struggles to keep water moving. Heavy tree cover means constant leaf and root pressure on the line. And in freeze-prone regions, any standing water in the pipe becomes an ice plug by January.
Pro Tip: If your lot has less than a foot of elevation change over 30 feet, get a level or laser first. A pipe that looks like it’s sloping downhill by eye can easily be dead flat, or worse, running slightly uphill.
Which Pipe Size and Depth Actually Work?
Use solid, non-perforated smooth-wall pipe, either PVC SDR-35 or dual-wall HDPE, for every foot of a buried downspout run. Perforated pipe belongs in French drains that disperse groundwater, not in a line meant to carry roof runoff straight to an outlet. Mixing the two up is one of the more common mistakes homeowners make when they grab whatever pipe is cheapest at the hardware store.
On sizing, 4-inch smooth-wall pipe is the standard choice for most residential runs, and for good reason: it clears debris more easily than 3-inch pipe and gives you far more margin before a clog turns into a backup. Three-inch pipe works fine as a minimum for short, simple runs, but anything over 20 or 30 feet, or any run collecting more than one downspout, should go 4-inch.
Depth depends on what’s above the pipe:
- Under lawn areas: 8 to 12 inches of cover is typical and keeps the pipe below normal aeration and light foot traffic.
- Under driveways or parking areas: go deeper and upgrade to SDR-35 or an equivalent rated pipe that can handle vehicle load without crushing.
- Near tree roots: add a few extra inches of cover and consider routing around the root zone entirely rather than through it.
Bedding matters just as much as the pipe itself. Lay pipe on firm, undisturbed soil or a compacted sand and gravel cradle, never directly on loose fill that will settle unevenly later and create a low spot where water and debris collect. Use the couplings designed for your pipe type, solvent-welded joints for PVC or gasketed fittings for HDPE, and avoid friction-fit joints on any run you’re backfilling permanently.
How Do You Choose Where the Water Goes?
The single most reliable discharge option is daylighting the pipe to a lower point on your property, where gravity does all the work and there’s nothing mechanical to fail. If your lot has any usable slope at all, this beats every other option because it self-drains completely between storms, leaving no standing water to freeze or stagnate.
When daylight isn’t available, here’s how to think through the alternatives:
- Pop-up emitter for nearly flat lots with no lower grade to daylight to. It pops open under water pressure and closes when flow stops, but it can hold a little water at the base and that water will freeze in cold climates, so it’s a compromise, not a first choice.
- Dry well only after a percolation test confirms your soil actually absorbs water. Dry wells fail in clay soil or where the water table sits high, turning an expensive gravel pit into a useless buried tank.
- Combination approach for larger roofs: daylight where the grade allows on one side of the house, and use a pop-up or dry well only for downspouts that have no other option.
Whichever outlet you pick, try to land it at least 10 feet from the foundation when slope and lot size allow it. Check your local code before finalizing the route. Some municipalities set minimum separation distances from property lines or septic systems. At the outlet itself, add a splash pad or a bed of rock to stop erosion, and screen the opening to keep rodents from moving in over winter.
Installing a Buried Downspout Step by Step
Getting this right is less about digging skill and more about sequencing. Skip a step and you’ll be re-digging in six months.
- Locate utilities and plan the route. Call before you dig, and walk the yard to pick your outlet before the shovel comes out. Deciding the destination first keeps you from digging a trench that dead-ends at a fence or a tree root ball.
- Dig a straight trench with continuous slope. Hold to a minimum of 1/8 inch of drop per foot, and aim for 1/4 inch per foot where your lot allows it, since the steeper grade helps the line clear itself of grit and leaf debris without any help from you. Set your depth based on the cover requirements above and whatever obstacles you hit along the way.
- Install a catch basin or screened inlet at the downspout. This step matters more than most homeowners expect. An inline catch basin traps shingle grit before it enters the buried line, and asphalt roofs shed enough of it over a few seasons to choke a pipe that doesn’t have one. Connect the downspout adapter and seal every joint.
- Lay pipe on compacted bedding. Use Y fittings anywhere two lines merge, never T fittings, since a straight-on T creates a dead-end pocket where debris collects and stalls flow. Match your couplings to your pipe type.
- Terminate the run at your chosen outlet. Whether that’s daylight, a pop-up emitter, or a dry well, finish with a splash pad or rock bed at the exit point so the discharge doesn’t carve a new erosion channel into your yard.
- Flood-test before you backfill for good. Run a garden hose into the inlet for several minutes and watch the outlet. Water should emerge steadily with no backup at the inlet end. Walk the trench line looking for sags or wet spots that signal a leak or a low point in the pipe.
Pro Tip: Leave the trench open overnight if you can, run the hose test again in the morning, and only then move to final tamping and backfill. A pipe that passes a flood test right after installation can still reveal a slow leak once the ground settles a little.
Why Buried Drains Clog, Freeze, or Fail
A buried downspout that was installed correctly rarely fails outright. What actually happens is slower: a slope that was marginal to begin with settles a little more each year until water starts sitting instead of running.
Watch for these warning signs:
- Gutters draining slower than usual, or water backing up at the downspout during moderate rain.
- Wet, soft ground near the foundation that wasn’t there before.
- Overflow at the gutter during heavy storms even though the system worked fine last season.
- No flow at all from the outlet after a hard freeze, which usually means ice has plugged a low spot in the line.
Most of this is preventable. Gutter guards and regular seasonal cleaning cut down on the debris entering the system in the first place, and an inline catch basin gives grit somewhere to settle before it ever reaches the buried pipe. Oversizing to 4-inch pipe, as covered earlier, buys you a real margin against the kind of slow clog that a 3-inch line can’t shake off.
For maintenance, inspect outlets and pop-up lids each spring and fall, clear out any catch basin that’s collected sediment, and run a hose test after any major storm to confirm the line is still moving water the way it should. Keep a simple record of what you find each time. A clog you can trace to “always happens after heavy rain in October” is a lot easier to fix than one that seems random.
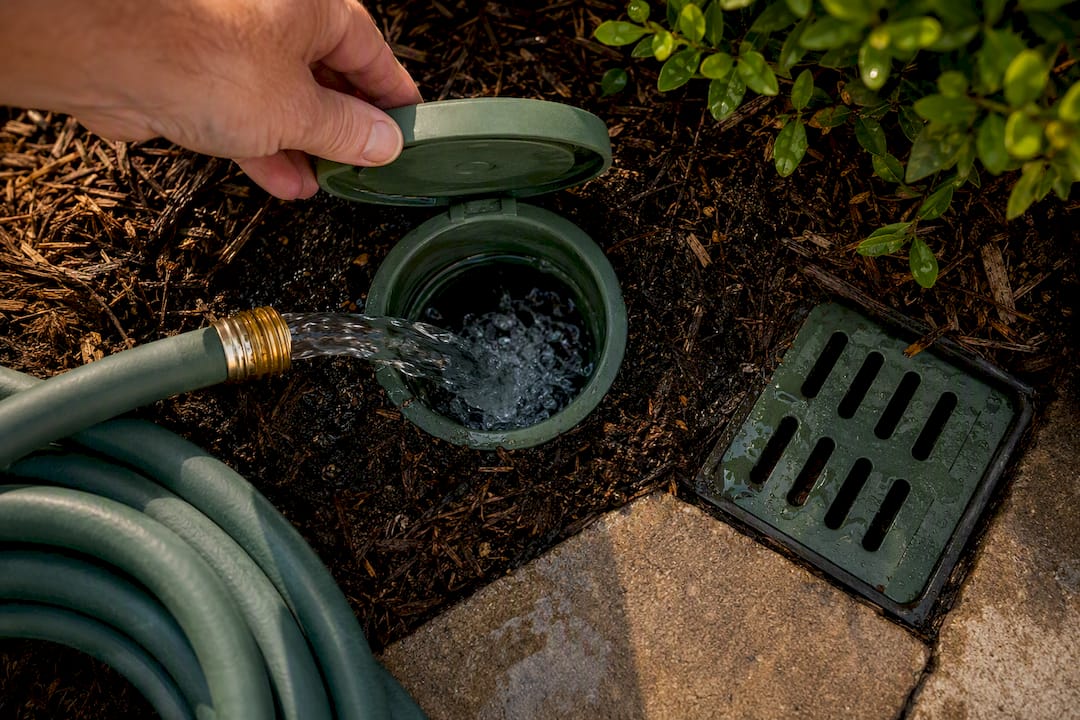
When a clog does happen, a plumbing snake or a garden hose with a jet nozzle clears most simple blockages. A hydro-jet service handles tougher, compacted debris. If you’re snaking the same spot repeatedly, that usually means the pipe has a structural problem, a sag, a root intrusion, a crushed section, and at that point you’re looking at a repair or a partial replacement, not another round of clearing.
What Should You Budget for This Project?
A single-downspout DIY run typically costs $100 to $250 in materials, covering pipe, fittings, and a catch basin. That’s a manageable weekend project cost for most homeowners with basic digging tools.
Contractor-installed runs commonly land in the $10 to $30 per linear foot range, with the wide spread coming down to soil type, how many downspouts tie into one system, and how far the run has to travel to reach a usable outlet.
Hiring a pro makes the most sense when your project involves any of the following:
- A run that has to pass under a driveway, patio, or other hardscape, where the pipe rating and depth requirements get stricter.
- A permit requirement in your municipality, which some jurisdictions impose for drainage work near property lines or septic systems.
- A discharge point that’s genuinely tricky, tight lot, no clear grade, or a shared drainage easement with a neighbor.
- A desire for a warranty and documented grading, which matters if you ever sell the house and a buyer’s inspector asks about drainage.
If you do collect bids, ask each contractor what pipe type and diameter they’re specifying, what slope they’re guaranteeing, whether they’re including a clean-out access, and what the warranty actually covers. A bid that skips these details is a bid you should ask more questions about before signing.
How Larry’s Gutters Approaches Buried Drainage
Drainage problems rarely start underground. They start at the gutter, with a roofline that’s shedding more grit and debris than the downspout below it was ever designed to handle. That’s the piece Larry’s Gutters focuses on first, matching gutter capacity and downspout placement to the roof before any pipe goes into the ground. Our downspout installation guide walks through that connection in more detail, and our filter and inlet guide covers the grit-control piece that keeps a buried line from clogging in the first place.
If you’re weighing a buried downspout project against your budget and your yard’s grade, an assessment is the fastest way to get a straight answer instead of a guess.
An Installer’s Take on the One Mistake That Ruins Everything
The most common error isn’t the pipe or the fittings. It’s skipping continuous slope, especially on asphalt roofs where nobody bothered installing a grit-catching basin first. Six months later, that “working” drain is holding water at a low spot, and the freeze cycle finishes the job. My rule: flood-test every run, and always leave a clean-out at every bend or merge. You’ll thank yourself the first time you actually need it.
— Results
Get a Straight Answer Before You Dig
If you’ve read this far, you already know the real risk with burying downspouts isn’t the concept. It’s getting the slope, pipe size, and outlet placement right the first time so you’re not digging the yard back up two winters from now. Larry’s Gutters handles that from the gutter down, assessing your roofline, mapping the route, choosing the correct pipe and outlet for your soil, pulling permits where they’re required, and backing the work with a warranty that a DIY run simply can’t offer.

DIY is a fine option for a straightforward single-downspout run on a lot with obvious grade. It stops making sense once you’re routing under a driveway, dealing with a tight lot with no clear outlet, or you’d just rather have someone else guarantee the slope holds. Start with our downspout installation guide to see what a professional install actually involves, then request a free assessment and we’ll tell you exactly what your yard needs and what it’ll cost to do it right.
Sources
For deeper technical specs on pipe selection, slope, and freeze prevention, see the contractor drainage guide and the DIY installation walkthrough.
- Downspout to Underground Drain: Pipe, Slope, Freeze | TRB
- Gutter Downspout Drainage Guide for Contractors | Projul
