
TL;DR:
- Gutter expansion joints are flexible connectors that allow metal gutters to move during temperature changes. They are necessary every 40-50 feet to prevent buckling, warping, or seam failure due to thermal stress. Proper installation and regular maintenance ensure long-lasting gutter performance in climate conditions like Florida’s.
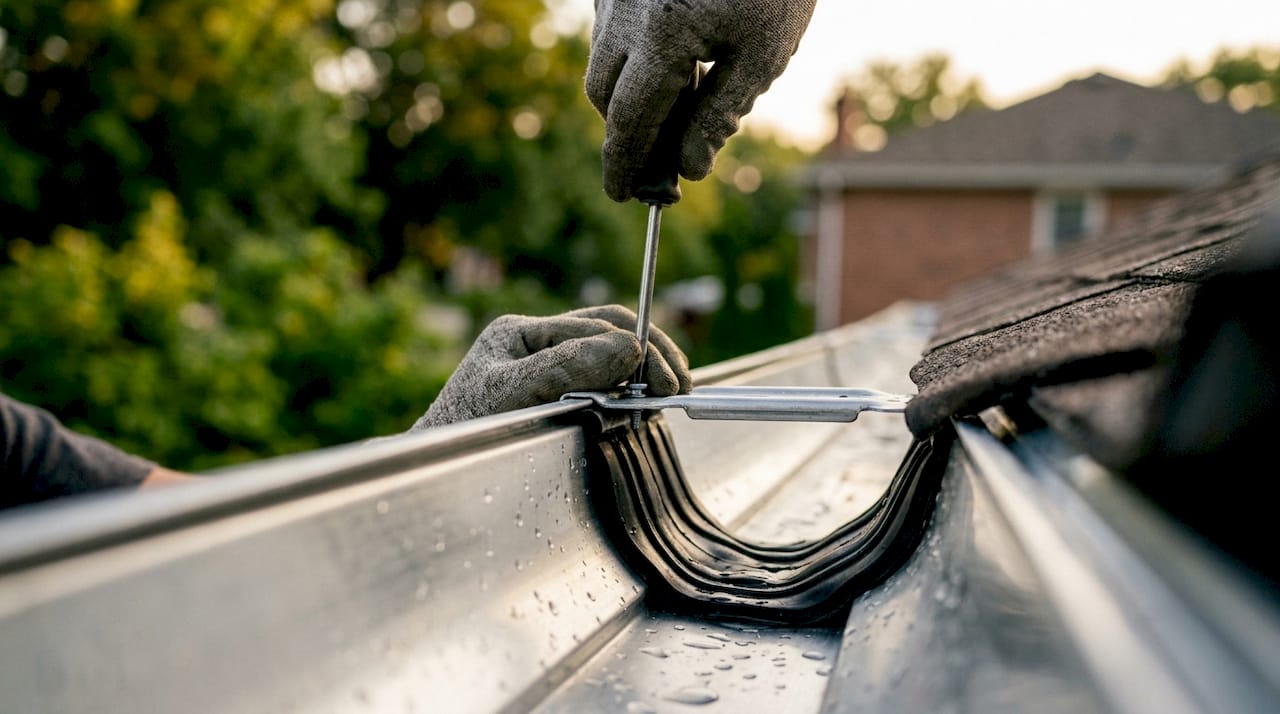
A gutter expansion joint is a flexible connector built into a gutter run that allows metal sections to move independently as temperatures rise and fall. Without one, thermal stress builds until the gutter buckles, warps, or pulls away from the fascia. This article covers gutter expansion joints explained from the ground up: how they work, when you need them, which materials hold up best, and how to install and maintain them correctly. Whether you are a homeowner in Central Florida or a contractor managing long residential runs, understanding these components is the difference between a gutter that lasts decades and one that fails in a few seasons.
What are gutter expansion joints and how do they work?
A gutter expansion joint is a two-part metal fitting with a flexible EPDM rubber insert between the sections. The rubber insert lets each metal section slide slightly without breaking the watertight seal. That sliding motion is the entire point. Metal gutters expand and contract with every temperature shift, and aluminum expands roughly 1/4 inch per 40 feet of run. That fraction of an inch sounds small, but it adds up fast on a long roofline.
The physics behind this are straightforward. Every metal has a fixed Coefficient of Linear Expansion, meaning it grows and shrinks at a predictable rate when heated or cooled. Thicker gauge metal resists buckling but does not eliminate movement. The joint does not stop the metal from moving. It gives the metal a safe place to move without stressing the end caps, seams, or hangers.
Rigid connections, like soldered joints, cannot flex. Soldering is brittle, and thermal cycling cracks solder lines over time. A mechanical expansion joint with an EPDM insert absorbs that energy instead of fighting it. EPDM performs reliably between -40°F and 300°F, which covers every climate condition a residential gutter will face in the United States.
Pro Tip: When inspecting an existing gutter system, press lightly on the middle of a long run. If the gutter flexes outward or feels bowed, thermal stress has already built up. An expansion joint installed at the midpoint can relieve that pressure before a seam tears.
Why and when are gutter expansion joints necessary?
The threshold is clear: expansion joints are needed every 40–50 linear feet of gutter run. Beyond that length, thermal movement accumulates faster than the gutter system can absorb it. The result is predictable and expensive.
A 120-foot aluminum gutter run with a 50-degree temperature swing can move over 3/8 inch. That movement has to go somewhere. Without a joint, it pushes against end caps, pulls fasteners loose, and opens seams. The common gutter problems that homeowners notice first, such as sagging sections and visible gaps, often trace back to missing or improperly spaced expansion joints.
Climate matters too. Florida homeowners face intense summer heat followed by cooler nights, which means daily thermal cycling rather than just seasonal shifts. That repeated expansion and contraction accelerates wear on every rigid connection in the system.
The table below shows how material and run length interact to determine expansion risk:
| Material | Expansion per 100 ft (50°F shift) | Joint needed at |
|---|---|---|
| Aluminum | ~0.75 inch | Every 40–50 ft |
| Copper | ~1.1 inch | Every 40–50 ft |
| Steel | ~0.65 inch | Every 40–50 ft |
Common installation errors that create problems include:
- Skipping joints on runs between 40 and 60 feet, assuming the length is “close enough”
- Installing joints but leaving no expansion gap, which defeats the purpose entirely
- Using standard sealant instead of flexible EPDM compound at the joint interface
- Spacing joints unevenly so one section carries more thermal load than another
Gutter joint leakage in Central Florida frequently starts at these exact failure points.
What materials and types of gutter expansion joints are available?
The two most common expansion joint materials in residential gutters are aluminum and copper. Each matches the base gutter material to prevent galvanic corrosion. Mixing metals in a gutter system accelerates deterioration at every contact point, so the joint material should always match the gutter.
The critical component inside both types is the EPDM rubber insert. EPDM sealants with 300% elongation absorb copper’s movement of about 1.1 inches per 100 feet without cracking. That elongation rating is what separates a functional joint from one that fails within a few years. Standard caulk does not come close to that flexibility.
| Joint type | Best for | Key advantage | Key limitation |
|---|---|---|---|
| Aluminum mechanical joint | Aluminum seamless gutters | Matches material, easy to install | Requires correct gap at install |
| Copper mechanical joint | Copper gutters | Matches material, long lifespan | Higher material cost |
| EPDM slip joint | Both materials | Maximum flexibility, wide temp range | Needs periodic inspection |
| Soldered joint | Copper only | Strong initial bond | Brittle under thermal cycling |
Seamless gutters and sectional gutters handle expansion joints differently. Seamless gutters, formed on-site from a continuous coil, have no factory seams. That means the only joints in the system are the ones the installer adds intentionally, including expansion joints. Sectional gutters come with factory seams every 10 feet or so, which adds connection points but also adds potential leak locations.
Pro Tip: For seamless aluminum gutters in Florida, specify a 5-inch or 6-inch aluminum expansion joint with a factory-fitted EPDM insert. These are available as ready-made units and install faster than field-fabricated alternatives, with consistent gap tolerances built in.
How to install and maintain gutter expansion joints correctly
Proper installation starts with planning the joint locations before any gutter goes up. Mark joint positions every 40–50 feet along the planned run. On a 100-foot roofline, that means at least two joints, placed at roughly the 33-foot and 66-foot marks to distribute thermal load evenly.
SMACNA standards require expansion joints to allow longitudinal thermal movement without stressing the gutter or its supports. That standard applies to both commercial and residential installations. Following it protects you from the most common failure modes.
The installation steps for a mechanical expansion joint are:
- Cut the gutter run at the planned joint location with tin snips or a gutter saw.
- Slide the expansion joint housing over one cut end, leaving the specified expansion gap (typically 3–4mm for box gutters, slightly more for K-style runs in hot climates).
- Insert the EPDM rubber sleeve into the joint body.
- Slide the second gutter section into the open end of the joint.
- Secure the joint to the fascia with a dedicated hanger, not to the gutter sections themselves.
- Apply a bead of EPDM-compatible sealant to the outer edges only. Do not seal the sliding interface.
Florida gutter industry standards reinforce these spacing and sealing requirements for residential installations across the state.
Maintenance is straightforward but easy to skip. Inspect every expansion joint twice a year, ideally in spring and fall. Look for:
- Cracked or hardened EPDM inserts
- Sealant that has pulled away from the joint edges
- Visible gaps wider than expected, which signal the joint has reached its movement limit
- Rust or corrosion on the metal housing
Clean debris from inside the joint channel. Leaves and dirt packed into the joint restrict movement and trap moisture, accelerating corrosion from the inside out.
How to identify and fix common expansion joint problems
Failing expansion joints show clear warning signs before they cause serious water damage. Catching them early saves money and protects your home’s foundation and fascia boards.
- Visible buckling or bowing. A gutter section that curves outward between hangers has absorbed more thermal stress than it can handle. This almost always means a missing or failed joint nearby.
- Leaks at mid-run seams. Leaks at the ends of gutter sections, away from downspouts and end caps, point directly to joint failure. The gutter leak repair process for these failures involves cleaning the joint area, replacing the EPDM insert, and resealing the edges.
- Cracks in the gutter body. Hairline cracks running lengthwise along a gutter section indicate the metal has been forced to absorb movement it should have transferred to a joint.
- Pulled or loose hangers. When a gutter expands and has nowhere to go, it pushes against its hangers. Hangers that pull away from the fascia are a downstream symptom of thermal stress.
- Water staining on the fascia. Staining below a mid-run location, not near a downspout, signals a leak that has been running for some time.
DIY repairs work for minor EPDM insert replacements and sealant refresh jobs. A homeowner comfortable with a ladder and basic tools can replace a worn insert in under an hour. Call a professional when the gutter body itself has cracked or buckled, when multiple joints have failed at once, or when the fascia shows rot from prolonged water exposure. Ignoring these signs leads to fascia replacement, which costs significantly more than a joint repair.
Key Takeaways
Gutter expansion joints are the single most overlooked component in residential gutter systems, and their absence causes more structural damage than any other installation error.
| Point | Details |
|---|---|
| Install every 40–50 feet | Aluminum and copper both require joints at this interval to prevent buckling and seam failure. |
| EPDM outperforms solder | Flexible EPDM inserts absorb thermal movement that rigid soldered joints cannot handle. |
| Leave an expansion gap | A 3–4mm gap at installation is required; sealing the sliding interface defeats the joint’s purpose. |
| Inspect twice a year | Check for cracked inserts, pulled sealant, and debris buildup each spring and fall. |
| Match material to gutter | Use aluminum joints for aluminum gutters and copper joints for copper gutters to prevent corrosion. |
What I have learned about expansion joints after years in Florida gutters
The most persistent myth I encounter is that a well-soldered joint is a strong joint. Strength is not the goal. Flexibility is. A solder line that holds perfectly under static load will crack under repeated thermal cycling because solder has almost no give. Many installers rely on soldering for joint strength, but flexible EPDM seals prevent warping and leaks far better on long runs. I have seen copper gutters on historic homes with beautiful solder work that were leaking at every joint within ten years, while EPDM-fitted aluminum gutters on the same street were still tight after fifteen.
Florida’s climate makes this more urgent than most homeowners realize. The temperature swing between a july afternoon and a january morning in Central Florida is not dramatic by northern standards, but the daily cycling is relentless. That daily expansion and contraction adds up to thousands of stress cycles per year. A joint installed with the correct gap on day one will still be working correctly a decade later. One installed tight, or skipped entirely, will show problems within two or three seasons.
My practical advice: if you are planning a new gutter installation or replacing an existing run longer than 40 feet, plan the joint locations before you order material. Gutter sizing and material choice both affect how much expansion you need to accommodate. Thicker gauge aluminum resists oil canning but still moves the same amount per degree. The joint is not optional on a long run. It is the component that makes everything else work.
— Larrysgutters
Larrysgutters handles expansion joints the right way
Larrysgutters specializes in seamless gutter installation across Central Florida, and proper expansion joint placement is built into every job. Long rooflines, complex layouts, and Florida’s demanding climate all require joints spaced and sealed correctly from the start.

If you are wondering whether seamless gutters are worth it for your home, the answer depends partly on how well the system is installed, including where and how expansion joints are placed. Larrysgutters provides free assessments and installs every run to handle Florida’s heat and rainfall without buckling or leaking. Contact Larrysgutters directly to get a quote and find out what your roofline actually needs. You can also review the full seamless gutter installation process to understand what a professional installation covers before you commit.
FAQ
What is a gutter expansion joint?
A gutter expansion joint is a flexible fitting installed in a gutter run that allows metal sections to move independently during temperature changes. It uses an EPDM rubber insert to maintain a watertight seal while absorbing thermal expansion and contraction.
How often should expansion joints be installed?
Expansion joints are required every 40–50 linear feet of gutter run. Skipping this interval on longer runs causes buckling, warping, and seam failure over time.
Can I use sealant instead of an expansion joint?
Standard sealant cannot replace a mechanical expansion joint. EPDM sealants with high elongation ratings can supplement a joint, but a rigid sealant bead alone will crack under repeated thermal cycling and fail within a few seasons.
How do I know if my expansion joint has failed?
Look for mid-run leaks, visible bowing between hangers, cracked gutter sections, or hangers pulling away from the fascia. These are the most common signs that a joint has failed or was never installed.
Do seamless gutters still need expansion joints?
Yes. Seamless gutters have no factory seams, but they still expand and contract with temperature. Any run exceeding 40 feet requires at least one expansion joint to prevent thermal stress from damaging the gutter body or its fasteners.