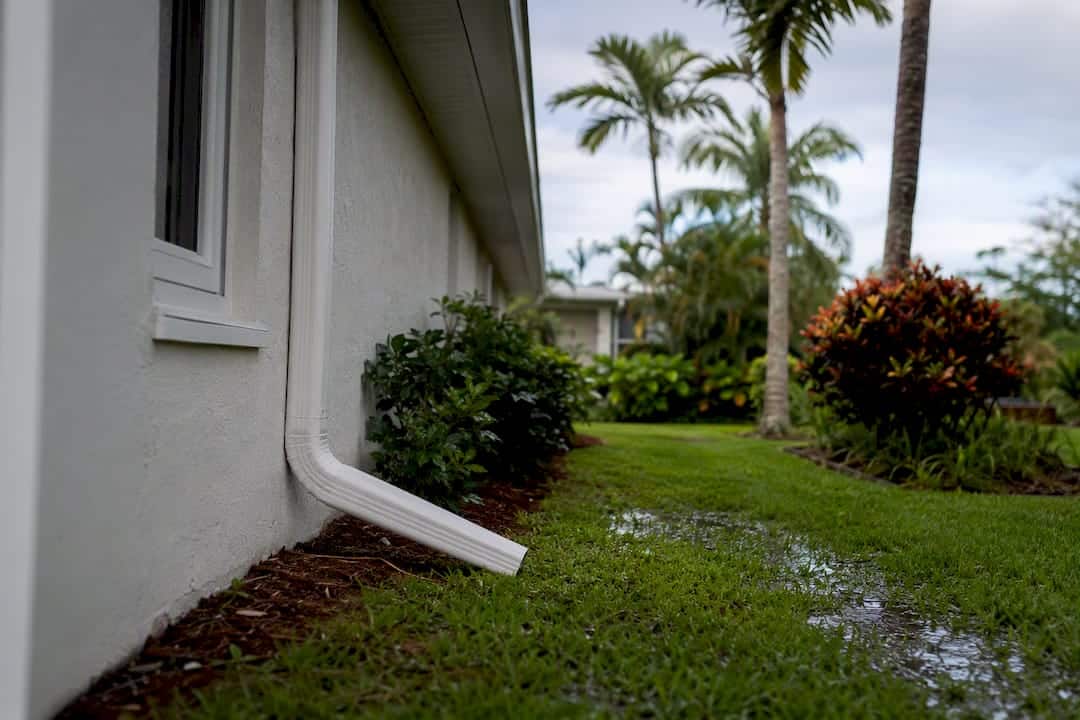
Flood protection means the structural and non-structural changes you make to a building so it takes less damage, or none, when water shows up where it shouldn’t. That’s the FEMA definition in plain terms, and it covers everything from a concrete floodwall to simply moving your water heater off the basement floor.
If you’re reading this because a storm is forecast or your insurance renewal just landed on the counter, here are the three things to do before anything else. First, check your property’s flood risk on FEMA’s Flood Map Service Center, which tells you whether you’re in a Special Flood Hazard Area and what your base flood elevation looks like. Second, confirm your flood insurance status right now, because most NFIP policies carry a 30-day waiting period before coverage kicks in. You cannot buy a policy the day before a hurricane and expect it to pay out. Third, handle the cheap, fast stuff: clear your gutters, test your sump pump, and stage sandbags if you’re anywhere near a floodplain.
Of the three, insurance paired with an honest look at your elevation relative to the base flood elevation delivers the biggest return for the money. Structural upgrades matter, but they take time and permits. A policy and a map check take an afternoon.
Do this in the next 30 minutes:
- Look up your address on FEMA’s flood map tool and note your flood zone
- Call your insurance agent and ask when your flood coverage actually becomes effective
- Walk your property line and check that gutters, downspouts, and drains aren’t blocked
- Confirm your foundation type (slab, crawlspace, or basement), since it determines which mitigation methods will even work later
Key Takeaways
Flood protection combines structural changes like elevation and barriers with non-structural steps like floodproofing and drainage improvements, and the right mix depends on your foundation, flood depth, and warning time.
| Point | Details |
|---|---|
| Check your flood zone first | Use FEMA’s Flood Map Service Center to confirm your BFE and SFHA status before choosing any method. |
| Insurance has a waiting period | Most NFIP policies take 30 days to become effective, so buy coverage well before storm season. |
| Match method to foundation | Dry floodproofing suits concrete/masonry homes only; wood-frame homes need wet floodproofing or elevation instead. |
| Small drainage fixes matter | Clogged gutters and poor grading cause a large share of residential water intrusion, independent of major flood events. |
| Gutters are a practical starting point | Larrysgutters’ seamless gutter and drainage services address the foundation-level runoff issues that often precede bigger flood damage. |
Where to Read More
For deeper detail beyond this guide, these primary sources cover the technical ground directly: FEMA’s P-312 retrofitting guide for method-by-method engineering detail, the NFIP coverage summary for policy specifics, EPA’s green infrastructure guidance for drainage-based mitigation, and Consumer Reports’ flood insurance primer for a consumer-facing take on coverage gaps. Pair any of these with your local building department’s flood map data for a picture that’s actually specific to your address.
Table of Contents
- Understanding Flood Protection: Key Terms Every Homeowner Should Know
- What Are the Main Types of Flood Protection Methods?
- How Should You Choose the Right Flood Protection for Your Home?
- What Do Flood Protection Projects Cost and How Long Do They Take?
- How Do You Vet an Engineer or Contractor for Flood Work?
- How Does Flood Insurance Work With Mitigation Efforts?
- What Are the Biggest Flood Protection Mistakes Homeowners Make?
- Where This Guide’s Recommendations Come From
- Gutters and Drainage: A Practical Piece of Your Flood Protection Plan
- Sources
Understanding Flood Protection: Key Terms Every Homeowner Should Know
Floods aren’t one event with one cause, and the terminology engineers use isn’t decoration. It’s how they decide which fix will actually hold up on your property.
Base flood elevation (BFE) is the height floodwater is expected to reach during a flood with a 1% chance of happening in any given year, what most people still call the “100-year flood.” Your home’s elevation relative to the BFE determines your flood insurance rates and whether elevation or floodproofing even makes sense for your structure.
Then there’s the physics that actually breaks buildings. Hydrostatic pressure is the steady push of standing water against a wall or foundation. It’s why a sealed basement can crack or even collapse inward once water outside gets deep enough. Hydrodynamic pressure is the force of moving water, and it’s a different animal entirely; a few feet of fast-moving water can do more damage than several feet of still water, because it also carries debris that batters siding, doors, and support posts. Flow velocity, duration, and debris impact together decide whether a given wall, barrier, or floodproofing method survives the event or fails partway through it.
The cause of the flood changes which of these factors dominates. Coastal storm surge brings depth and often high velocity together, sometimes with almost no warning if a storm intensifies quickly. Riverine flooding, the kind that comes from a swollen river overflowing its banks, usually gives more warning time but can sustain high water for days. Flash flooding, common after intense rainfall on hard or saturated ground, is the worst combination: high velocity, short or no warning, and it’s the scenario where FEMA’s guidance most strongly discourages banking on temporary barriers alone. Drainage failure, meanwhile, is often a local problem, water pooling because gutters, storm drains, or grading can’t move it away fast enough, and it’s frequently the easiest of the four to prevent.
A simple labeled diagram helps here: picture a cross section of a house showing the BFE line marked against the foundation, an arrow showing hydrostatic pressure pushing sideways into a basement wall, and a second arrow showing hydrodynamic flow pushing against a raised pier foundation. Seeing depth and force side by side makes the difference between floodproofing and elevation click faster than any paragraph can.
The stakes are not abstract. Floods are consistently the costliest natural disaster in the country by dollar losses, yet Consumer Reports has found that only a small share of at-risk homeowners actually carry flood insurance. That gap between exposure and coverage is exactly why the first section of this guide leads with checking your risk and your policy status before anything else.
A few terms worth keeping straight as you read the rest of this guide:
- 100-year flood / 1% annual chance flood: not “once a century,” but a 1-in-100 statistical chance in any given year
- Freeboard: extra height added above the BFE as a safety margin, often required by local codes
- Flood protection depth: the maximum water depth a specific mitigation method is rated to handle
- Contingent measure: something installed in advance but activated only when a flood is imminent, like a flip-up floodgate
What Are the Main Types of Flood Protection Methods?
Every method on this list falls into one of two buckets. Structural measures physically change or reinforce the building or the land around it: levees, floodwalls, elevation, permanent barriers. Non-structural measures change how the building is used or how water is managed without necessarily changing its footprint: wet floodproofing, dry floodproofing, relocation, drainage improvements, and green infrastructure. The National Conference of State Legislatures treats elevation as the standout structural approach precisely because it’s the one method that works across nearly every flood depth and velocity scenario, once you’re willing to pay for it.
Here’s what each one actually looks like in practice, and where it falls apart.
Barriers: levees, floodwalls, and temporary barriers
Levees and floodwalls are the most visible flood defense most people picture: earthen embankments or engineered concrete walls that hold water back from a property or neighborhood. They work well against sustained, predictable water levels, but they have a hard ceiling. Once water rises above the wall’s design height, the results are often worse than having no wall at all, because water pools behind it with no way to drain back out.
Temporary and contingent barriers, think flood panels, inflatable tubes, or the classic sandbag wall, cost far less and deploy fast, but FEMA’s homeowner guidance is blunt about their limits: they require warning time and someone physically present to install them. If a flash flood hits at 2 a.m. with no alert, a garage full of sandbags does nothing.
Wet floodproofing
Wet floodproofing accepts that water will get into part of the structure, usually a basement, garage, or crawlspace, and works to minimize the damage that causes. That means moving the water heater, furnace, and electrical panel above expected flood levels, using flood-resistant materials like concrete board instead of drywall below that line, and adding flood vents that let water flow through a crawlspace instead of pressing against the walls. It’s one of the more affordable options and it plays well with almost any foundation type, but it means accepting some water intrusion as the cost of avoiding a structural failure.

Dry floodproofing
Dry floodproofing seals the building envelope so water can’t get in at all: waterproof coatings, watertight door and window shields, and backflow valves on sewer lines. It sounds like the best option until you look at the fine print. This method is generally only appropriate for concrete or masonry buildings, and it’s usually only recommended up to around 3 feet of water depth unless a certified engineer designs something more robust. A wood-frame house sealed up tight against several feet of standing water is at real risk of the walls buckling or the whole structure floating off its foundation, because dry floodproofing doesn’t just keep water out, it also has to resist the full hydrostatic push of that water trying to get in. This is the single most common mistake homeowners make when they pick a method based on price instead of foundation type.
Elevation
Raising the structure, or the living space within it, above the base flood elevation is the method engineers point to most often as the one that works regardless of flood depth, because once you’re above the water, depth stops mattering as much. Elevation usually means lifting the house on piers, posts, or an extended foundation wall. It’s expensive and disruptive, and it works best on homes with crawlspace or pier foundations rather than slab-on-grade homes, where elevation means an entirely different, far costlier project.

Relocation and acquisition
Sometimes the honest answer is that a parcel shouldn’t have a structure on it at all. Relocation means physically moving the building to higher ground, and acquisition programs, often run through state or FEMA-administered buyout programs, pay homeowners to sell repeatedly flooded properties so the land can revert to open space. These are last-resort options for properties with a long flood history, not typical homeowner projects.
Drainage improvements and green infrastructure
Not every flood comes from a river or the coast. A lot of residential flooding is just water with nowhere to go: clogged gutters, undersized storm drains, and hard surfaces that don’t let rain soak in. The EPA’s guidance on green infrastructure points to rain gardens, permeable paving, and improved grading as effective ways to reduce localized runoff around a home’s foundation. These measures rarely stop a major riverine or coastal flood on their own, but they’re often the difference between a wet yard and a wet basement during ordinary heavy rain, and they’re usually the cheapest category on this list.
Here’s how the main options stack up against each other:
| Method | Best for (foundation/flood type) | Cost range | Effectiveness by flood type | Time to implement | Maintenance | Engineer/permit needed |
|---|---|---|---|---|---|---|
| Temporary barriers (sandbags, panels) | Any foundation; flash or riverine flooding with warning time | Low | Low to moderate; fails without warning time | Hours to days | Low; inspect and restock yearly | Rarely |
| Wet floodproofing | Crawlspace or basement homes; riverine and coastal | Low to moderate | Moderate; limits damage rather than preventing entry | Weeks | Moderate; check vents and materials yearly | Sometimes |
| Dry floodproofing | Concrete/masonry, slab foundations; shallow depth flooding only | Moderate | High up to about 3 feet; risky beyond that | Weeks to months | Moderate; test seals and valves annually | Usually, especially past 3 feet |
| Elevation | Crawlspace/pier foundations; coastal, riverine, repeat flooding | High | High across most depths and velocities | Months | Low once complete; periodic structural checks | Yes, licensed engineer and permit |
| Levees and floodwalls | Whole-property or neighborhood scale; riverine and coastal | High | High within design height; fails above it | Months | Ongoing inspection for erosion and seepage | Yes |
| Drainage improvements/green infrastructure | Any foundation; local drainage failure and minor flooding | Low to moderate | Moderate for nuisance flooding; limited for major floods | Days to weeks | Low to moderate; clear debris seasonally | Sometimes, for larger drainage tie-ins |
A few suitability notes worth underlining. Slab foundations rule out most crawlspace-based wet floodproofing techniques and make elevation a major undertaking rather than a retrofit. Basements almost never tolerate dry floodproofing safely once water depth climbs past a couple of feet, because the hydrostatic load against a full basement wall is enormous. And any method that depends on a human being showing up to deploy it, temporary barriers especially, is only as good as the warning time your flood type actually gives you.
How Should You Choose the Right Flood Protection for Your Home?
Picking a method isn’t about finding the “best” flood protection in the abstract. It’s about matching a method to your specific foundation, your flood type, and how much warning you’ll realistically get. Here’s the sequence that actually works.
- Identify your flood type and expected depth. Pull your BFE from FEMA’s flood map tool and compare it to your home’s elevation. That gap, in feet, is your starting number for every decision after this.
- Check your foundation and utility placement. Slab, crawlspace, and basement homes each rule certain methods in or out before cost even enters the conversation.
- Estimate frequency and warning time. A property that floods every few years from a slow-rising river can lean on contingent barriers. A property prone to flash flooding cannot.
- Run a rough cost-benefit filter. Multiply your flood probability by your likely damage cost, and compare that number to the price of the mitigation you’re considering. A $3,000 drainage fix that prevents a $30,000 basement loss every few years pays for itself fast; a $60,000 elevation project on a home that floods once a decade needs a longer conversation.
- Bring in a licensed engineer before committing to anything structural. Ask specifically about site flow velocity, your exact BFE, soil and erosion risk, and the freeboard your local code requires above the BFE.
Watch for these red flags before you sign a contract with anyone:
- A contractor recommends dry floodproofing for a wood-frame home, or for flood depths beyond about 3 feet, without a certified engineer’s sign-off
- Nobody can tell you your property’s actual BFE or flood zone before quoting a solution
- A proposal for permanent barriers or elevation skips the phrase “licensed engineer” entirely
- The plan relies entirely on a temporary, human-deployed barrier for a flash-flood-prone property with no real warning system
If you can answer flood type, foundation, and warning time before you make a single call, you’ll spend your consultation asking better questions instead of getting sold a generic package.
What Do Flood Protection Projects Cost and How Long Do They Take?
Costs vary enormously by property, region, and contractor, so treat these as planning bands rather than quotes. Temporary barrier systems tend to run from a few hundred dollars for basic sandbag setups to a few thousand for reusable panel systems. Wet floodproofing retrofits, moving utilities and swapping in flood-resistant materials, typically land in the low thousands. Dry floodproofing costs more once you add engineered seals and backflow valves, often reaching into the moderate five figures for a full system. Elevation projects and permanent floodwalls sit at the top end, frequently tens of thousands of dollars once engineering, permitting, and construction are all included.
Timelines split into the same three categories FEMA uses for planning: emergency measures (hours, improvised during the event itself), contingent measures (installed in advance but deployed only with warning, days to install), and permanent measures (weeks to many months, including design and permitting).
| Project phase | Typical duration | What happens |
|---|---|---|
| Planning and engineer assessment | 2 weeks or more | Site visit, BFE confirmation, foundation analysis, method recommendation |
| Permitting | 2 weeks or more | Local building department review; varies heavily by jurisdiction |
| Installation (elevation or floodwalls) | 2 months or more | Construction, inspections, final sign-off |
| Installation (floodproofing or drainage work) | 1 to 4 weeks | Faster turnaround, fewer structural changes |
Maintenance isn’t optional once anything is installed. Pumps need testing every few months, backflow valves need periodic inspection, and any barrier system, temporary or permanent, needs a debris and erosion check after every significant storm season.
On funding, the NFIP’s Increased Cost of Compliance (ICC) coverage can pay eligible policyholders up to $30,000 toward bringing a repeatedly flooded structure into compliance, according to the NFIP’s own summary of coverage. State and local mitigation grant programs, and FEMA’s resilience grant programs, are also worth a call to your local emergency management office before you assume a project is out of reach.
How Do You Vet an Engineer or Contractor for Flood Work?
Not every contractor who installs a floodgate or floodproofing system should be trusted with the job. Before signing anything, run through this list:
- Confirm an active license in your state and specific experience with flood retrofitting, not just general remodeling
- Ask for references from at least two similar projects, ideally on homes with a comparable foundation type
- Verify liability insurance and, for anything structural, confirm a licensed engineer is stamping the plans
- Get the full scope in writing before work starts, including who pulls permits
A proper on-site flood mitigation assessment should map how water flows across your specific lot, confirm your BFE against surveyed elevation (not just the online map estimate), analyze your foundation type, and end with a recommendation that states an estimated flood protection depth, not just a method name. If an assessment skips any of those four items, ask why.
Permits and documentation typically come from your local building department, and for anything tied to NFIP compliance or ICC funding, expect additional FEMA or NFIP paperwork through your insurer.
Pro Tip: Get at least two independent quotes and have both contractors walk the same site before you compare numbers. A surprising number of change orders come from vague initial scopes, not unexpected site conditions.
How Does Flood Insurance Work With Mitigation Efforts?
Mitigation reduces damage. Insurance pays for whatever damage gets through anyway. Neither one replaces the other, and homeowners who treat physical protection as a substitute for coverage are making an expensive mistake.
The NFIP’s summary of coverage breaks policies into building coverage and contents coverage, purchased separately, with common exclusions for things like temporary housing costs and most personal property stored below ground level. Before renewing or buying a policy, check three things: your waiting period (new NFIP policies typically take 30 days to become effective), whether your building coverage pays replacement cost or only actual cash value, and whether ICC coverage is included for compliance upgrades after a repeat flood.
Given how few at-risk households carry flood coverage at all, the combination of a policy already in force and a mitigation project already completed is what actually shortens recovery time after water recedes. A homeowner with both isn’t waiting on a claims adjuster to decide whether repairs happen; they’re already covered and the damage is already smaller.
If flooding does happen, move fast:
- Photograph and document every affected area and item before cleanup starts
- Contact your insurer within days, not weeks, of the event
- Keep every receipt for temporary repairs, hotel stays, or cleanup services
- Get a written damage estimate from a licensed contractor before major repairs begin
What Are the Biggest Flood Protection Mistakes Homeowners Make?
The most expensive mistakes are usually decisions made under pressure, days before a storm, instead of months before one.
Relying entirely on sandbags or temporary barriers with no evacuation plan is a recurring one; barriers buy time, they don’t guarantee safety. Choosing dry floodproofing for a wood-frame home, or for depths beyond what the system is rated for, risks structural failure rather than just water intrusion. And waiting until a hurricane is named to think about flood insurance guarantees you’ll miss the 30-day window entirely.
During an active flood, a few rules matter more than any mitigation plan: never walk or drive through moving floodwater, even shallow water can sweep a car off a road. Only shut off utilities if you can do so safely and without standing in water. Follow local evacuation orders rather than waiting to see how bad it gets.
Maintenance neglect quietly undoes protection you already paid for. Untested sump pumps fail exactly when you need them. Clogged gutters and storm drains turn a manageable rain event into standing water at your foundation. Levees and floodwalls that never get inspected for erosion can fail well before their design height is even reached.
Pro Tip: Store emergency flood supplies (a battery-powered pump, extra sandbags, a wet/dry vacuum) somewhere accessible from outside the house, not in the basement they’re meant to protect. Test your sump pump and backflow valve every few months, not just after the first flood warning of the season.
Where This Guide’s Recommendations Come From
This guide leans on the same sources engineers and insurance agents use every day: FEMA’s homeowner retrofitting manual for method selection and technical limits, NFIP’s own coverage summaries for insurance specifics, and EPA guidance for the drainage and green infrastructure recommendations.
Local codes and updated flood maps can shift what’s actually required or advisable on your specific lot, so treat this as a starting framework and confirm details with your local building department before finalizing any project.
A Practical Note From Larrysgutters
We spend our days looking at exactly the kind of water problems that turn a heavy rain into a flooded yard or a wet foundation wall: clogged gutters, poor downspout placement, grading that pushes water toward the house instead of away from it. None of that replaces an engineer’s flood assessment, but it’s often the first failure point we find on a site visit. If your risk check above turned up anything concerning, an on-site look at your drainage is a reasonable next step alongside the bigger mitigation questions.
Gutters and Drainage: A Practical Piece of Your Flood Protection Plan
Most flood damage conversations jump straight to floodwalls and elevation, but a huge share of residential water problems start somewhere much smaller: a gutter system that can’t keep up with Central Florida’s downpours. Water that overshoots a clogged gutter lands right at your foundation, saturates the soil, and finds its way into a crawlspace or basement long before any river ever rises.

Larrys Gutters installs custom-fit seamless gutters sized for the volume of rain Central Florida actually gets, along with downspout routing that moves water away from your foundation instead of pooling it there. Gutter guards cut down on the debris clogs that cause overflow during the exact storms when you need drainage working most. For homes with more complex drainage needs, tying gutter systems into broader yard drainage is worth discussing directly with a licensed plumber who understands flood-relevant plumbing, since backflow valves and sewer connections interact with surface drainage in ways a gutter system alone can’t fix.
None of this replaces engineered mitigation for a home in a high-risk flood zone, but it’s often the most affordable improvement you can make this month. If you’re not sure whether seamless gutters are worth the investment for your property, a free assessment is the fastest way to find out. We’ll look at your current gutters, downspouts, and grading, flag anything that’s making drainage worse, and give you a straightforward quote, no pressure, no upsell. Request your free property assessment today and find out what your roof-to-ground drainage is actually doing during the next storm.
