
TL;DR:
- Homeowners should understand core gutter components like gutters, downspouts, elbows, and end caps to communicate effectively with contractors. Proper identification of parts and their roles helps prevent leaks, ensures correct sizing, and maintains system efficiency in heavy rainfall regions. Knowing how to inspect, measure, and document gutter issues can lead to faster, more accurate repairs and installation.
Here are the core gutter component names every homeowner should know before calling a contractor or ordering parts:
- Gutter (trough): The horizontal channel that collects rainwater at the roof edge. Also called a run or spouting.
- Downspout (leader): The vertical pipe that carries water from the gutter to the ground. Leader is the most common alternate name.
- Outlet / drop outlet: The flanged fitting in the gutter floor where water exits into the downspout.
- Elbow: A curved fitting that redirects the downspout around overhangs or walls. Comes in A-style (front-to-back) and B-style (side-to-side).
- End cap: A flat piece that seals the open end of a gutter run.
- Inside / outside miter: Corner pieces that join two gutter sections at an angle, either deflecting inward or outward.
- Hanger / bracket: The fastener that holds the gutter to the fascia. Types include hidden hangers, spike-and-ferrule, and roof T-straps.
- Drip edge / gutter apron: Metal flashing tucked under shingles to direct water into the gutter and protect the fascia from rot.
- Fascia: The flat board running along the roof edge where gutters mount.
- Splash block / downspout extension: A concrete or plastic pad (or rigid tube) placed at the downspout base to direct water away from the foundation.
- Gutter guard: A cover or screen over the gutter opening that reduces debris entry.
These are the names to use when describing a problem to a contractor or searching for replacement parts. Getting the terminology right saves time and avoids ordering the wrong piece.
Table of Contents
- How the gutter system works: three functional zones
- Alphabetical homeowner glossary of gutter parts and alternate names
- Downspouts: parts, routing, and what goes at the bottom
- Fittings, connectors, and corner miters: how parts join
- Hangers, brackets, and best-practice spacing
- Gutter guards and accessories: types and trade-offs
- Materials, gauges, and standard sizes
- How to inspect your gutters: a safe homeowner checklist
- Quick-reference table: part, definition, and common synonyms
- What is a downspout cleanout and where is it located?
- Key Takeaways
- What installers notice first on a site visit
- Larrysgutters: free estimates for Central Florida homeowners
- Further reading and sources
How the gutter system works: three functional zones
A gutter system is easier to understand when you see it as three zones working together rather than a pile of separate parts.
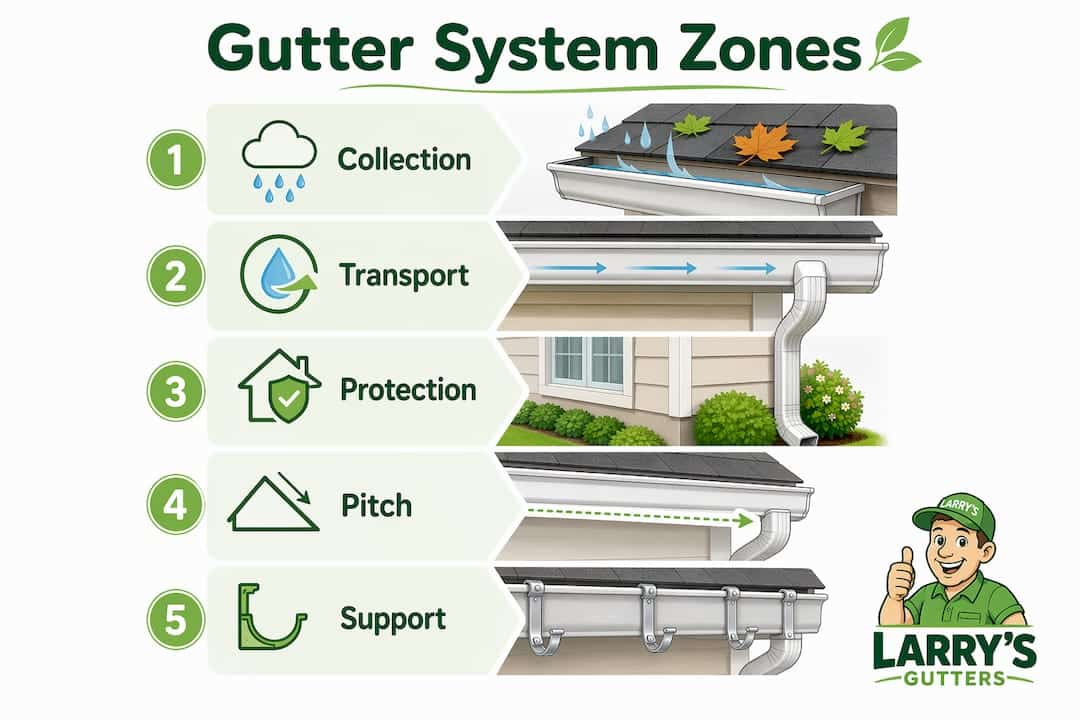
Zone 1: Collection. The gutter trough runs horizontally along the fascia and catches water as it leaves the roof. End caps seal each run at the ends. Inside and outside miters connect runs at corners. The gutter system components in this zone are the ones most visible from the ground.
Zone 2: Transport. The outlet (drop outlet) punches through the gutter floor and connects to the downspout below. Elbows route the downspout around soffits and walls. Straps or clips fasten the downspout to the siding. At the bottom, a splash block, rigid extension, or buried boot carries water away from the foundation.

Zone 3: Protection and finishing. The drip edge and gutter apron sit at the roof-to-gutter transition, tucked under shingles to stop water from curling behind the gutter and rotting the fascia. Gutter guards sit on top of the trough. The fascia itself is the structural anchor for the whole system.
Pitch (slope) is built into Zone 1 during installation. Hangers are set at slightly different heights along the run — typically a drop of about ¼ inch per 10 feet of gutter — so water flows toward the outlet rather than pooling. When you see standing water or a debris line in the middle of a gutter, the pitch has failed, usually because a hanger has pulled loose.
When documenting an issue for a contractor, photograph the corner miter, the outlet connection at the gutter floor, and any spot where the gutter visibly sags. Those three photos cover the most common failure points.
Alphabetical homeowner glossary of gutter parts and alternate names
This table covers the full rain gutter terminology a homeowner is likely to encounter. Common failure locations are noted where relevant.
| Part | Definition | Alternate Names | Common Failure Spot? |
|---|---|---|---|
| Box gutter | A gutter built into the roof structure, not hung at the eave | Built-in gutter, integral gutter | Seams, interior joints |
| Box miter | A corner piece joining two gutter sections at 90° with a formed box shape | Premium corner, formed miter | Corner seams |
| Downspout | Vertical pipe carrying water from gutter to ground | Leader, downpipe | Joints, elbows |
| Drip edge | Metal flashing along roof edge directing water into gutter | Gutter apron, eave flashing | Behind-gutter rot |
| Elbow (A-style) | Fitting that turns the downspout front-to-back | A-elbow, front elbow | — |
| Elbow (B-style) | Fitting that turns the downspout side-to-side | B-elbow, side elbow | — |
| End cap | Flat piece sealing the open end of a gutter run | Stop end, end piece | End-cap seams |
| Expansion joint | A slip joint allowing gutter sections to move with temperature changes | Slip joint | Long straight runs |
| Fascia | Flat board at roof edge where gutters are mounted | Fascia board | Rot behind gutter |
| Gutter (K-style) | Most common U.S. profile; flat back, ogee front face | Ogee gutter, trough | Seams, outlets |
| Gutter (half-round) | Semicircular trough, common on older homes | Half-round, U-gutter | Hanger points |
| Gutter apron | Flashing tucked under shingles and over gutter back to prevent rot | Drip edge, eave flashing | Fascia rot |
| Gutter guard | Cover or screen reducing debris entry | Leaf guard, gutter cover | Mesh clogging |
| Hanger (hidden) | Internal clip screwed through gutter into fascia | Hidden bracket, snap-in hanger | Screw pull-out |
| Hanger (spike-and-ferrule) | Spike driven through gutter and ferrule into rafter | Spike hanger, nail hanger | Spike loosening |
| Inside miter | Corner piece deflecting inward at an inside corner | Inside corner, inside box | Corner seams |
| Offset | A pair of elbows routing the downspout away from the wall | Kickout, standoff | Elbow joints |
| Outlet / drop outlet | Flanged fitting in gutter floor connecting to downspout | Gutter drop, pop, nozzle | Outlet-to-gutter seal |
| Outside miter | Corner piece deflecting outward at an outside corner | Outside corner, outside box | Corner seams |
| Rain barrel | Storage tank connected to downspout to collect runoff | Water butt, cistern | Overflow fitting |
| Rain chain | Decorative chain replacing a downspout to guide water visually | Kusari-doi | Splash at base |
| Soffit | The underside of the roof overhang, adjacent to fascia | Eave underside | Moisture damage |
| Splice / joiner | Fitting connecting two gutter sections end-to-end | Coupler, coupling, union | Seam leaks |
| Splash block | Concrete or plastic pad at downspout base directing water away | Downspout pad | Erosion at base |
| Strap / clip | Flat fastener holding the downspout against the wall | Downspout strap, clip | Rust, loosening |
| Strip miter | A flat corner piece joining two gutter sections at 90° or 135° | Economy miter, flat miter | Corner seams |
| Valley shield | Flashing or cover at roof valley protecting gutter from debris surge | Valley guard | Debris buildup |
Seams, outlets, and end caps are where gutter leaks most commonly start. If you see staining on the fascia or siding directly below any of those points, that is where to start your inspection.
Downspouts: parts, routing, and what goes at the bottom
The downspout is more than one piece. Understanding its anatomy helps you describe exactly what is failing.
- Downspout sections: Rectangular tubes (most common in the U.S.) connected end-to-end to cover the full wall height. Common sizes are 2×3 inches for smaller roofs and 3×4 inches for larger roof areas or high-rainfall regions. Florida’s heavy rain seasons often justify the larger size.
- Elbows: A-elbows turn front-to-back; B-elbows turn side-to-side. A typical downspout run uses two A-elbows and one B-elbow to clear the soffit and reach the wall.
- Offset: Two elbows paired together to move the downspout away from or toward the wall, clearing architectural details like window trim.
- Straps / clips: Flat metal fasteners screwed into the siding every 6–8 feet to keep the downspout flush against the wall.
- Cleanout access: Some installations include a removable section or cleanout plug near the base of the downspout, making it easier to clear blockages without disassembling the whole run. More on this in the cleanout section below.
Bottom options matter more than most homeowners realize:
- Splash block: The simplest solution. A concrete or plastic pad redirects water away from the foundation. Works well for low-volume situations.
- Rigid extension: A short section of downspout angled away from the house. Inexpensive and easy to add.
- Flexible extension: A corrugated plastic tube that can be routed around landscaping. Prone to kinking and debris buildup.
- Buried boot / underground drain: The downspout connects to a buried pipe that carries water to a pop-up emitter or storm drain. Best for homes with chronic foundation moisture issues.
For a step-by-step downspout routing guide, the choice of bottom option depends on your yard grade and how far you need to move water from the foundation.
Fittings, connectors, and corner miters: how parts join
Outlets and drop outlets are the most leak-prone fitting in the system. The outlet is cut into the gutter floor and flanged outward; pop rivets and gutter sealant lock it in place. A poorly sealed outlet drips directly onto the fascia below. If you see a rust streak or paint peel directly under the gutter, the outlet seal has likely failed.
Miters handle corners. Strip miters are flat pieces that fold over the outside or inside of two gutter ends meeting at 90° or 135°. They are economical and widely used. Box miters are formed three-dimensional pieces that create a cleaner, more watertight corner. Professional installers often choose box miters for outside corners because they handle water flow better and look sharper. The trade-off is cost: box miters run slightly higher than strip miters.
Splices (joiners / couplings) connect two gutter sections end-to-end on a long run. Every splice is a potential leak point. Seamless gutters, formed on-site from a continuous coil, eliminate interior seams entirely. That is the core advantage of seamless over sectional: fewer joints means fewer places for water to escape.
For sealing any of these fittings, installers typically use 1¼-inch self-tapping hex-head screws and pop rivets alongside gutter sealant. The role of gutter caulking in keeping these joints watertight is often underestimated until a seam fails.
Hangers, brackets, and best-practice spacing
Hangers do more than hold the gutter up. They set the pitch. A hanger installed even slightly higher or lower than its neighbors changes the slope of the run, which determines whether water flows to the outlet or sits stagnant.

Hidden hangers are the current installer standard. They clip inside the gutter and screw through the back into the fascia, supporting roughly 50 pounds per linear foot when properly installed. Spike-and-ferrule systems, the older style, drive a long nail through the gutter face and a metal tube into the rafter. The spike creates stress points as the wood expands and contracts seasonally. Hidden hangers are generally longer lasting than spike-and-ferrule systems. Hidden hangers often last 25 years, while spike-and-ferrule systems commonly fail in 5–10 years. If you see nail heads poking through the front face of your gutter, that is a spike-and-ferrule system showing its age.
Roof T-straps are a third option, used when there is no accessible fascia. They extend onto the roof deck and fasten under the shingles.
Spacing: Industry standards recommend hangers spaced close enough to properly support the gutter and maintain pitch, with tighter spacing especially important in high-rainfall areas to hold pitch better over time and reduce sagging between supports.
Pro Tip: From the ground, look along the bottom edge of your gutter. A straight line means hangers are holding. Any dip or wave means at least one hanger has pulled loose or was never set at the correct height. Photograph the sag and the nearest visible hanger before calling a contractor — it tells them exactly what to expect.
Gutter guards and accessories: types and trade-offs
Guards reduce how often you clean gutters, but they do not eliminate the need for inspection. The right type depends on what falls on your roof.
- Micro-mesh: Fine stainless steel mesh blocks most debris including pine needles and shingle grit. Best all-around performance; higher upfront cost.
- Reverse-curve (surface tension): Water clings to a curved surface and drops into the gutter while debris falls off. Works well for large leaves; struggles with small debris and heavy rain surges.
- Foam inserts: Porous foam sits inside the gutter trough. Inexpensive and easy to install; tends to trap seeds and grow moss over time.
- Brush inserts: Cylindrical brushes fill the trough. Similar trade-offs to foam; debris catches in the bristles rather than washing through.
For Florida homes with heavy oak leaf and Spanish moss fall, micro-mesh gutter guards consistently outperform the other types.
Other accessories worth knowing: rain chains replace downspouts with a decorative chain that guides water visually; rain barrels connect to the downspout to capture runoff for irrigation; valley shields protect the gutter section directly below a roof valley, where debris and water volume are highest.
Materials, gauges, and standard sizes
Aluminum is the dominant residential material in the U.S. The two common gauges are .027 inch (standard) and .032 inch (heavier duty). Thicker gauge resists denting and holds shape better over long runs. Expected lifespan with proper maintenance is 20–30 years. K-style is the most common profile on American homes because it holds more water than half-round and mounts flat against the fascia.
Steel is heavier and stronger but prone to rust if the coating is scratched. Copper is premium: it lasts 50 years or more and develops a patina, but costs significantly more. Vinyl is the least expensive option and the shortest-lived, especially in climates with UV exposure and temperature swings.
Standard sizes for residential use:
- 5-inch K-style: The default for most single-story homes.
- 6-inch K-style: Recommended for larger roof areas or high-rainfall regions. Central Florida’s rainfall totals make 6-inch a common upgrade.
- Half-round: Typically 5 or 6 inches in diameter; common on older craftsman and colonial homes.
- Downspouts: 2×3 inches for smaller roofs; 3×4 inches for larger or steeper roofs.
For a deeper look at which gutter profiles fit Florida homes, roof pitch and annual rainfall both factor into the right size choice.
How to inspect your gutters: a safe homeowner checklist
You can learn a lot without leaving the ground. Save the ladder for when you already know what you are looking for.
- Walk the perimeter at ground level. Look along the bottom edge of each gutter run for sags, waves, or sections pulling away from the fascia.
- Check for staining. Rust streaks or paint peeling on the fascia below the gutter usually indicate a leaking outlet, seam, or end cap.
- Look at the downspouts. Confirm each one has a splash block or extension directing water at least 4–6 feet from the foundation. Check for visible dents or separation at elbow joints.
- Run a hose test (optional, ground level). Have someone run water into the gutter at the far end while you watch the outlet and downspout for drips or overflow.
- Note hanger condition. Visible spike heads on the gutter face mean spike-and-ferrule hangers that may be loosening. Count the spacing between visible hangers; gaps over 30 inches are worth flagging.
- Check for pooling or debris lines. A ring of dried debris in the center of a gutter run after rain means water is sitting there, which points to a pitch problem.
- Photograph everything before climbing. Seams, outlets, corners, sagging sections, and any rotted fascia visible from below. A contractor can often diagnose the issue from good photos before arriving on site.
- If you use a ladder: follow standard ladder safety (three points of contact, stable footing, never lean past the rails). Measure the approximate gutter run length and the downspout size (width × depth) while you are up there.
Document your measurements and photos before contacting a contractor. It shortens the estimate conversation considerably.
Quick-reference table: part, definition, and common synonyms
Print tip: landscape orientation at 90% scale fits this table on one page.
| Part | One-line definition | Common synonyms |
|---|---|---|
| Gutter | Horizontal trough collecting roof runoff | Trough, run, spouting |
| Downspout | Vertical pipe carrying water to ground | Leader, downpipe |
| Outlet / drop outlet | Flanged fitting connecting gutter floor to downspout | Gutter drop, pop, nozzle |
| Elbow | Angled fitting redirecting downspout around obstacles | A-elbow, B-elbow |
| End cap | Flat piece sealing the open end of a gutter run | Stop end, end piece |
| Inside miter | Corner piece for an inward-turning corner | Inside corner |
| Outside miter | Corner piece for an outward-turning corner | Outside corner |
| Hanger | Fastener holding gutter to fascia and setting pitch | Bracket, clip |
| Splice / joiner | Fitting connecting two gutter sections end-to-end | Coupler, coupling |
| Drip edge / gutter apron | Flashing at roof edge directing water into gutter | Eave flashing |
| Fascia | Flat board at roof edge where gutters mount | Fascia board |
| Splash block | Pad at downspout base directing water from foundation | Downspout pad |
| Gutter guard | Cover reducing debris entry into trough | Leaf guard, gutter cover |
What is a downspout cleanout and where is it located?
A downspout cleanout is an access point built into the downspout that lets you clear a blockage without disassembling the entire pipe. Not every installation includes one, but they are a practical addition on tall or complex runs.
The cleanout is typically located near the base of the downspout, just above the elbow that directs water away from the foundation. Some versions use a removable plug or a hinged door in the downspout face. Others are simply a section of pipe with a slip-fit joint that can be pulled apart by hand.
To check whether your downspout has a cleanout, look for a small door, plug, or noticeably loose section in the lower third of the pipe. If there is none and you have a recurring blockage, a contractor can add one during a service visit. It is a small addition that saves significant labor on future cleanings.
Key Takeaways
Knowing your gutter component names before calling a contractor cuts estimate time, reduces miscommunication, and helps you spot problems early.
| Point | Details |
|---|---|
| Hanger spacing matters most | Space hangers no more than 30 inches apart; many professionals recommend 24 inches for better stability, especially in areas with heavy rainfall. |
| Hidden hangers outlast spikes | Hidden hangers typically last 25 years; spike-and-ferrule systems commonly fail in 5–10 years. |
| Outlets are the top leak point | Seal and rivet every outlet-to-gutter joint; staining on the fascia below is the first warning sign. |
| Size to your rainfall | Use 6-inch K-style gutters and 3×4-inch downspouts for larger roofs or high-rainfall regions like Central Florida. |
| Larrysgutters serves Central Florida | Larrysgutters provides seamless gutter installation, guard installation, and repair across Central Florida with free estimates. |
What installers notice first on a site visit
The first thing an experienced installer looks at is usually the fascia. Rotted fascia indicates prolonged water exposure, which must be addressed before new gutters can be properly mounted. Outlet connections and hanger spacing also often indicate common installation issues leading to gutter failure.
Most homeowners are surprised to learn how much of a gutter system’s performance comes down to those two things: a properly sealed outlet and correctly spaced hangers. The rest of the parts are straightforward. The installation details are where systems succeed or fail.
Bringing photos and measurements to a contractor conversation puts you ahead of most homeowners. It signals that you understand the system and helps the installer give you an accurate estimate on the first visit rather than the second.
Larrysgutters: free estimates for Central Florida homeowners
When you have identified the parts that need attention, the next step is getting a professional assessment. Larrysgutters specializes in custom-fit seamless gutter installation for residential properties across Central Florida, including Gainesville, Alachua, and surrounding counties. Seamless gutters eliminate the interior seams where sectional systems most commonly leak.

Larry’s Gutters also installs gutter guards and handles cleaning and repair. If your inspection turned up sagging hangers, a failed outlet seal, or rotted fascia, those are exactly the issues the team addresses on a standard service visit. Find out whether seamless gutters are worth it for your home, then request a free estimate directly through the site.
Further reading and sources
These are the primary sources used to build this guide. Bring them to a contractor conversation if you want to go deeper on any specific part.
- Rain Gutter Parts Diagram — ngutter.com: Labeled diagram with hanger spacing data, hidden hanger load ratings, and gauge information. Good visual reference for identifying parts on your own home.
- Gutter Parts Diagram and Reference Guide — GutterAll: Covers outlet sealing best practices, miter types, and seamless vs. sectional differences. Useful for the fittings and connectors section.
- Do I Need a Gutter Apron? — Fine Homebuilding: First-person installer account of why gutter apron installation matters and how it interacts with drip edge and hidden hangers.
- Seamless Gutter Installation Technical Library — The Gutter Guy: Installer-level detail on elbow types (A vs. B), downspout routing, and fastener specs.
- How to Install Gutters — Family Handyman: Practical fastener and tool reference (self-tapping screws, pop rivets, crimpers) useful for understanding what a contractor is doing during installation.
- Gutter Glossary — Rain Gutter Association: Industry-standard definitions for terms like pitch, fall, sole, and run. The authoritative source for formal gutter system vocabulary.
- Hung Gutters Architectural Details — Copper Development Association: Technical specifications for bracket spacing (30 inches on center), expansion joint placement, and copper gutter construction. Useful background for understanding why spacing standards exist.
- Gutter Installation Service — REPS of Texas: Regional installer resource with practical installation techniques applicable across the Southeast.
