
TL;DR:
- Proper gutter flashing prevents moisture from rotting fascia and structural decay behind gutters. It includes two main types: gutter apron at eaves with gutters and drip edge at rake edges without gutters, both requiring proper overlap and metal matching. Regular inspection and correct installation of flashing are essential to protect homes from water damage and extend roof lifespan.
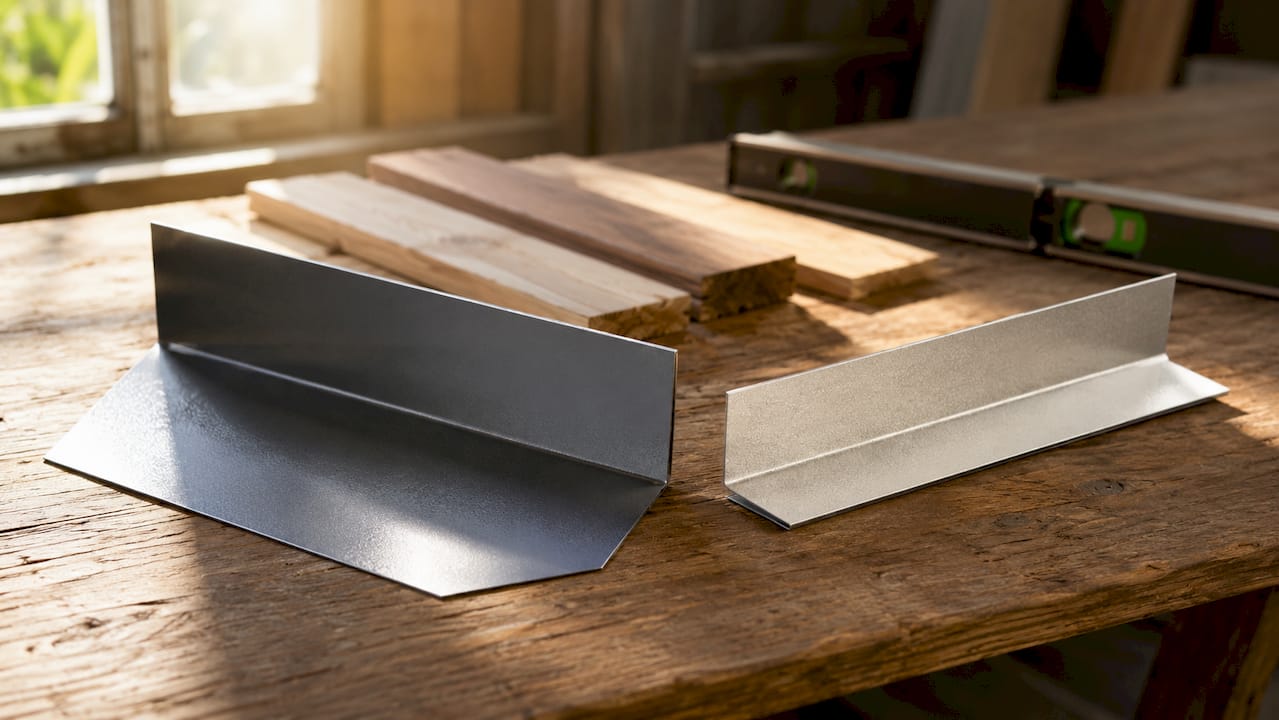
Gutter flashing is defined as a thin metal strip installed at roof edges to direct rainwater off the roof deck and into the gutter trough, preventing moisture from seeping behind the gutter and rotting the fascia board. Most homeowners focus on the gutter itself and overlook this critical component. That oversight leads to hidden wood rot and structural decay that costs far more to fix than the flashing itself. This guide covers flashings for gutters explained in full: the two primary types, how they work, how to install them correctly, and what happens when you get it wrong.
What are the main types of gutter flashings?
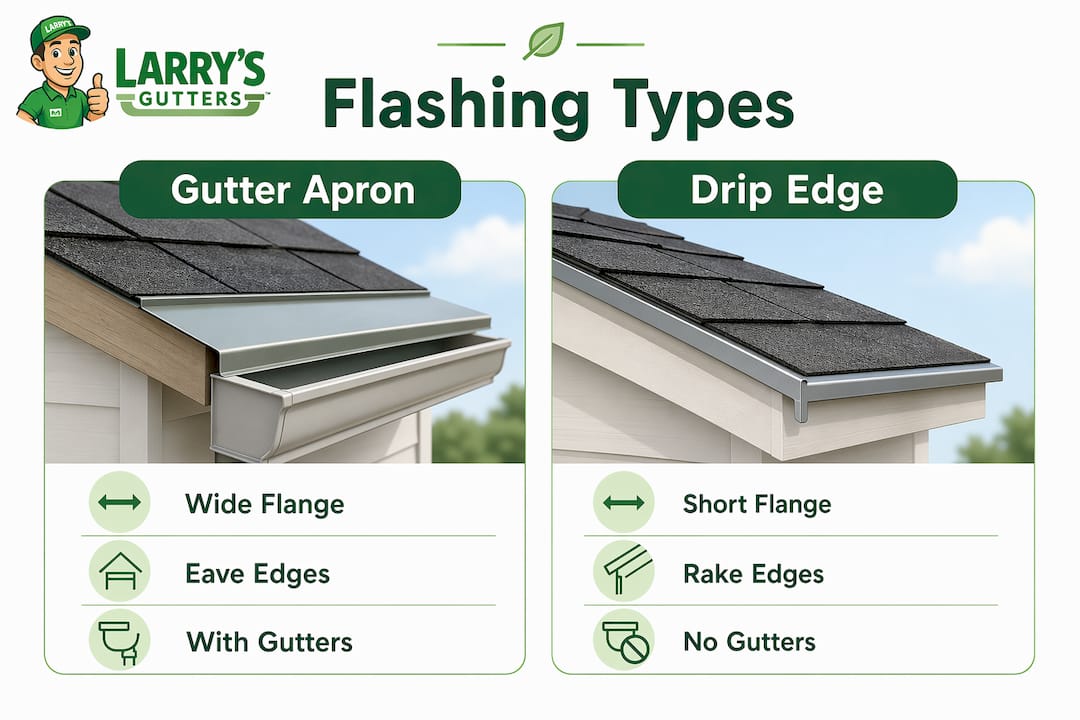
Two types of flashing handle the majority of residential gutter work: the gutter apron and the drip edge. Knowing which one to use where is the foundation of any solid gutter flashings guide.
Gutter apron (Type F) is the correct choice at eave edges where gutters are installed. Type F flashing features a 3–4 inch extended flange that reaches down into the gutter trough, so water flows directly off the shingles and into the channel. Without that long flange, water can miss the gutter entirely and run down the fascia.
Drip edge (Type C) is the right choice at rake edges where no gutter is present. Its shorter flange directs water away from the fascia and off the roof edge. Using a Type C drip edge at an eave with a gutter is a common mistake. The flange is too short to reach into the trough, which leaves a gap for water to exploit.
Here is a quick comparison to keep both types straight:
| Feature | Gutter apron (Type F) | Drip edge (Type C) |
|---|---|---|
| Flange length | 3–4 inches | 1–2 inches |
| Best location | Eave edges with gutters | Rake edges without gutters |
| Primary function | Directs water into gutter trough | Directs water away from fascia |
| Overlap requirement | 2 inches minimum at corners | 2 inches minimum at corners |
Key installation rules that apply to both types:
- Overlap all flashing sections by at least 2 inches to maintain continuous water protection at corners and seams.
- Install flashing under the first course of shingles at eaves and over shingles at rake edges.
- Secure with roofing nails spaced every 12 inches along the top flange.
Pro Tip: If you are replacing an existing gutter, check which flashing type is already installed before ordering materials. Swapping from Type C to Type F at an eave requires removing the bottom shingle course, which adds labor time.
How do gutter flashings prevent water damage?
The physics here are simple but often misunderstood. Water clings to shingle undersides due to surface tension, which pulls it backward toward the fascia instead of letting it drip freely into the gutter. Flashing breaks that surface tension by creating a physical barrier that forces water to fall forward into the trough.
Modern building codes now require drip edge flashing on all new residential roofs for exactly this reason. The code requirement exists because without flashing, fascia boards absorb moisture repeatedly and begin to rot from the inside out. By the time you see paint peeling or soft wood, the damage is already deep.
Correct positioning is just as important as choosing the right type. Follow these steps for a watertight installation:
- Position the flange correctly. The flashing should extend past the fascia by approximately 1/4 inch so the drip edge extends cleanly over the gutter lip without touching it.
- Hang the gutter at the right height. The back of the gutter trough should sit directly below the flashing tip so all water falls inside, not behind.
- Overlap every section. Flashing overlaps must be at least 2 inches and oriented so water always lands on top of the next piece, never behind it. Gravity is the rule.
- Nail through the top flange only. Nailing through the face of the flashing creates entry points for water. Use roofing nails rated for the flashing material.
- Check for kick-out flashing at wall junctions. Failed sealant and missing kick-out flashing are the top two causes of residential roof flashing leaks. A kick-out piece redirects water away from the wall where the roof meets a vertical surface.
Pro Tip: Match your flashing metal to your gutter material. Copper gutters require copper flashing because aluminum flashing in contact with copper causes galvanic corrosion when wet, degrading both metals within a few years.
What is reverse flashing and when do you need it?
Reverse flashing is a secondary metal strip installed to seal the gap between the drip edge and the back of the gutter. Standard flashing handles the primary water flow, but small gaps can still allow moisture to slip behind the gutter during heavy rain or wind-driven storms. Reverse flashing seals that gap permanently, giving the system a second line of defense.
This technique matters most in three specific situations:
- Seamless gutters. The continuous profile of a seamless gutter sits tighter against the fascia, which can create a narrow gap at the top edge where water wicks behind the system.
- Gutter guard systems. Guards add weight and change the angle of the gutter lip slightly, which can open a gap between the drip edge and the trough.
- Half-round gutters. Half-round systems use circle hangers that set the gutter further from the fascia than K-style gutters do. That set-back creates a larger gap that standard flashing cannot bridge without an extended flange or a reverse flashing strip.
To install reverse flashing correctly, slide the top edge under the existing drip edge and bend the bottom edge into the gutter trough. The piece should lie flat against the fascia with no gaps. Seal the top edge with roofing caulk rated for metal-to-metal contact. This is not a replacement for proper primary flashing. It is a reinforcement that makes the whole system more reliable in Florida’s heavy rainfall conditions.
Best practices and common mistakes in gutter flashing installation
Getting flashing right the first time saves you from costly gutter repairs down the road. The most frequent errors are not about skill. They are about skipping steps that seem minor but create serious long-term problems.
Common mistakes to avoid:
- Using Type C drip edge at eaves with gutters instead of the correct Type F gutter apron.
- Overlapping sections by less than 2 inches, which leaves seams vulnerable during heavy rain.
- Pairing dissimilar metals such as aluminum flashing with copper gutters, which triggers galvanic corrosion.
- Skipping kick-out flashing at roof-to-wall junctions, which is one of the leading causes of water intrusion behind siding.
- Nailing through the face of the flashing rather than the top flange, creating direct water entry points.
Best practices that extend flashing lifespan:
Extend the flashing flange 1–2 inches into the gutter trough consistently along the full run. This prevents any water from missing the trough at low-pitch roof sections where water moves slowly. Use galvanized or stainless steel nails when working with galvanized flashing. Stainless nails resist rust longer and will not stain the flashing over time.
Inspect your flashing every spring and after major storms. Look for lifted edges, cracked sealant at counter-flashing joints, and any separation between the flashing and the fascia. Sealant at metal joints typically lasts 5–10 years before it needs replacement. Catching a failed seal early costs almost nothing. Ignoring it for two seasons can mean replacing fascia boards and sections of roof decking.
Pro Tip: When inspecting your roof and gutter coordination, run a garden hose along the roof edge and watch from below. Any water appearing behind the gutter or on the fascia points directly to a flashing gap.
Key takeaways
Proper gutter flashing is the single most effective way to prevent water from rotting the fascia and decking behind your gutter system.
| Point | Details |
|---|---|
| Use the right flashing type | Type F gutter apron at eaves with gutters; Type C drip edge at rake edges without gutters. |
| Overlap every section | All flashing pieces must overlap by at least 2 inches to block water at seams and corners. |
| Match metals to prevent corrosion | Pair copper flashing with copper gutters and aluminum with aluminum to avoid galvanic degradation. |
| Add reverse flashing for premium systems | Seamless gutters, gutter guards, and half-round systems benefit from a secondary reverse flashing strip. |
| Inspect sealant regularly | Counter-flashing sealant fails every 5–10 years; catching it early prevents fascia rot and costly repairs. |
Why flashing deserves more attention than it gets
Most homeowners spend real money on quality gutters and then install whatever flashing comes in the box without a second thought. I have seen this pattern play out dozens of times, and the result is always the same. The gutter looks fine from the street for years while water quietly destroys the fascia behind it.
The part that surprises people is how fast wood rot progresses once moisture gets behind a gutter. A small flashing gap that lets water wick backward during Florida’s summer storms can saturate a fascia board within a single rainy season. By the time the paint bubbles or the wood feels soft, you are often looking at replacing not just the fascia but sections of the soffit and roof decking too.
Flashing also protects the aesthetic investment homeowners make in their rooflines. A well-installed gutter apron keeps the fascia dry, which means paint lasts longer and the trim stays sharp-looking for years. Skipping proper flashing does not just risk structural damage. It accelerates the visible aging of your home’s exterior.
My honest recommendation is to treat flashing as a non-negotiable part of any gutter installation or replacement project. If you are doing a seamless gutter installation, budget for the correct Type F apron flashing and reverse flashing where needed. The material cost is minimal compared to the protection it provides. The homeowners who call for repairs are almost never the ones who spent extra on proper flashing. They are the ones who skipped it.
— Larrysgutters
How Larrysgutters can help with your gutter flashing project
Larry’s Gutters specializes in residential gutter solutions across Central Florida, where heavy seasonal rainfall makes proper flashing installation non-negotiable. Whether you are starting fresh or replacing an aging system, the team at Larrysgutters installs gutter apron and drip edge flashing correctly the first time, using materials matched to your specific gutter system.

If you are ready to take the next step, the gutter installation guide at Larrysgutters walks you through the full process from flashing selection to downspout placement. For homeowners who want a complete system, the downspout installation steps page covers how flashing, gutters, and downspouts work together to move water safely away from your foundation. Contact Larrysgutters today for a free quote on a system built to handle Florida’s weather.
FAQ
What is the difference between a drip edge and a gutter apron?
A drip edge (Type C) has a short flange designed for rake edges where no gutter is present. A gutter apron (Type F) has a longer 3–4 inch flange that reaches into the gutter trough at eave edges, making it the correct choice wherever gutters are installed.
How far should flashing extend into the gutter?
Flashing should extend past the fascia by approximately 1/4 inch and reach 1–2 inches into the gutter trough. This positioning captures all water running off the roof edge and prevents it from contacting the fascia board.
Can I use aluminum flashing with copper gutters?
No. Aluminum flashing paired with copper gutters causes galvanic corrosion when moisture is present, which degrades both metals prematurely. Always match flashing material to gutter material, using copper flashing with copper gutters.
What is reverse flashing used for?
Reverse flashing seals the gap between the drip edge and the back of the gutter, providing a second barrier against water infiltration. It is especially useful with seamless gutters, gutter guard systems, and half-round gutters where standard flashing may leave a small gap.
How often should gutter flashing be inspected?
Inspect gutter flashing every spring and after major storms. Pay particular attention to sealant at counter-flashing joints, which typically needs replacement every 5–10 years. Catching a failed seal early prevents fascia rot and avoids expensive structural repairs.
